Phone Gets Hot and Battery Drops 20% in Minutes? The Runaway Process and Failing Component Behind Sudden Power Crashes

Written By: Ronnie Gonenc

Overheating smartphone showing rapid battery drain warning — phone gets hot and battery drops fast from runaway process or hardware failure

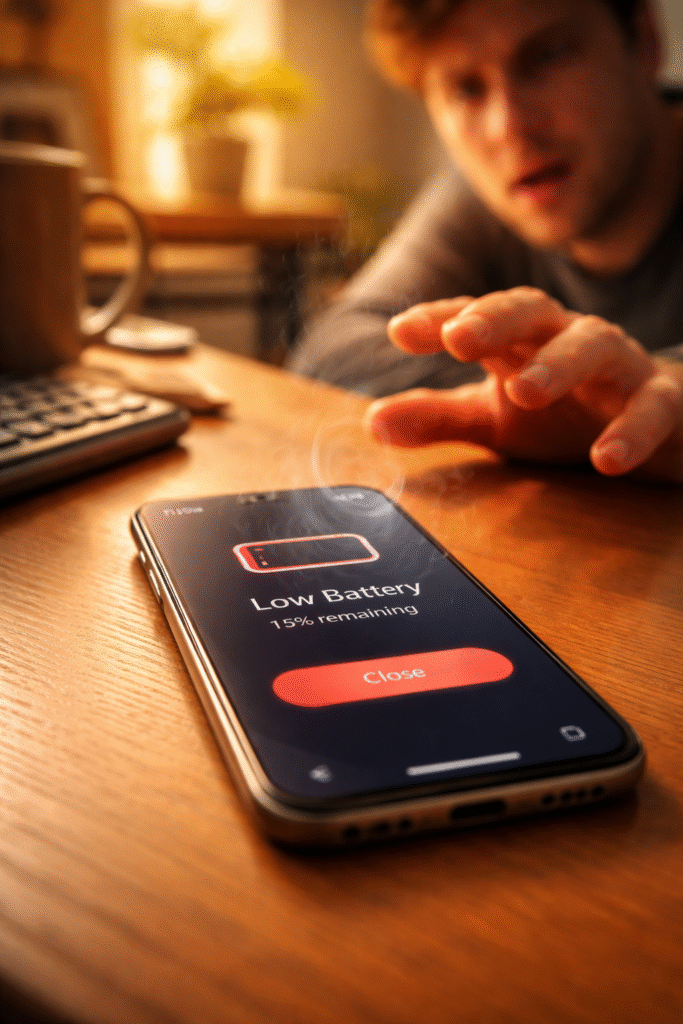
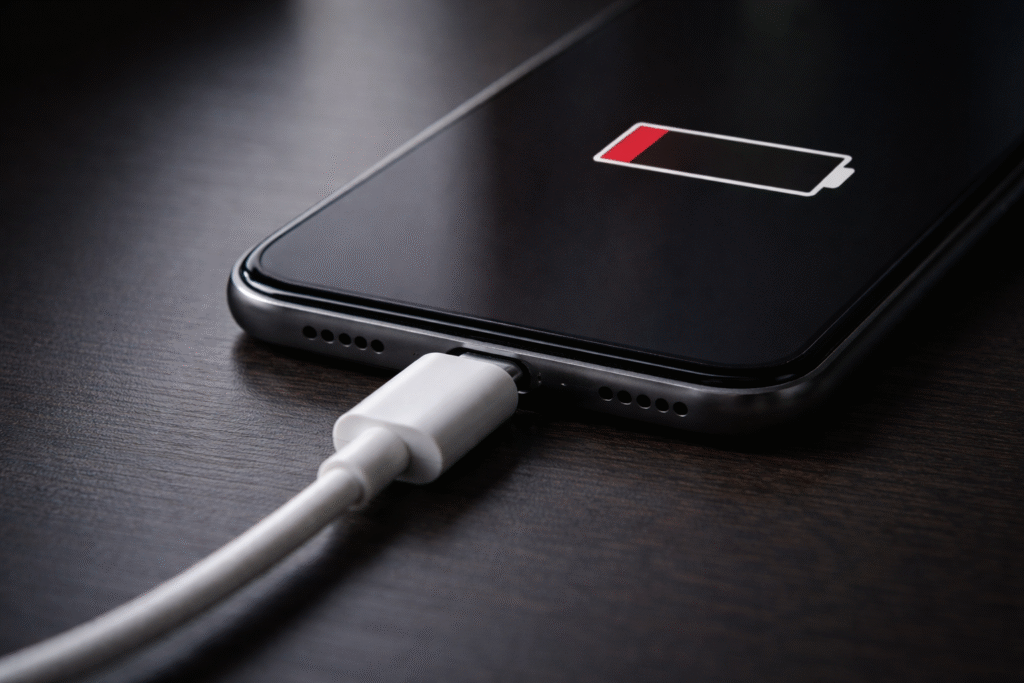
You pick up your phone and it’s warm. Not “just finished a video call” warm — genuinely hot. The kind of heat that makes you shift it between hands. Then you glance at the battery. It was at 75% twenty minutes ago. Now it reads 53%. You haven’t opened a game. You haven’t streamed anything. The phone is cooking itself and bleeding power while doing absolutely nothing you asked it to.

When your phone gets hot and battery drops fast at the same time, something inside the device is drawing massive power without your knowledge. Either a software process spiraled out of control and refuses to stop, or a hardware component started failing and now pulls current it shouldn’t. Both feel identical from the outside — excessive heat paired with rapid drain. But the fix for each is completely different.

At Fix Wireless in Connecticut, this combination — heat plus rapid drain — shows up constantly. Customers assume the battery died. Sometimes it did. But just as often, the battery is perfectly healthy. Something else is forcing it to dump its charge at five times the normal rate. This guide separates the software causes from the hardware ones and walks you through exactly what to check.


Section 1: Software Runaway — When an App or Process Won’t Stop Consuming Power

What a Runaway Process Looks Like

Every app on your phone consumes CPU cycles when active. Most apps release those cycles when you close them or switch away. A runaway process breaks that cycle. The app or system service continues consuming maximum CPU power in the background — indefinitely.

The CPU working at full speed generates significant heat. That heat spreads through the logic board to the back panel. Simultaneously, the battery drains rapidly because the processor draws peak current nonstop. The phone gets hot and battery drops fast as a direct result.

How to Identify the Culprit

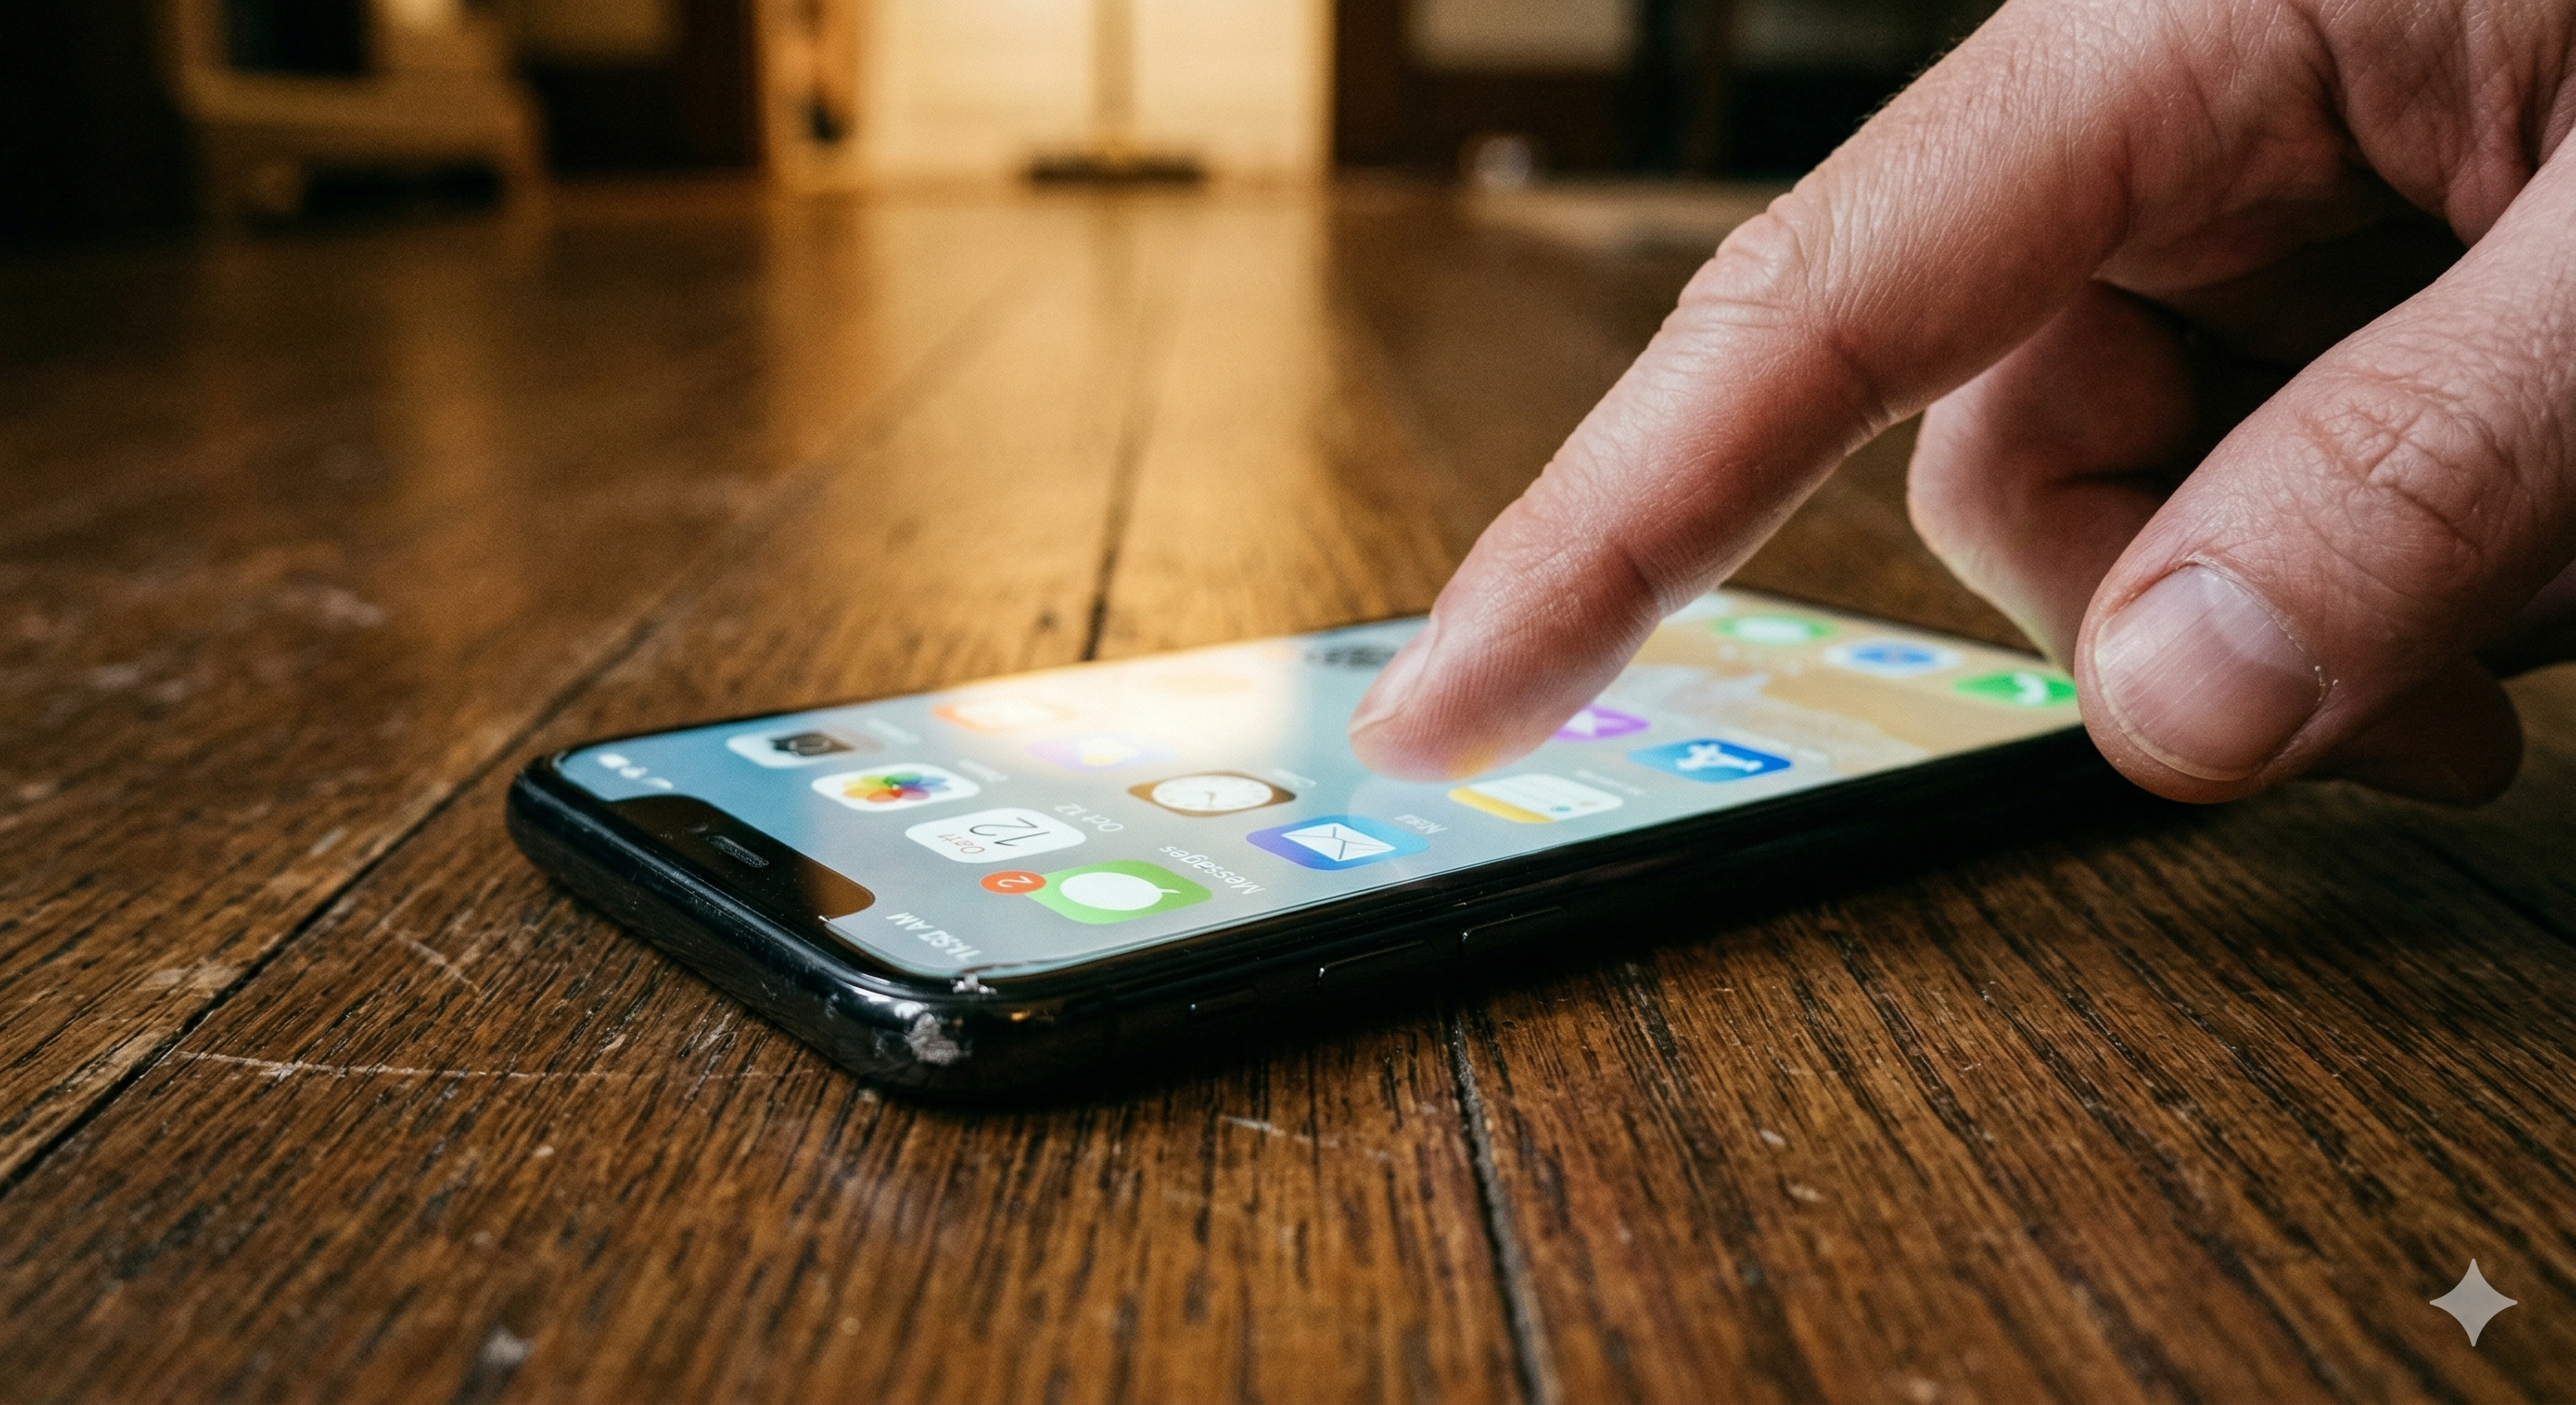
Check battery usage stats. On iPhone: Settings > Battery. Scroll down to see which apps consumed the most power in the last 24 hours. On Android: Settings > Battery > Battery Usage. Look for anything consuming a disproportionate share — 30%, 40%, or more from a single app you barely used.

Look for background activity. On iPhone, the battery screen shows “Background Activity” under each app. If an app you haven’t opened consumed significant battery through background activity, it’s running a process it shouldn’t.

Check for stuck location services. A navigation app that keeps GPS active after you arrive eats battery aggressively. The GPS radio draws substantial power and generates heat near the top of the phone. Go to Settings > Privacy > Location Services and review which apps accessed your location recently.

Software Fixes That Actually Work

Force-close the offending app. Swipe it away from the app switcher. On iPhone, swipe up from the bottom and flick the app card upward. On Android, use the recent apps button and swipe the card off screen.

Restart the phone. A full power-off and power-on clears stuck processes from memory. This resolves the majority of software runaway cases. If the heat and drain stop after restarting, a rogue process caused it.

Update or delete the problematic app. If the same app keeps showing up in battery stats, check for updates. Developers frequently patch background process bugs. If no update exists and the problem repeats, delete the app entirely.

Reset all settings. On iPhone: Settings > General > Transfer or Reset iPhone > Reset > Reset All Settings. On Android: Settings > System > Reset Options > Reset All Settings. This clears corrupted system preferences without erasing your data. It forces all background services to rebuild from clean defaults.

If the phone cools down and battery drain normalizes after these steps, the problem was software. Monitor over the next few days. If heat and drain return, the cause is likely hardware.


Section 2: Hardware Failures — When a Failing Component Silently Drains Your Battery

The Components That Cause Heat and Drain Simultaneously

When software troubleshooting makes no difference — the phone still overheats and drains rapidly after restarts and resets — a physical component is pulling current it shouldn’t. Three hardware failures produce this exact symptom combination.

Degraded battery with increased internal resistance. As lithium-ion cells age, internal resistance rises. Higher resistance means the battery generates more heat while delivering less usable power. The phone reads the unstable voltage as rapid percentage drops. The battery feels hot to the touch through the back panel. Checking battery health reveals the problem — anything below 80% maximum capacity strongly suggests the battery itself is the issue.

Short circuit on the logic board. A micro-short from liquid exposure, a hard drop, or corroded traces creates a parasitic current path. Electricity flows continuously through a connection that shouldn’t exist. The affected area of the board heats up. The battery drains even when the phone sits idle with the screen off. Our guide on logic board failures explains how micro-shorts cascade into broader component damage when left unaddressed.

Failing power management IC (PMIC). This chip regulates how current flows from the battery to every component. When the PMIC malfunctions, it allows unregulated power draw. Components receive more voltage than they need. Excess energy converts to heat. The battery depletes rapidly because current flows without proper throttling.

Warning Signs That Confirm Hardware Failure

Watch for patterns that software issues never produce:

  • Heat during idle with screen off. Place the phone face-down on a cool surface for 30 minutes with the screen off. Pick it up. If the back feels warm, something draws power even during complete idle. Software processes sleep when the screen turns off. Hardware shorts don’t.
  • Battery percentage jumps erratically. Drops from 65% to 40% in seconds, then bounces to 55% on the charger. The battery’s internal gauge lost accuracy because the cells degraded unevenly.
  • Localized hot spots. The heat concentrates in one specific area — upper left, lower center, near the camera. That localized heat points to a specific chip or connection on the logic board pulling excess current.
  • Phone shuts off above 20%. The battery reports remaining charge but can’t deliver enough voltage to keep the phone running. Sudden shutdowns at 25% or 30% confirm degraded cells.

If any of these match your experience, bring the phone in for a hardware diagnostic. Our smartphone repair team can isolate the exact failing component.


Section 3: What Repair Looks Like — and Why Timing Matters

Battery Replacement

For the majority of heat-plus-drain cases, a new battery solves the problem. At Fix Wireless, we stock high-quality replacement batteries for iPhones and Samsung devices across all recent models. Most replacements finish same-day, often within an hour. The phone runs cooler immediately and lasts a full day again.

Board-Level Diagnosis and Repair

If a fresh battery doesn’t fix the heat and drain, the technician moves to board-level inspection. Using thermal imaging, we identify which chip or trace generates the excess heat. Micro-soldering tools let us repair or replace the specific component — whether it’s a PMIC, a shorted capacitor, or a corroded trace.

Board-level repair preserves your data and saves the phone. It costs substantially less than replacement. And it fixes the actual root cause instead of masking symptoms.

Why You Shouldn’t Wait

A phone that runs hot and drains fast stresses every internal component simultaneously. The elevated temperature degrades the battery faster. Excess current ages solder joints on the logic board. Meanwhile, sustained heat weakens adhesives holding the screen and back glass in place.

What starts as a single failing component cascades into multiple failures over weeks and months. We’ve seen phones come in for what should have been a simple battery swap but needed screen repair and board work because the customer waited too long. A battery that overheated for three months softened the display adhesive enough to cause separation. Early repair prevents that chain reaction.

According to the U.S. Consumer Product Safety Commission, overheating lithium-ion batteries in consumer electronics pose documented fire and burn risks. Addressing heat issues promptly isn’t just about convenience — it’s a safety decision.

Getting Started

Get a quick estimate through our instant quote tool before visiting. Or walk into our New Haven or Hamden location for a same-day diagnostic. Our common repair questions and device repair FAQs cover warranty details and turnaround expectations.


Section 4: Conclusion and Final Thoughts

A phone that gets hot and drops 20% battery in minutes is telling you something urgent. Either a software process ran away and won’t stop consuming CPU power, or a hardware component started failing and silently drains current around the clock.

Start with software. Check battery usage stats. Force-close suspicious apps. Restart the phone. Reset all settings. These steps cost nothing and resolve the majority of runaway process cases.

But if the phone stays hot after a restart — especially during idle with the screen off — the problem lives in the hardware. A degraded battery, a shorted trace on the logic board, or a failing power management IC won’t fix itself through settings menus. Professional diagnosis identifies the exact component, and the repair typically finishes the same day.

Don’t adapt to the heat. Don’t carry a charger everywhere and accept two-hour battery life as normal. A phone running that hot actively damages itself with every passing day. Early repair keeps the fix simple and affordable. Waiting turns a single-component failure into a multi-system breakdown.

If your phone runs hot and drains fast, contact Fix Wireless or stop by either Connecticut location. We’ll pinpoint the cause and give you honest options — whether that’s a battery swap, a board repair, or a recommendation to trade up to a replacement device.


FAQs

Heat and Drain Questions

Is it normal for a phone to get warm during use?

Mild warmth during gaming, video calls, or GPS navigation is normal. The processor works hard during those tasks and generates heat. What isn’t normal is heat during light use — texting, scrolling social media, or sitting idle. If the phone feels hot during basic tasks, something draws excess power.

Can a phone charger cause overheating?

Yes. Low-quality chargers deliver inconsistent voltage that stresses the battery and charging circuit. Always use manufacturer-certified chargers or reputable third-party options. If overheating only occurs during charging, try a different cable and adapter before assuming a phone hardware issue.

Does closing all background apps help with battery drain?

Not usually. Force-closing apps actually increases battery use because the system spends energy reloading them. Only close an app if battery stats show it consuming a disproportionate share of power. Otherwise, let the operating system manage background apps on its own.

Repair Questions

How do I know if the battery or the logic board caused the problem?

Start with battery health. Below 80% maximum capacity points strongly to the battery. If health reads above 85% but the phone still overheats and drains during idle, the logic board likely has a short or PMIC issue. Our technicians test both during every heat-related diagnostic.

How much does a battery replacement cost at Fix Wireless?

It varies by phone model. Get an exact number through our instant quote tool. Most smartphone battery replacements fall in a very affordable range — far less than a new phone.

My phone gets hot near the camera area — what does that mean?

Localized heat near the camera usually points to a specific chip on the logic board generating excess current. The image signal processor, modem, or a nearby voltage regulator may have a failing solder joint or micro-short. Board-level diagnosis with thermal imaging identifies the exact chip. This differs from general warmth across the whole back panel, which more commonly points to battery degradation.

Phone Screen Goes Black but Calls Still Come Through? The Backlight, LCD, and Proximity Sensor Failures That Cause a ‘Phantom Display’

Written By: Ronnie Gonenc

Person holding smartphone with black screen during active phone call — phone screen goes black but still works due to backlight or proximity sensor failure

Your phone rings. You hear it and feel the vibration. But when you pick it up — nothing. The screen is completely black. But the call is definitely coming through. You swipe where the answer button should be and somehow manage to take the call. Audio works perfectly. The other person hears you fine. The phone functions. You just can’t see a single thing on the display.

When your phone screen goes black but still works in every other way, you’re dealing with what repair technicians call a “phantom display.” The phone operates normally behind a dead screen. Touch still registers if you tap the right spots blindly. Sounds play. Notifications arrive. The problem lives exclusively in the display output — not the phone’s brain.

At Fix Wireless in Connecticut, phantom display cases come through our doors multiple times a week. The cause falls into one of three categories: a failed backlight, a damaged LCD or OLED panel, or a malfunctioning proximity sensor that thinks the phone is permanently against your ear. Each one looks identical from the outside. Only proper diagnosis reveals which component actually failed.


Section 1: The Three Hardware Failures That Create a Phantom Display

Failed Backlight (LCD Models)

Phones with LCD screens use a separate backlight layer behind the display panel. The backlight produces the white light that makes the image visible. The LCD layer in front filters that light into the colors and images you see.

When the backlight fails, the LCD still receives and processes image data. The screen technically displays content — but without light behind it, you can’t see it. If you take the phone into a dark room and shine a flashlight at the screen at a sharp angle, you might see a faint ghost image. That confirms the LCD works but the backlight died.

Common causes: A failed backlight driver IC on the logic board. This tiny chip controls the voltage that powers the backlight LEDs. A drop, liquid exposure, or even a power surge through a cheap charger can kill it. The backlight circuit can also fail after a screen replacement if the technician damaged the backlight connector during reassembly.

Damaged OLED Panel

OLED screens don’t use a separate backlight. Each pixel produces its own light. When an OLED panel fails, individual pixels or entire regions stop emitting light. A complete OLED failure turns the screen fully black — no ghost image, no faint glow, nothing visible even with a flashlight.

Common causes: Physical impact cracking the OLED layer beneath intact top glass. This is the classic “screen looks fine outside but displays nothing” scenario. The flexible OLED substrate fractures internally from a drop without the cover glass breaking. Burn damage from sustained high brightness or prolonged static images can also kill OLED regions. On older devices, the OLED driver IC on the logic board can fail — producing a black screen while the phone otherwise operates normally.

Proximity Sensor Stuck in “Active” Mode

This third cause surprises most people. Your phone has a proximity sensor near the top of the screen. During calls, this sensor detects when your face is close and turns the display off to prevent accidental touches. When the proximity sensor malfunctions and reads “face detected” permanently, the display stays black at all times — not just during calls.

Common causes: A damaged or dirty proximity sensor. A screen protector or case covering the sensor cutout. A prior screen repair that didn’t calibrate the replacement panel’s proximity sensor properly. Liquid residue from a small spill that dried over the sensor window. We covered this exact failure in detail in our guide on phone screens staying black during calls — but when the sensor locks in active mode permanently, it blacks out the display during all use, not just calls.


Section 2: How to Diagnose Which Failure You’re Dealing With

The Flashlight Test (LCD Backlight Check)

Take the phone into a completely dark room. Wake it up by pressing the power button or having someone call you. Hold a bright flashlight directly against the screen at a slight angle. Look closely for any faint image — icons, text, wallpaper shapes.

If you see a dim ghost image, the backlight failed but the LCD panel still works. This means the display assembly might not need full replacement. A backlight IC repair on the logic board can restore the screen at a fraction of full screen replacement cost.

If you see absolutely nothing — not even a hint of an image — the panel itself likely died (OLED failure) or the display flex cable disconnected entirely.

The Call Test (Proximity Sensor Check)

Have someone call your phone. Answer the call using Siri, Google Assistant, or by swiping blindly where the answer button sits. Once on the call, put the phone on speakerphone (again, using voice command or blind tapping).

Now watch the screen. Does it light up when you place the phone face-up on a table during the call? If yes, the proximity sensor works and the display functions — meaning the black screen only appears when the sensor detects something close. Check for screen protectors, case edges, or debris covering the sensor window at the top of the phone.

If the screen stays black even face-up on a flat surface during a call, the sensor is either stuck or the display failure is unrelated to proximity detection.

The External Display Test

Connect the phone to a TV or monitor using a Lightning-to-HDMI adapter (iPhone) or USB-C-to-HDMI cable (Android). If the phone’s interface appears on the external display, the logic board and graphics processor work fine. The failure sits in the display panel, backlight, or flex cable — not the phone’s brain.

This test also lets you back up your data through the external screen before bringing the phone in for repair. Securing your data before any repair is always smart. Our device repair FAQs cover backup recommendations in detail.


Section 3: What Repair Looks Like for Each Failure Type

Backlight IC Repair (Board-Level Fix)

When the backlight driver IC fails, a skilled technician can replace or reball the chip directly on the logic board. This preserves the existing screen and costs significantly less than a full display replacement. The repair requires micro-soldering equipment and board-level expertise.

At Fix Wireless, our technicians handle logic board repairs as part of our standard service. A backlight IC repair typically finishes same-day. The phone gets its display back without replacing any screen components.

Full Screen Replacement (LCD or OLED Panel Failure)

If the panel itself cracked internally or the OLED substrate failed, the entire display assembly needs replacing. For iPhones, this involves removing the damaged screen, transferring internal components like the earpiece speaker and front camera to the new assembly, and calibrating the replacement panel. For Samsung and Android devices, the process is similar with model-specific adhesive and connector differences.

Quality matters here. Low-grade replacement screens can introduce new problems — ghost touches, color inaccuracy, or reduced touch sensitivity. We use OEM-quality panels to avoid these issues. Every screen replacement at Fix Wireless comes with our standard warranty.

Proximity Sensor Fix

If the proximity sensor caused the phantom display, the fix depends on what’s wrong with it. A dirty or blocked sensor gets cleaned. Screen protectors covering the sensor window get trimmed or replaced. Miscalibrated sensors from a prior screen repair get recalibrated or swapped with the new screen assembly.

On some phone models, the proximity sensor connects through the display flex cable. Replacing the screen automatically includes a new sensor. On others, the sensor mounts separately and can fail independently of the display. Our technicians test both during every phantom display diagnostic.

Getting Started

You can get a quick estimate through our instant quote tool before visiting. Or stop by either of our locations — New Haven or Hamden — for a walk-in diagnostic. Our common repair questions page covers what to expect from the process.


Section 4: Conclusion and Final Thoughts

A phone screen that goes black but still works is one of the most disorienting failures a user can experience. The phone clearly functions. Calls ring. Audio plays. Touch responds blindly. But the screen shows nothing — leaving you locked out of everything visual on a device that revolves around its display.

The cause always lives in one of three places: the backlight circuit, the display panel, or the proximity sensor. A quick flashlight test and call test narrow it down before you ever visit a repair shop.

The good news? Each of these failures has a well-established repair path. Backlight IC repairs save the existing screen through board-level work. Panel replacements restore full display function with OEM-quality parts. Proximity sensor fixes often take minutes once the root cause is identified.

Don’t try to live with a phantom display by memorizing tap locations and relying on voice commands. The phone works — but one wrong blind tap can change settings, delete data, or trigger actions you never intended. And if the cause involves liquid damage or a failing IC, the problem only worsens from here.

Bring it to Fix Wireless for a proper diagnostic. We’ll identify exactly which component failed and give you repair options with clear pricing. Most phantom display repairs finish same-day, and every fix comes with our standard warranty.

If the repair cost doesn’t make sense for your device’s age, our buy and sell program offers certified pre-owned replacements and trade-in credit for your current phone.


FAQs

Understanding the Phantom Display

Why can I hear calls but not see the screen?

The display and audio systems operate independently. The processor, modem, and speakers function normally even when the screen output fails. Your phone still receives calls, processes audio, and registers touch — the display simply stopped rendering the image. The failure sits in the backlight, panel, or proximity sensor, not the phone’s core systems.

How do I tell if it’s the backlight or the whole screen?

Shine a flashlight directly against the screen in a dark room. If you see a faint ghost image of icons or text, the LCD panel still works and only the backlight died. If you see absolutely nothing, the panel itself failed. OLED screens won’t show any ghost image regardless because they don’t use a separate backlight.

Can a screen protector cause a phantom display?

Yes — if it covers the proximity sensor window. The sensor reads the protector as a face pressed against the screen and keeps the display off. Remove the protector and test. If the screen returns, trim the protector around the sensor area or switch to one with a proper cutout.

Repair Questions

Is a backlight repair cheaper than a full screen replacement?

Significantly. A backlight IC repair targets one small chip on the logic board. It preserves the existing screen, saving the cost of a new display panel entirely. Not every shop offers board-level repair, but at Fix Wireless, it’s part of our standard service.

How long does a phantom display repair take?

Backlight IC repairs and proximity sensor fixes typically finish same-day, often within an hour or two. Full screen replacements also finish same-day when parts are in stock. Complex cases involving both board-level and panel damage may take slightly longer.

My phone screen went black after a screen repair elsewhere — why?

The replacement screen may have a faulty backlight, a damaged flex cable, or an improperly seated proximity sensor. Alternatively, the technician may have damaged the backlight IC on the logic board during disassembly. Bring it to our New Haven or Hamden location for a second-opinion diagnostic. We regularly resolve issues left behind by other repair shops.

Phone Vibration Stopped Working? The Software Fixes and Hardware Failures Behind a Silent Haptic Engine

Written By: Ronnie Gonenc

Morning alarm on a wooden nightstand

You set an alarm. It goes off with sound but no vibration. A text comes in — nothing buzzes. You toggle the ring/silent switch and feel absolutely zero feedback from the phone. The haptic engine went silent, and now your phone can’t get your attention unless you’re staring directly at the screen.

When your phone vibration stopped working, the instinct is to check the settings. And that’s the right first step — sometimes a toggle got switched accidentally or an update reset a preference. But if the settings check out and the motor still won’t fire, the problem lives deeper. Either in the software stack managing haptic feedback, or in the physical vibration motor itself.

At Fix Wireless in Connecticut, haptic engine failures rank among our steadiest repair requests. They show up across every brand — iPhones, Samsungs, Pixels, Motorolas. The fix ranges from a 30-second settings adjustment to a full motor replacement. This guide helps you figure out which one you’re dealing with before you spend a dime.


Section 1: How Your Phone’s Vibration System Actually Works

The Evolution From Spinning Motors to Linear Actuators

Older phones used a tiny eccentric rotating mass (ERM) motor — basically a small weight on an off-center shaft that spins to create vibration. These motors produced a generic buzz. They wore out predictably, usually after two to three years.

Modern flagships use a linear resonant actuator (LRA), often called a “Taptic Engine” by Apple or “haptic motor” by Android manufacturers. Instead of spinning, the LRA drives a small mass back and forth along a track using electromagnetic force. This produces the sharp, precise taps you feel during typing, notifications, and system feedback.

LRAs deliver much better haptic quality. But they also fail differently than the old spinning motors. Understanding that difference matters for diagnosis.

Why Haptic Engines Fail

Several factors cause vibration failure. Some involve no physical damage at all:

  • Software misconfiguration. A system update, accessibility setting, or Do Not Disturb mode can silently disable haptic feedback. The motor works fine — the phone just stopped telling it to fire.
  • Firmware corruption. The low-level software that controls the haptic driver can corrupt after a failed update or unexpected shutdown. The motor receives garbled instructions and stays silent.
  • Loose flex cable connection. The haptic motor connects to the logic board through a small flex cable. A drop, rough handling, or even a previous screen repair can partially unseat this connector. The motor loses its signal intermittently or completely.
  • Worn-out actuator coil. After thousands of hours of micro-vibrations, the electromagnetic coil inside the LRA degrades. It produces weaker output, then stops entirely. Heavy users — gamers, constant texters — hit this threshold sooner.
  • Water or moisture damage. Liquid exposure corrodes the motor’s internal contacts and coil. Vibration weakens progressively before dying completely. If your phone encountered any moisture, even humidity or condensation, this is a likely contributor.

Section 2: Software Troubleshooting — Fix It Yourself Before Assuming Hardware

Work through these steps in order. Each one targets a specific software cause.

Step 1: Check Vibration Settings

On iPhone, go to Settings > Sounds & Haptics. Confirm “System Haptics” is toggled on. Also check that the vibration patterns under Ringtone and Text Tone aren’t set to “None.” On Android, go to Settings > Sound & Vibration. Verify “Vibration intensity” sliders aren’t set to zero for calls, notifications, and touch feedback.

Step 2: Check Do Not Disturb and Focus Modes

Both iPhone and Android have focus modes that can suppress vibration without muting sound. On iPhone, check Settings > Focus. On Android, check Settings > Do Not Disturb. Make sure no active mode suppresses vibration alerts.

Step 3: Test With a Different App

Open the Clock app and set a quick alarm with vibration. Or dial your own number from another phone. If vibration works for the alarm but not for texts, a specific app’s notification settings overrode the system vibration. Check that app’s individual notification preferences.

Step 4: Restart and Update

Power the phone off completely. Wait 10 seconds. Turn it back on. Then check for pending system updates. Both Apple and Google have patched haptic driver bugs through firmware updates in the past. A restart re-initializes the motor driver. An update may fix a known bug affecting your device model.

Step 5: Reset All Settings

On iPhone: Settings > General > Transfer or Reset iPhone > Reset > Reset All Settings. On Android: Settings > System > Reset Options > Reset All Settings. This resets sound, display, and network configurations to factory defaults without erasing your data. It clears any corrupted preference file that might block haptic feedback.

If vibration returns after any of these steps, the problem was software. Monitor it for a few days to make sure it holds. If vibration stays dead through all five steps, the issue lives in the hardware.


Section 3: Hardware Failures — What Breaks Inside and What Repair Involves

Diagnosing the Physical Problem

Once software causes get ruled out, three hardware scenarios cover nearly every case we see at our New Haven and Hamden locations.

Disconnected haptic motor flex cable. The small ribbon cable between the motor and the logic board popped loose. This often happens after a drop. It also occurs when a prior repair at another shop disturbed the connection without reseating it properly. The fix takes minutes — our technician opens the phone, reseats the cable, and tests the motor. If the motor fires correctly, the repair costs almost nothing.

Failed haptic motor (dead actuator). The electromagnetic coil inside the LRA burned out or mechanically failed. The motor receives the signal but can’t produce movement. Replacement involves removing the old motor and installing a new OEM-quality unit. For iPhones, this is a standard same-day repair. For Samsung and other Android devices, the process is similar though motor location varies by model.

Corrosion from liquid exposure. Moisture reached the motor or its connector and corroded the contact points. The motor may partially work — producing weak, inconsistent vibrations — before failing entirely. Repair involves cleaning the corrosion, testing the motor’s viability, and replacing it if the coil sustained permanent damage. If you suspect your phone encountered liquid, acting fast matters. The longer corrosion sits, the more components it affects beyond just the haptic motor.

Vibration Problems Connected to Other Failures

Sometimes a dead haptic engine signals a broader issue. We’ve seen phones where the vibration motor shares a flex cable or power rail with another component. A failure in one affects the other.

For example, on certain iPhone models, the Taptic Engine connects near the same area as the barometric vent and lower speaker. Damage to this zone can affect vibration, call audio, and water resistance simultaneously. If your phone lost vibration AND developed sound problems during calls, both issues may share a single root cause.

Similarly, a logic board issue affecting the haptic driver IC on the motherboard can kill vibration while leaving everything else functional. This requires board-level diagnosis rather than a simple motor swap.

Getting Your Phone Diagnosed

You can get a quick estimate through the Fix Wireless instant quote tool before visiting. Our common repair questions and device repair FAQs cover warranty details and what to expect during the process. Walk-ins are always welcome at both Connecticut locations.


Section 4: Conclusion and Final Thoughts

A phone that lost its vibration feels surprisingly crippled. Alarms don’t wake you up. Notifications slip by unnoticed. The subtle haptic feedback during typing — the kind you never thought about until it disappeared — leaves every keystroke feeling hollow and imprecise.

Start with software. Check your settings, restart, update, and reset preferences. These steps solve a meaningful percentage of cases without any repair cost. But if the vibration stays dead after a full software troubleshooting pass, the haptic motor or its connection needs professional attention.

The repair itself ranks among the simpler ones in phone repair. A flex cable reseat takes minutes. A motor replacement finishes same-day for most models. Even corrosion cleanup, while more involved, resolves in a single appointment when caught early.

Don’t ignore a dead haptic engine and adapt around it. Vibration serves a real functional purpose — especially for alarms, emergency alerts, and accessibility features. And if the failure stems from liquid damage or a loose connection, delaying repair gives the underlying problem time to spread to neighboring components.

If your phone vibration stopped working and the settings check out, bring it to either Fix Wireless location in Connecticut. We’ll diagnose the exact cause — software, cable, motor, or board — and give you clear, honest options. Every repair comes with our standard warranty, and most haptic motor fixes finish before you leave the shop.


FAQs

Vibration Troubleshooting Questions

Why does my phone vibrate for calls but not for texts?

Each app manages its own notification vibration setting independently. Open the messaging app’s notification settings and verify vibration is enabled. Also check that the app isn’t using a custom notification channel (on Android) with vibration turned off.

Can a phone case block vibration?

Not entirely, but thick rugged cases dampen the vibration so much that you barely feel it. Try removing the case and testing. If vibration feels strong without the case but weak with it, the case is absorbing the motor’s output. Switching to a thinner case solves this.

My phone vibrates but very weakly — is the motor dying?

Likely yes. A weakening vibration pattern signals a motor approaching end-of-life. The electromagnetic coil loses strength gradually. Replacement restores full haptic intensity. Don’t wait until it dies completely — weak vibration means the motor is already stressed.

Repair Questions

How much does a haptic motor replacement cost?

It varies by phone model. Get an exact number through our instant quote tool. Most haptic motor replacements cost far less than people expect — significantly cheaper than replacing the phone.

Does Fix Wireless repair vibration on all phone brands?

Yes. We handle haptic engine repairs on iPhones, Samsung Galaxy devices, Google Pixels, Motorolas, and other smartphone brands. We also repair vibration issues on tablets and game controllers that use similar motor technology.

Could a previous screen repair have caused my vibration to stop?

Absolutely. The haptic motor sits near the display assembly in many phone models. A screen replacement at another shop may have disturbed the motor’s flex cable or accidentally damaged the motor itself during disassembly. If vibration stopped working around the same time as a prior repair, the two are almost certainly connected. Bring it to our New Haven or Hamden location and we’ll inspect the connection.

How to Fix a Phone Screen That Turns On but Won’t Respond to Touch After a Drop

Written By: Ronnie Gonenc

Smartphone with lit screen lying on wooden floor not responding to touch after being dropped — phone screen won't respond to touch after drop

You dropped your phone. It hit the ground, you picked it up, and the screen lights up just fine. You can see your notifications, your wallpaper — everything looks normal. But when you try to swipe, tap, or type… nothing. The display works, but the touch is dead. It’s confusing because the screen looks perfect yet ignores every finger.

When your phone screen won’t respond to touch after a drop, the damage almost always hides beneath the surface. The glass might not show a single crack. But inside, something shifted or disconnected at a microscopic level. Now the layer that detects your touch no longer talks to the rest of the phone.

At Fix Wireless, we diagnose this exact issue several times a week. We see it across iPhones, Samsungs, Pixels, and just about every other brand. This guide explains what’s going on inside your device. It covers what you can try at home and when you need a professional repair.


Section 1: What’s Actually Broken When the Screen Displays but Touch Doesn’t Work

Understanding the Digitizer — the Invisible Layer You Never Think About

Your phone’s display isn’t one single piece of technology. It’s a stack of layers working together. The part you see — showing images, colors, and text — is the LCD or OLED panel. But sitting on top of that panel is a separate component called the digitizer.

The digitizer senses your touch. It uses a grid of microscopic sensors that detect the electrical charge from your fingertip. Those sensors translate your taps into coordinates that the processor understands.

A hard impact can crack the digitizer, disconnect it from the display, or break its link to the logic board. Meanwhile, the display panel underneath keeps working fine. That’s why you get a screen that looks perfect but ignores every tap and swipe.

The Most Common Types of Internal Damage After a Drop

Not every drop causes the same failure. Here’s what we typically find at our New Haven and Hamden locations:

  • Hairline digitizer fracture. The top glass might look flawless. But the digitizer layer underneath can develop micro-cracks from impact shock. These invisible fractures break the sensor grid. They kill touch input in certain zones — or across the entire screen.
  • Loose display flex cable. The digitizer connects to the logic board through a thin ribbon cable. A solid drop can partially unseat that connector. This cuts off communication between the touch layer and the processor. Reseating the cable often restores full touch without replacing any parts.
  • Damaged Screen IC (touch controller chip). A small chip on the logic board — the Screen IC — interprets signals from the digitizer. Impact shock can crack a solder joint under this chip. Once the Screen IC fails, touch stops working entirely. Our post on touch response failures and Screen IC issues covers this repair in detail.
  • Frame deformation pressing on the display. Sometimes the phone’s frame bends slightly from impact. That subtle bend puts constant pressure on the display assembly. It interferes with digitizer accuracy. Touch might work in some areas but not others.

Section 2: What You Can Try at Home Before Heading to a Repair Shop

A drop strongly suggests physical damage. But spend a few minutes ruling out software issues first. Sometimes the impact triggers a system glitch that mimics hardware failure. You can often resolve these without opening the phone.

Force Restart the Phone

This is always step one. A force restart clears temporary system errors and re-initializes the touch drivers.

On iPhone (Face ID models): press and release Volume Up, then Volume Down, then hold the Side button until the Apple logo shows. On Samsung and most Android phones: hold Power + Volume Down together for 10 to 15 seconds. Wait for the vibration and restart.

If touch comes back, the drop likely caused a software crash. Monitor it over the next few days though. If touch fails again, the digitizer connection is likely compromised.

Remove the Case and Screen Protector

This sounds too simple, but we’ve seen it dozens of times. A drop can shift a thick case or tempered glass protector. Even a small shift puts uneven pressure on the display edges. That stops the digitizer from registering touch. Pull everything off and test the bare screen.

If touch returns without the case, the case caused the problem. If you’ve noticed ghost touches or phantom taps, uneven accessory pressure is a surprisingly common cause.

Boot Into Safe Mode (Android Only)

Hold the power button, then long-press “Power Off” until Safe Mode appears. This disables all third-party apps. If touch works perfectly here, a downloaded app was interfering with the touch driver. Uninstall recently added apps one by one until normal behavior returns.

Connect an External Mouse via OTG

This won’t fix the touch screen. But it can save your data. Plug a regular computer mouse into a USB-C OTG adapter. A cursor appears on screen. You can navigate, back up files, or adjust settings before repair.

On iPhone, enable a Bluetooth mouse through Settings > Accessibility > Touch > AssistiveTouch. You’ll need to reach settings through Siri first.

Securing your data before any repair is always smart. If you’re comparing repair costs to replacement costs, our buy and sell program lets you trade in damaged devices for credit.


Section 3: Professional Repair — What Actually Happens and What to Expect

Why DIY Screen Repair Is Risky for Touch-Specific Failures

Plenty of online tutorials make screen replacement look easy. For a simple cracked glass swap, experienced DIYers can sometimes manage. But touch failure after a drop demands more nuance. The fault might sit in the digitizer, the flex cable, the Screen IC, or the frame. You won’t know which until a technician opens the phone and tests each part.

Swapping the screen when the real culprit is a loose flex connector wastes money. Worse, prying open a phone without proper tools can puncture the battery or tear other cables. That’s how a $70 repair turns into a $250 one.

What a Professional Diagnostic Involves

At Fix Wireless, our technicians test the display flex cable first. Reseating it takes minutes and costs nothing if that solves it. Next, we test with a known-good replacement screen. This tells us whether the touch layer itself has physical damage.

If both the cable and digitizer check out, we inspect the logic board for Screen IC failures. We look for cracked solder joints and chip damage. This layered approach means you only pay for the actual broken part.

Typical Repairs and Timeframes

Here’s a realistic look at what most cases involve:

Flex cable reseat: The connector popped loose from impact. Our tech opens the phone, reseats the cable, tests it, and closes it up. Done within 30 minutes. Minimal cost.

Digitizer or full screen replacement: The touch layer has physical damage and needs a new display assembly. For iPhones, this ranks among our most common repairs. For Samsung and other Android devices, the process is similar. Adhesive removal adds extra time. We typically finish same-day.

Screen IC repair (micro-soldering): Our technician removes the touch controller chip, re-balls it, and resolders it under a microscope. This avoids a full screen replacement when the screen itself works fine. It requires specialized equipment and trained hands.

The FCC’s consumer guide also recommends professional diagnosis over guesswork after physical impact.

For a quick price estimate, the Fix Wireless instant quote tool gives you numbers in seconds. Our device repair FAQs and common repair questions page cover warranty info and the repair process.


Section 4: Conclusion and Final Thoughts

A phone screen that turns on but won’t respond to touch after a drop looks deceptively simple. The screen works. No visible crack. Everything seems fine — except the one thing that makes a smartphone usable.

Most of the time, the digitizer or its connection to the logic board took the hit. Sometimes a loose cable just needs reseating. Other times the touch layer fractured beneath the glass. Or the Screen IC lost a solder joint during impact. Each scenario calls for a different fix. Only proper diagnosis reveals which one applies.

Try the quick steps first. Force restart. Strip the case and screen protector. Boot into Safe Mode on Android. These take minutes. They occasionally reveal a software cause. But if touch stays dead after those attempts, the damage is physical. No amount of restarting will fix it.

Most repairs finish faster and cost less than people expect. Don’t write off a $1,000 phone over a component that costs a fraction of that. And don’t wait too long. A partially connected flex cable worsens over time. A stressed Screen IC can eventually take the display with it.

If you’re in Connecticut, bring it to either Fix Wireless location for a proper diagnosis. We identify exactly what’s wrong before any work begins. No guessing. No unnecessary parts. Just the fix your phone actually needs.


FAQs

Common Questions About Touch Failure After a Drop

Why does my screen still display perfectly if the touch layer failed? The display and touch sensor are separate layers. The LCD or OLED panel handles visuals. The digitizer handles touch. A drop can damage the digitizer while leaving the display intact. Think of a window with a broken lock. You can still see through it, but the mechanism no longer works.

Can a screen protector cause touch to stop working after a drop? Yes. If the impact shifted the protector or lifted it at the edges, that creates air gaps. Uneven pressure disrupts the digitizer. Remove the protector entirely and test. If touch returns, replace it with a fresh one that sits flush.

Will a factory reset fix touch that stopped working after a drop? Almost certainly not. A factory reset targets software problems. If touch died right after physical impact, the cause is hardware. A reset would erase your data without solving anything. Try a force restart first. If that fails, the phone needs physical repair.

Repair and Cost Questions

Should I repair the touch, or just buy a new phone?

For most devices, repair makes financial sense. A screen or digitizer replacement costs far less than a new phone. Even Screen IC micro-soldering — the most involved option — still comes in much cheaper. Buying new only makes sense if the phone already had multiple problems before the drop.

My touch works in some areas but not others — what does that mean?

This points to a partial digitizer fracture. The sensor grid cracked in certain zones. Touch registers where the grid remains intact and fails where it broke. A slightly bent frame can also cause this by pressing on part of the display. Either way, it needs professional attention. This damage spreads over time with daily use.

How to Fix a Phone That Keeps Dropping Calls or Has No Sound During Conversations

Written by: Ronnie Gonenc

Frustration over dropped call

There’s nothing quite like the frustration of being mid-sentence on an important call and hearing… nothing. Dead silence. Or worse — the call just drops entirely, and you’re left staring at your home screen wondering what happened. If your phone keeps dropping calls or the sound cuts out during conversations, you know how quickly it goes from annoying to genuinely disruptive.

This isn’t some rare glitch that only affects old phones. We see it at Fix Wireless on a regular basis — across brand-new iPhones, Samsung Galaxy models, Pixels, and budget Androids alike. Sometimes the fix takes thirty seconds. Other times, there’s a hardware issue hiding behind what looks like a simple call quality problem. Either way, guessing won’t get you anywhere.

This guide walks through the actual causes behind dropped calls and call audio failures, gives you a clear troubleshooting path to follow at home, and helps you recognize when it’s time to bring the device in for professional diagnosis.


Section 1: Why Phones Drop Calls or Lose Audio — the Real Causes

It’s Rarely Just “Bad Signal”

Most people blame dropped calls on their carrier, and sometimes that’s fair. But when calls drop repeatedly from the same phone — especially in places where they used to work fine — the carrier usually isn’t the problem. The phone is.

Your device manages call audio through a chain of components working together: the cellular modem connects the call, the earpiece speaker delivers audio to your ear, the microphone picks up your voice, and the proximity sensor tells the screen when to turn off so your cheek doesn’t accidentally mute or hang up the call. If any single link in that chain fails, calls drop or audio disappears.

Software Causes

A surprising number of call problems trace back to software. Here’s what we commonly find:

  • Outdated carrier settings. Your phone periodically receives small updates from your carrier that affect how it connects to cell towers. If these fall out of date — or get corrupted — call stability suffers noticeably.
  • VoLTE or Wi-Fi Calling conflicts. Voice over LTE and Wi-Fi Calling are great features when they work. But on some devices, particularly after an OS update, they can create handoff failures where the call drops as the phone switches between networks.
  • Rogue background apps. Battery optimizers, VPNs, and call-recording apps sometimes interfere with the phone app’s ability to maintain a stable connection. We’ve seen a single aggressive battery saver app cause persistent dropped calls on an otherwise perfectly healthy Samsung device.
  • Corrupted system cache. Accumulated temporary files from months of use can interfere with core system functions, including how your phone handles cellular connections and audio routing.

Hardware Causes

When software troubleshooting doesn’t solve it, the culprit is almost always physical. The most common hardware failures we diagnose at our New Haven and Hamden locations include:

  • Damaged earpiece speaker. If you can’t hear the other person but they can hear you, or if audio is crackly and distorted, the tiny earpiece speaker at the top of your phone may be blown or partially failing.
  • Faulty microphone. The reverse scenario — they can’t hear you, or your voice sounds muffled and robotic. Phones actually have multiple microphones (usually two or three), and damage to even one of them can ruin call quality.
  • Loose or corroded antenna connections. A drop or water exposure can dislodge the antenna flex cables that connect to the logic board. Our post on logic board repairs explains how even minor board-level issues can cascade into bigger problems.
  • Proximity sensor malfunction. If the sensor that detects your face during a call isn’t working correctly, the screen stays active and your cheek accidentally taps mute, hold, or the end call button. It looks like a dropped call, but it’s really a sensor problem.

Section 2: Step-by-Step Troubleshooting You Can Do Right Now

Work through these in order. Each step rules out a specific category of problems so you don’t waste time repeating fixes that target the same thing.

Step 1: Test in Safe Mode

On Android, hold the power button and long-press “Power Off” until Safe Mode appears. Make a test call. If calls work perfectly in Safe Mode, a third-party app is interfering. Uninstall recently added apps one at a time — start with VPNs, call recorders, and battery optimization tools.

iPhone doesn’t have a traditional Safe Mode, but disable any active VPN profiles under Settings > VPN & Device Management and test again.

Step 2: Update Carrier Settings and System Software

On iPhone, go to Settings > General > About. If a carrier update is available, you’ll get a prompt. On Android, check Settings > About Phone > Software Update. Also look for carrier-specific updates under Settings > Connections > Mobile Networks.

Keeping carrier settings current is something many people overlook, but it directly affects how your phone negotiates connections with nearby cell towers.

Step 3: Toggle VoLTE and Wi-Fi Calling

Turn off both features temporarily. On iPhone: Settings > Cellular > Cellular Data Options > Voice & Data — switch from LTE to 3G temporarily. Also toggle off Wi-Fi Calling under Settings > Phone > Wi-Fi Calling. On Android, these settings are usually under Settings > Connections > Mobile Networks.

Make several test calls with both features disabled. If calls stop dropping, re-enable them one at a time to identify which feature is causing the conflict.

Step 4: Reset Network Settings

This is the nuclear option for software-based call issues. It wipes all saved Wi-Fi networks, Bluetooth pairings, VPN configurations, and cellular settings — then rebuilds them fresh. On iPhone: Settings > General > Transfer or Reset iPhone > Reset > Reset Network Settings. On Android: Settings > System > Reset Options > Reset Wi-Fi, Mobile & Bluetooth.

You’ll need to re-enter Wi-Fi passwords afterward, but this single step resolves a large percentage of persistent call-dropping issues that are software-related.

Step 5: Test the Speakers and Microphone

Make a call on speakerphone. If the audio sounds clear on speaker but not through the earpiece, the earpiece speaker is likely failing. Record a voice memo and play it back — if your voice sounds muffled, distant, or cuts in and out, one of the microphones may be damaged.

Also try a pair of wired headphones or Bluetooth earbuds. If calls work perfectly with an external audio device but not through the phone’s built-in speakers and mics, that confirms a hardware issue with the phone’s internal audio components.

Step 6: Check the Proximity Sensor

During a call, move the phone away from your face and watch the screen. Does it light up immediately? Now bring it back to your ear — does the screen go black? If the screen stays on while the phone is against your face, or stays black when you pull it away, the proximity sensor is malfunctioning. A screen protector or case that covers the sensor area at the top of the phone is the first thing to rule out. Remove it and test again.

If you’ve had a recent screen repair done elsewhere and the sensor started acting up afterward, the replacement display may not have been calibrated properly — or the sensor flex cable may have been damaged during the repair.


Section 3: When It’s a Hardware Problem — What to Expect From a Professional Repair

Recognizing the Signs You Can’t Fix at Home

If you’ve worked through every software step above and calls still drop or audio still fails, the problem lives inside the phone. Here are the clear indicators that point to hardware:

  • Audio issues that only affect calls (not music, not videos, not speakerphone — just the earpiece during calls)
  • Calls dropping in locations where other phones on the same carrier work fine
  • Intermittent static, buzzing, or echoing that worsens over time
  • The proximity sensor behaving erratically despite no screen protector or case

These patterns don’t resolve with software resets. They require opening the device and diagnosing at the component level.

What a Quality Repair Looks Like

A proper diagnostic starts with isolating the faulty component — not guessing and replacing parts until something works. At Fix Wireless, our technicians test the earpiece, microphone array, antenna connections, and proximity sensor individually before recommending any repair. We handle everything from iPhones and Samsung Galaxy devices to other Android brands.

Earpiece and microphone replacements are among the most straightforward phone repairs — typically done same-day, often within an hour. Antenna reconnections are similarly quick if nothing is physically damaged. Proximity sensor issues tied to a previous screen repair may require a recalibration or a higher-quality replacement display.

The FCC’s consumer guide on wireless device troubleshooting also recommends consulting a professional if basic steps don’t resolve persistent call issues, particularly when signal quality varies by device rather than location.

Don’t Ignore Charging Port Connections

This one catches people off guard. On many phone models, the charging port assembly also houses the primary microphone. If you’ve been having charging problems alongside muffled audio or the other person not hearing you, the two issues may share a single cause — a failing charging port flex cable. Replacing it fixes both problems at once.

You can get a fast price estimate through our instant quote tool or check our common repair questions and device repair FAQs for details on what to expect.


Section 4: Conclusion and Final Thoughts

A phone that keeps dropping calls or loses sound during conversations is trying to tell you something. Maybe it’s a software conflict that a quick settings reset can solve. Maybe it’s a slowly failing earpiece speaker or a microphone that took a hit during a fall you barely remember. Whatever the cause, there’s a clear path to figuring it out — and most fixes are far less expensive than people assume.

Start with the software steps: Safe Mode, carrier updates, toggling VoLTE, and resetting network settings. Test the speakers and microphone with voice memos and speakerphone calls. Check that proximity sensor. These steps eliminate the most common culprits without costing you a cent.

But if the problem survives all of that, don’t keep cycling through the same resets hoping for a different result. Persistent call issues that resist software troubleshooting are hardware issues — and they tend to get worse, not better. A loose antenna connection today becomes a dead cellular modem next month. A crackling earpiece becomes total earpiece failure.

If you’re in the New Haven or Hamden area, stop by either of our Fix Wireless locations for a proper diagnostic. We’ll pinpoint exactly what’s going on and give you honest options — whether that’s a quick same-day fix or a recommendation to consider your repair-versus-replace options.


FAQs

Why does my phone drop calls only at home but work fine everywhere else?

This usually points to a weak cell signal at your specific location rather than a phone hardware issue. Try enabling Wi-Fi Calling if your carrier supports it — it routes calls through your internet connection instead of the cell tower. If calls still drop on Wi-Fi Calling, then the phone itself likely has a problem.

Can a cracked screen cause call audio problems?

Not the crack itself, but the impact that caused it can. A hard drop can loosen internal connections to the earpiece speaker, microphone, or antenna. If your call issues started around the same time as screen damage, the two are likely related. Our smartphone repair team can inspect both during a single diagnostic.

Why can people hear me on speakerphone but not on a normal call?

Because speakerphone and normal calls use different microphones. Your phone has a primary mic near the charging port (used for regular calls) and secondary mics near the top or back (used for speakerphone and noise cancellation). If only the primary mic has failed, speakerphone will still work while regular calls sound muffled or silent to the other person.

Does a SIM card cause dropped calls?

It can. A damaged, corroded, or improperly seated SIM card can cause intermittent connectivity issues including dropped calls. Try removing the SIM, cleaning the contacts gently with a dry cloth, reinserting it firmly, and testing. If you have access to a second SIM card, swapping it in is one of the fastest ways to rule out the SIM as the issue.

My phone only drops calls after a few minutes — why?

This pattern often indicates overheating. When the cellular modem or processor gets too hot, the phone throttles its radios to cool down, which weakens the cellular connection and can end the call. If your phone feels warm during calls or you notice it getting hot during general use, the battery or thermal management system may need attention. That kind of overheating warrants a professional inspection before it causes further damage.

Phone Won’t Charge Even When Plugged In? How to Tell if It’s Your Charging Port, Your Cable, or Something Worse

Written by: Ronnie Gonenc

Phone won't charge even when plugged in — smartphone connected to USB-C cable showing empty battery icon on screen

Introduction

There’s a special kind of dread that comes with plugging in your phone, walking away, and coming back to find the battery hasn’t moved. Your phone won’t charge even when plugged in—and you have no idea why. Is the cable shot? Is the port damaged? Or is something more serious happening inside the device?

At Fix Wireless, we see this exact scenario multiple times a day at both our New Haven and Hamden locations. After diagnosing and repairing thousands of phones with charging failures—iPhones, Samsungs, Pixels, Motorolas, and everything in between—we can tell you that the answer is rarely what people expect. Sometimes it’s a ten-second fix. Other times, it’s a failing chip buried deep on the logic board.

This guide gives you a clear, step-by-step framework to figure out what’s actually wrong with your phone’s charging, what you can safely fix on your own, and when it’s time to bring the device to a professional. No fluff, no guessing—just real diagnostic knowledge from a team that does this work every day.

Section 1: How Phone Charging Actually Works — And Where It Breaks Down

Before you can diagnose a charging failure, it helps to understand the chain of components involved. Every time you plug in your phone, electricity has to travel through four distinct stages: the wall adapter, the cable, the physical charging port, and the power management circuitry on the phone’s logic board. A break at any single point kills the entire process.

The wall adapter converts household AC power into the DC voltage your phone requires. The cable carries that power from the adapter to the device. The charging port—whether USB-C or Lightning—receives the cable’s connector and transfers electricity through a set of tiny metal pins. And the power management IC (PMIC) on the motherboard regulates that incoming current and directs it safely to the battery.

Industry repair data consistently shows that charging complaints make up approximately one in five service tickets at independent repair shops. The breakdown of root causes is revealing: around 30–35% turn out to be cable or adapter problems, another 25–30% involve debris or physical damage to the port, and the remaining cases involve board-level IC failures or battery degradation.

The practical takeaway? More than half of all charging failures come from things outside the phone itself. That’s good news, because those are the easiest and cheapest problems to solve. The challenge is figuring out which category your situation falls into—and that’s exactly what the rest of this guide covers.

Section 2: Start Here — Ruling Out the Cable and Adapter

The single most common reason a phone won’t charge is a bad cable or adapter. Not a broken phone. Not a damaged port. Just a cable that’s quietly died on you. It’s also the easiest thing to test, which is why any competent repair technician will check this before opening your device.

Why Cables Fail More Than You’d Think

Charging cables endure constant mechanical stress. Every time you plug in at an angle, yank the cable out in a hurry, or bend the connector end while using your phone in bed, you’re weakening the internal wiring. The outer jacket might look fine while the copper conductors inside are frayed or broken. Cheap, uncertified cables are especially prone to this because they use thinner gauge wire and lower-quality connectors.

How to Test Properly

  • Swap the cable first. Use a different cable with your current adapter. If the phone charges, your cable was the problem. Replace it with a certified option—MFi for iPhones, USB-IF certified for USB-C devices.
  • Then swap the adapter. Use your original cable with a different wall adapter. Adapters can fail internally without any visible sign. If a different adapter works, you’ve isolated the issue.
  • Test both on another device. Plug your original cable and adapter into a different phone or tablet. If they charge that device normally, the problem is with your phone—not your accessories.
  • Skip the computer USB port. Computer USB ports deliver lower amperage than wall adapters. Some phones with depleted batteries won’t respond to the lower power output, which can create a false impression that the phone is broken.

If swapping cables and adapters doesn’t solve it, the issue is inside the phone. Keep reading.

Section 3: The Five-Minute Fix — Cleaning Debris from Your Charging Port

If your cable and adapter check out fine but the phone still won’t charge, the next most likely culprit is debris packed inside the charging port. This is the most satisfying fix in phone repair because it takes almost no time, costs nothing, and the results are immediate.

How Lint and Dust Cause Charging Failure

Every time your phone goes into a pocket, purse, or bag, microscopic fibers and dust particles enter the port opening. Over weeks and months, this material compacts at the bottom of the port cavity. Eventually, when you insert the charging cable, the connector can’t seat fully—the lint prevents the metal pins from making proper electrical contact. The cable might feel like it clicks in, but the connection is incomplete.

Safe Cleaning Method

  • Power off your phone completely before touching the port.
  • Use a wooden or plastic toothpick. Never use a metal tool—no paperclips, no SIM ejector pins, no needles. Metal can short-circuit the connector pins or scratch the internal contacts.
  • Insert the toothpick gently and scrape along the bottom wall of the port. Work side to side to loosen compacted material.
  • Blow out loosened debris with a few short bursts of compressed air, held at a slight angle to the port opening.
  • Reinsert the charging cable. If it clicks in more firmly than before and charging begins, you’ve solved it.

At our iPhone repair bench, we regularly pull out surprisingly large clumps of compacted lint from ports that looked clean at first glance. A flashlight and close inspection can reveal what the naked eye misses.

Section 4: Software Issues That Mimic Hardware Charging Problems

Here’s a scenario that surprises many customers: the phone is actually receiving power, but a software glitch hides the charging indicator or drains the battery so fast it offsets the incoming charge. Before assuming hardware failure, rule out these software causes.

Force Restart

A frozen or glitched operating system process can prevent the charging animation from appearing, even when electricity is flowing into the battery. Force restarting clears these stuck processes.

  • iPhone (iPhone 8 and later): Quick-press Volume Up, quick-press Volume Down, then press and hold the Side button until the Apple logo appears.
  • Samsung Galaxy: Press and hold Power + Volume Down simultaneously for 10–15 seconds until the device restarts.
  • Other Android phones: Most follow the Samsung method, but some require holding the Power button alone for 15–20 seconds.

If your phone has been stuck in a restart loop or frozen on the logo screen, the charging issue may be a symptom of a larger software failure rather than a port problem.

Check for OS Updates

Both Apple and Google have released updates specifically addressing charging detection bugs in recent software versions. Running outdated firmware can trigger false “not charging” states. Update your operating system and retest.

Safe Mode (Android Only)

Third-party apps—particularly battery “optimizers” and fast-charging apps—can interfere with the system’s native charging behavior. Booting into Safe Mode disables all third-party apps. If the phone charges normally in Safe Mode, a recently installed app is the culprit. Uninstall apps one by one, starting with the most recent, until normal charging returns.

Section 5: Moisture Warnings and Water-Related Charging Refusal

If your phone displays a liquid detection or moisture warning when you plug in the cable, it’s doing exactly what it’s designed to do—protecting itself from a short circuit. This is a safety mechanism, not a malfunction.

What to Do

  • Unplug the cable immediately. Charging through moisture can cause corrosion or electrical damage to the port pins.
  • Do not blow into the port or insert anything to dry it. Your breath contains moisture, and foreign objects risk pin damage.
  • Hold the phone with the port facing downward and gently shake it to help water escape.
  • Place the phone in a dry, well-ventilated area and wait 30 minutes to an hour. Room temperature with natural airflow works best.
  • Skip the rice. It’s a persistent myth. Rice dust can enter the port and compound the problem. A dry countertop near an open window is more effective.

If the moisture warning clears after drying and the phone charges normally, no repair is needed. If the warning persists when the port is visibly dry, the moisture detection sensor may have sustained damage—that’s a repair you should bring to a professional smartphone repair shop.

Section 6: When It’s the Charging Port — Physical Damage That Requires Professional Repair

You’ve tested multiple cables, cleaned the port, restarted the phone, and waited out any moisture warnings. Nothing worked. At this point, the problem is almost certainly physical damage to the charging port itself or the electronics directly behind it.

Bent, Broken, or Worn Connector Pins

The pins inside a USB-C or Lightning port are extremely small and delicate. Regular plugging and unplugging wears them down over time. Inserting the cable at an angle, using force, or catching the cable on something while it’s plugged in can bend or snap these pins outright.

Telltale signs of pin damage include charging that only works when the cable is held or wiggled at a specific angle, charging that starts and stops unpredictably, and a cable that no longer clicks or seats firmly into the port.

Charging port replacement is one of the most common repairs we perform at Fix Wireless. For most iPhone models and popular Android devices, it’s a same-day repair—typically done in under an hour. The full port assembly gets replaced with high-quality parts, and every repair comes with our standard warranty.

Loose Port from Internal Disconnection

The charging port connects to the phone’s logic board through a delicate flex cable. A significant drop or repeated impact can partially unseat this connection. Externally, the port might look normal, but inside, the electrical pathway is compromised.

Symptoms overlap with pin damage: intermittent charging, a wobbly feeling when the cable is inserted, or the phone only recognizing the cable in certain positions. The difference is that the port’s pins may be physically intact—the flex cable behind them is the issue.

This repair requires opening the phone, inspecting the internal connection, and either re-seating or replacing the dock connector assembly. If you suspect this is your issue, get a free repair quote from us to see what the fix involves for your specific model.

Port Corrosion from Past Liquid Exposure

Water resistance ratings like IP67 and IP68 are tested in controlled laboratory conditions—clean, still freshwater at specific depths and durations. Real life is different. Exposure to sweat, saltwater, coffee, soda, cleaning products, and even high-humidity environments over time can corrode the port’s metal contacts without ever triggering a moisture warning.

Green or white residue visible around the port opening is an obvious sign. But corrosion often hides on the underside of the connector or along the flex cable solder joints, invisible unless the phone is opened. Corroded ports require professional ultrasonic cleaning or complete replacement. Left untreated, corrosion spreads along the flex cable toward the logic board—turning a port repair into a much more expensive board-level problem.

Section 7: When It’s Not the Port at All — Logic Board and Battery Failures

Sometimes the charging port is in perfect condition, but the phone still won’t charge. When that happens, the failure is upstream—on the logic board or inside the battery itself. These are the more complex and costly scenarios, and they’re the ones where accurate diagnosis saves you from wasting money on the wrong repair.

Power Management IC (PMIC) Failure

The PMIC is a small chip soldered to the logic board that controls how incoming electricity is regulated and distributed to the battery. If the PMIC fails—from a power surge caused by a bad charger, a drop that cracks a solder joint, or simply age and heat cycles—the phone may show zero response when plugged in. In other cases, the charging icon appears, but the battery percentage never actually increases.

PMIC repair is a microsoldering procedure performed under a microscope. It involves removing the failed chip and replacing it with a working component. This is board-level repair work—not every shop is equipped or trained for it. At Fix Wireless, we offer logic board diagnostics and can tell you honestly whether a PMIC repair is cost-effective for your device or whether replacing the phone makes more practical sense.

Tristar (U2) or Hydra (U6) IC Failure — iPhone Only

iPhones have a dedicated chip—called Tristar on older models and Hydra on newer ones—that manages the communication handshake between the Lightning cable and the device. When this chip fails, the phone literally cannot detect that a cable has been inserted. You get no charging, no iTunes/Finder recognition, and no response of any kind from the wired connection. Wireless charging, if supported, may still work normally.

Non-certified Lightning cables and low-quality third-party chargers are the leading cause of Tristar and Hydra IC failure. This is why we always recommend MFi-certified accessories for any iPhone. Repairing this chip is a microsoldering job similar to PMIC replacement.

Battery at End of Life

Lithium-ion batteries are consumable components with a finite lifespan. After roughly 500 to 800 complete charge cycles—which translates to about two to three years for most users—the battery’s ability to hold and accept charge degrades significantly. A severely degraded battery can refuse to charge altogether, mimicking a port failure.

How to distinguish battery failure from port failure:

  • The phone shuts down unexpectedly at 15–30% battery remaining.
  • The battery health percentage (check iPhone Settings > Battery > Battery Health, or Samsung Settings > Battery and Device Care > Diagnostics) shows 79% or below.
  • The phone feels abnormally hot when attempting to charge.
  • There’s visible swelling—the screen may lift slightly from the frame, or the back panel may bulge.

Battery replacement is a routine repair. If you’re noticing these symptoms, don’t wait—a swollen battery is a safety concern. Bring it in for assessment promptly.

Section 8: A Step-by-Step Diagnostic Flowchart You Can Follow Right Now

Use this checklist to systematically narrow down the cause before spending any money:

  • Step 1: Try a different certified cable. Does the phone charge? → Cable was the issue.
  • Step 2: Try a different wall adapter with the new cable. Does the phone charge? → Adapter was the issue.
  • Step 3: Inspect the port with a flashlight. See lint, dust, or debris? → Clean it with a wooden toothpick and compressed air.
  • Step 4: Force restart the phone. Does the charging indicator now appear? → Software glitch was the issue.
  • Step 5: Try wireless charging (if supported). Does wireless work but wired doesn’t? → Problem is localized to the port or its IC chip.
  • Step 6: Connect to a computer via USB. Does the computer detect the phone? If no detection AND no charging → Likely an IC-level failure (Tristar, Hydra, or PMIC).
  • Step 7: Check battery health in settings. Below 80%? → Battery replacement is likely needed.
  • Step 8: Does the cable feel loose or wobbly in the port? Does charging work only at certain angles? → Physical port damage. Time for professional repair.

If you get through all eight steps without a clear answer, bring the phone in for a professional diagnostic. At Fix Wireless, our assessment is thorough—we’ll tell you exactly what’s wrong before any work begins. Check our Common Repair Questions or Device Repair FAQs for more guidance on what to expect.

Section 9: What a Professional Charging Port Repair Looks Like

If your diagnosis points to hardware, here’s what a quality repair experience should involve:

Honest diagnostics before any commitment. A reputable shop examines your phone and explains the root cause clearly. You should know what’s wrong and what it costs before a single screw is turned. At Fix Wireless, we don’t charge for the initial diagnostic assessment.

OEM-equivalent replacement parts. The quality of replacement charging ports varies dramatically. We use components that match original manufacturer specifications for pin alignment, conductivity, and durability. Cheap knockoff ports fail faster and can cause secondary damage to the logic board.

Fast turnaround. Standard charging port replacements for iPhones and Samsung Galaxy devices are completed within an hour at our New Haven and Hamden locations. Board-level work takes longer, and we’ll set expectations up front.

Warranty on every repair. All Fix Wireless repairs come with a standard warranty. If something isn’t right after the fix, come back and we’ll make it right at no additional cost.

Ready to find out what’s going on with your phone? Get a free instant repair quote online, or stop by either of our Connecticut locations.

Section 10: How to Prevent Charging Port Problems Before They Start

A few simple habits go a long way toward keeping your charging port functional for the full life of your phone:

  • Invest in certified cables. MFi-certified for iPhone, USB-IF certified for USB-C. Certified cables have proper voltage regulation, correct pin sizing, and thicker gauge wire. They cost more but protect the port and the logic board’s power IC.
  • Clean your port once a month. A quick pass with a wooden toothpick takes ten seconds and prevents the kind of lint buildup that causes false charging failures.
  • Insert and remove the cable straight. Don’t plug in at an angle or pull the cable sideways. Lateral force is the primary mechanical cause of bent pins inside the port.
  • Never charge through a wet port. If you see a moisture warning, wait it out. Charging through moisture causes corrosion that may not show symptoms for weeks but will eventually kill the port.
  • Use wireless charging when practical. If your phone supports Qi wireless charging, using it as your primary charging method eliminates all mechanical wear on the port. Reserve the wired port for data transfer and travel.
  • Avoid charging from unreliable power sources. Low-quality car chargers, public USB outlets, and off-brand portable battery packs can deliver inconsistent voltage that stresses the PMIC over time.

And if your phone is beyond repair or the cost doesn’t make sense, remember that Fix Wireless also offers a buy, sell, and trade program. We’ll buy your device in any condition, and you can browse our selection of inspected, refurbished phones to find a replacement that fits your budget.

Final Thoughts

When your phone won’t charge even when plugged in, the answer is almost always somewhere in the chain between your wall outlet and your phone’s battery. Start with the simplest explanations—a bad cable, a dirty port, a software glitch—and work your way deeper only if those don’t pan out. That systematic approach saves you time, money, and unnecessary stress.

If you’ve worked through the checklist and the problem is clearly hardware, that’s where Fix Wireless comes in. We’ve been diagnosing and repairing these exact issues for years across every major phone brand. We’ll give you a straight answer, a fair price, and a repair backed by warranty.

Stop stressing over your dead phone. Get your free repair quote now or contact our team to book your appointment today.

How to Recalibrate Your 120Hz Pro-Motion Display to Fix Touch Lag and Vertical Line Flickering

Written by: Ronnie Gonenc

Learn how to recalibrate 120Hz Pro-Motion display settings to fix touch lag and flickering. Expert repair tips to restore your screen's smooth performance.

High-refresh-rate screens have changed how we interact with our devices, making every scroll feel fluid. However, when that fluidity breaks down, it is incredibly noticeable. If you are seeing vertical line flickering or experiencing a frustrating delay when you tap an icon, your screen’s synchronization is likely off. As a specialist in high-end mobile tech, I know that hardware isn’t always the culprit; often, the software controlling the refresh rate needs a nudge.

In this guide, I will explain how to recalibrate 120Hz Pro-Motion display settings to eliminate lag and visual artifacts. We will focus on non-invasive recalibration techniques that refresh the display driver without risking your personal data. Because screen issues can sometimes signal deeper hardware stress, we will also identify when it is time to seek a professional technician.


Section 1: Why 120Hz Displays Develop Touch Lag

The “Pro-Motion” technology found in modern smartphones is dynamic. This means the screen constantly shifts between 10Hz and 120Hz to save battery life. Touch lag usually occurs when the device fails to “ramp up” the refresh rate quickly enough in response to your finger. This mismatch creates a heavy, unresponsive feeling.

Vertical line flickering is often a separate issue related to the voltage sent to the pixels. If the display controller loses its calibration, the refresh cycles can overlap, causing those distracting lines. Based on industry standards for OLED panels, these glitches are frequently linked to “ghost touches” or static buildup behind the glass. Understanding this helps you realize that a software refresh can often re-align these cycles.


Section 2: Step-by-Step Recalibration Methods

Follow these steps to refresh your screen’s logic. These methods are designed to be safe and effective for all 120Hz-capable devices.

1. The Refresh Rate “Hard Toggle”

The simplest way to force a recalibration is to manually break the dynamic cycle.

  1. Go to Settings > Display > Motion Smoothness (or Pro-Motion).
  2. Switch the setting from “Adaptive/High” to “Standard” (60Hz).
  3. Restart your device completely.
  4. Return to settings and switch back to “Adaptive/High.” This forces the display driver to reload its configuration files from scratch.

2. Clearing the System Cache Partition

Sometimes, residual files from a system update interfere with touch sensitivity. To fix this, you may need to enter your device’s recovery menu to “Wipe Cache Partition.” If you are unsure how to access this menu for your specific model, feel free to contact us for guidance. This process does not delete your photos, but it clears out “junk” data that can cause display lag.

3. Digitizer Calibration via Developer Options

For advanced users, enabling “Show Taps” in Developer Options can help you see if the lag is consistent. If you notice the visual feedback is behind your finger, the digitizer needs a reset. You can often trigger this by performing a “Force Restart” (Volume Up, Volume Down, then hold the Power Button) while the device is plugged into a certified charger.


Section 3: When to Consider Professional Repair

If you have tried to recalibrate 120Hz Pro-Motion display settings and still see permanent vertical lines, you may be facing a “flexgate” issue. This happens when the delicate ribbon cables inside the phone become strained or damaged. At this stage, software adjustments cannot bridge a physical break in the connection.

In these instances, continuing to use a flickering screen can lead to a total “black out” of the panel. We recommend visiting our smartphone repairs page to see how we handle delicate OLED replacements. If the cost of repair is too high for an older model, you might prefer to buy or sell through our verified platform instead.


Section 4: Conclusion and Final Thoughts

A 120Hz display is a premium feature, and you shouldn’t have to settle for a laggy experience. By taking the time to recalibrate 120Hz Pro-Motion display settings, you can often restore that “out of the box” smoothness without spending a dime. Remember to keep your software updated, as manufacturers frequently release patches for display driver stability.

If you want to learn more about the technology we use to test these screens, you can read about us and our commitment to using OEM-grade parts. Don’t let a flickering screen ruin your productivity—most of the time, the fix is just a few taps away.


FAQs

Does vertical line flickering mean I need a new screen?

Not always. While it can be a hardware fault, it is often caused by a software glitch in the display controller. Always try a hard reset first.

Will a screen protector cause touch lag?

Yes, especially if it isn’t “High-Sensitivity” rated. If you experience lag, try turning on “Touch Sensitivity” in your display settings before removing the protector.

How much does it cost to check my screen?

You can use our instant quote widget to get a transparent price for diagnostics and repairs in seconds.


Disclaimer: This article provides informational troubleshooting steps. Screen flickering can sometimes indicate battery swelling or internal hardware failure. If your device feels excessively hot or the screen is lifting, stop use immediately and seek professional help.

How to Manually Reset Your 2026 Smartphone’s Satellite Modem and 5G Connectivity Without Data Loss

Written by: Ronnie Gonenc

Satellite connection under the night sky

There is nothing more frustrating than looking at your brand-new 2026 flagship device only to see a “No Service” message or a hanging satellite SOS icon when you’re miles away from a Wi-Fi router. As mobile technology integrates non-terrestrial networks (NTN) more deeply into our daily lives, the complexity of our hardware increases. Having spent years in the trenches of device repair, I’ve seen how a simple software handshake failure can make a $1,200 phone feel like a paperweight.

In this guide, I’ll walk you through the precise steps to reset 2026 smartphone satellite modem components and 5G configurations. The goal here is a “soft” logic reset—fixing the signal without wiping your photos, messages, or apps. Because this involves critical communication hardware, we prioritize accuracy and manufacturer-recommended sequences to ensure your device stays functional and secure.


Section 1: Understanding the 2026 Connectivity Stack

The latest generation of smartphones doesn’t just rely on local cell towers; they use a sophisticated handoff system between high-frequency 5G bands and low-earth orbit (LEO) satellites. When your connectivity drops, it is rarely a total hardware failure. Instead, it’s usually a “state-table” error where the modem is stuck searching for a satellite that has already passed over the horizon.

According to technical standards from the 3GPP, the integration of satellite-to-cell features requires a specific authentication token that can sometimes expire or glitch. Understanding that your phone is essentially a two-way radio helps take the mystery out of why a manual reset is occasionally necessary. Before you assume the worst, a targeted refresh of these network credentials can often solve the problem in under two minutes.


Section 2: Step-by-Step Manual Reset Procedures

If you find yourself stuck without a signal, follow these steps in order. We want to start with the least intrusive methods first to preserve your settings.

The “Triple Toggle” Method

This isn’t just turning Airplane Mode on and off. For 2026 models, you need to cycle the specific NTN (Non-Terrestrial Network) toggle found in your Connection Settings.

  1. Open Settings > Connections > Mobile Networks.
  2. Locate the Satellite Communication toggle.
  3. Turn it off, wait 30 seconds, and turn it back on. This forces the modem to re-scan the sky for the nearest active satellite constellation.

Resetting Network Settings

If a toggle doesn’t work, a deeper logic reset is required. You can contact us if the menus look different on your specific model, but generally, you’ll navigate to General Management > Reset > Reset Network Settings.

  • Note: This will remove saved Wi-Fi passwords and Bluetooth pairings, but it is the single most effective way to clear a “stuck” 5G or satellite modem cache.

Forcing a Modem Re-Initialization

For persistent 5G drops, we often recommend a physical “re-seat” of the logic. Even with eSIM technology becoming standard, most 2026 devices still maintain a physical or digital partition for identity modules. Restarting the phone while in an open-sky environment allows the GPS and modem to sync time-stamps simultaneously, which is critical for satellite positioning.


Section 3: Professional Recommendations and Best Practices

While manual resets fix 90% of software-related signal issues, hardware damage is a different story. If you’ve recently dropped your phone and notice the “Searching…” text never disappears, you might be looking at a dislodged internal antenna flex cable. In these cases, software tweaks won’t help.

If your 5G is working but the satellite features remain grayed out, check your service provider’s active “Emergency SOS” or “Remote Messaging” subscription status. Many 2026 data plans require these to be provisioned at the account level. For those dealing with physical damage or more complex internal issues, our smartphone repairs team can run a diagnostic on the RF (Radio Frequency) chips to see if the modem itself has failed.


Section 4: Conclusion and Final Thoughts

Technology in 2026 has made us more connected than ever, but that connectivity relies on a delicate balance of software and hardware. Being able to reset 2026 smartphone satellite modem settings yourself is an essential skill for the modern user. It saves time, reduces stress during travel, and ensures you aren’t left stranded when you need a signal most.

If you’ve tried these steps and you’re still seeing a “dead” device, don’t keep hammering at the software. Sometimes the best move is to let a professional look under the hood. You can read more about us and our history with high-end tech to see why we’re the trusted choice for complex mobile issues.


FAQs

Will resetting my modem delete my photos?

No. Following the “Reset Network Settings” or “Toggle” methods only clears connection data like Wi-Fi passwords and Bluetooth pairings. Your personal files remain untouched.

Why does my 5G work but my Satellite SOS doesn’t?

Satellite connectivity requires a clear line of sight to the sky. If you are indoors or under heavy tree cover, the modem may fail to initialize even after a reset.

Is it worth fixing an older model if the modem fails?

It depends on the device’s overall health. You can get an instant quote to see the repair cost versus the current value of your phone before deciding to buy or sell a replacement.


Disclaimer: This guide is for informational purposes only. While resetting network settings is a standard troubleshooting step, always ensure your device is backed up. If you are unsure about performing these steps, consult a professional technician to avoid accidental setting changes.

Beyond the Flickering: Why 120Hz Pro-Motion Displays are Spontaneously Developing ‘Vertical Line’ Failures

Written by: Ronnie Gonenc

If you own a flagship device, you likely love the butter-smooth scrolling of a 120Hz Pro-Motion display. However, many users are waking up to a frustrating sight: a permanent, bright green or pink vertical line slicing through their screen. As a repair professional handling smartphone repairs daily, I can tell you this isn’t usually a simple software glitch. It is often a physical hardware failure linked to the technology that makes your screen look so good. High-refresh-rate panels push mobile display technology to its limits, and sometimes those limits lead to hardware fatigue. Understanding the root cause is the first step toward a permanent vertical line phone screen repair.

Section 1: The Anatomy of a High-Refresh Failure

A 120Hz display refreshes its image 120 times every second. This requires a significant amount of data and power to be sent through the “COF” (Chip-on-Flex) connector. This connector is a microscopic ribbon cable bonded directly to the bottom of the glass panel.

The appearance of a line usually signals a “gate driver” failure or an incorrect voltage application to the pixels. These drivers control specific columns of pixels on your screen. When the connection between the display controller and the glass is compromised, a specific column stays “stuck” on a single bright color. While older 60Hz screens suffered from this occasionally, the higher voltage requirements of 120Hz Pro-Motion panels appear to accelerate the degradation of these microscopic bonds.

Section 2: Why These Lines Appear “Spontaneously”

Many customers report that the line appeared out of nowhere without any physical impact. Here is what is actually happening behind the glass:

  • Thermal Stress: Running a screen at 120Hz generates more internal heat than a standard display. This heat can cause the adhesive bonding the display ribbon to the glass to weaken over time.
  • Flex Cable Fatigue: Every time your phone heats up and cools down, internal materials expand and contract. In the world of iPhone repairs, we find that this “thermal cycling” eventually cracks the microscopic traces on the flex cable.
  • Voltage Spikes During Updates: Major software updates can cause phones to work extra hard and overheat. This intense heat, combined with fast charging, can trigger a failure in a weak display connector that was previously sitting dormant.
  • Manufacturing Defects: Some panels have hidden flaws from the factory. These defects may stay hidden for months until environmental factors like extreme temperature changes finally bring them to the surface.

Section 3: Professional Recommendations and Solutions

If you see a vertical line, it is important to know that a software update or a “pixel flasher” app will rarely fix the issue. These are typically permanent physical breaks.

  1. Perform a Screenshot Test: Take a screenshot of your screen. If the line appears in the photo when viewed on another device, it is a software issue. If it doesn’t, it is a hardware failure.
  2. Check for Warranty or Recalls: Some manufacturers offer free replacements for specific models known for “green line” issues.
  3. Avoid DIY Pressure: Do not press down hard on the bottom of the screen. This can cause the internal glass to crack further or cause the entire display to go black.
  4. Professional Replacement: A vertical line phone screen repair usually requires a full display assembly replacement. Because these panels are integrated with biometric sensors, the repair must be handled carefully to maintain all functions.

If you are unsure of the cause, we recommend visiting our about us page or contacting us directly for a free diagnostic.

Section 4: Conclusion and Final Thoughts

The transition to 120Hz Pro-Motion technology has changed how we use our phones, but it has also introduced new hardware vulnerabilities. These “spontaneous” vertical lines are often the result of high-performance components working in a very small, hot environment.

While you can’t always prevent a manufacturing defect, keeping your phone away from extreme heat can help protect your screen’s longevity. If the worst happens, you can get an instant quote to see your repair options. Whether you want to repair your current device or buy and sell to upgrade, we are here to help you solve your display problems.

FAQs

Can a vertical line on my screen go away on its own?

Rarely. If it is caused by a temporary software glitch, a restart might help. However, if it is a hardware break in the connector, it is permanent.

Is my phone still water-resistant if it has a vertical line?

The line itself doesn’t break the seal, but if the line was caused by a drop that bent the frame, your water resistance may be compromised.

Why do lines often appear after a system update?

Updates cause the phone to run at high temperatures for an extended period. This heat can cause a slightly loose or weak display connector to finally fail.


Disclaimer: This content is for informational purposes only. Screen failures should be inspected by professionals to avoid further computer repairs or data loss.

The NPU Thermal Wall: Why 2026 AI Features are Physically Aging Your Phone’s Motherboard

Written by: Ronnie Gonenc

Modern smartphones are becoming incredibly powerful. You might notice your device getting very warm lately. This often happens when using new AI photo tools or live translation features. As a repair professional, I see the internal results of this every day. We are currently hitting a physical hardware ceiling.

The Neural Processing Unit (NPU) powers 2026’s sophisticated on-device intelligence. Unfortunately, these processes generate intense, concentrated heat. Modern phone chassis were not designed to dissipate this much energy constantly. This creates a high risk for phone motherboard heat damage. It affects the most critical internal components of your device.

Section 1: Understanding the NPU Thermal Wall

The “Thermal Wall” is a physical limit for electronics. It occurs when a processor reaches its maximum safe heat capacity. To prevent melting, the chip must “throttle” or slow down. In older phones, this mostly happened during high-end gaming. Today, even simple AI tasks require the NPU to perform trillions of operations per second.

These tasks create extreme “hot spots” on the logic board. The chips reach peak temperatures in just seconds. This localized heat is the main cause of phone motherboard heat damage. Inside, delicate solder joints begin to expand and contract rapidly. Over months of use, this cycle leads to “interconnect failure.” The chip eventually loses its stable connection to the board, leading to crashes or total failure.

Section 2: How Modern AI Strains Your Hardware

On-device processing is excellent for your privacy. However, it is very demanding on your phone’s silicon hardware. Here is a detailed look at what is happening inside your device during these tasks:

  • Micro-Soldering Degradation: Modern motherboards are extremely dense. Components are packed tightly together with almost no gaps. Heat has nowhere to escape. Constant high temperatures cause small electrical shorts. It can also lead to cracked solder balls under the main chips.
  • Battery Stress Synergy: The NPU pulls massive amounts of current from the battery. This creates two heat sources at the same time. If your screen dims unexpectedly, it is a safety protocol. Your phone is trying to avoid expensive smartphone repairs.
  • Voltage Regulator Fatigue: Power management chips are now working overtime. We are seeing many iPhone repairs caused by this stress. Small capacitors near the power rail can actually “pop” from the intense heat.
  • Thermal Throttling Side Effects: When the phone slows down to cool off, it stays at a high “soaking” temperature for longer. This prolonged heat exposure degrades the organic materials used in the motherboard’s construction.

Section 3: Practical Advice to Protect Your Device

You can still enjoy the latest AI features. However, you must use them mindfully to protect your investment. This extends your hardware’s lifespan significantly.

  1. Avoid Task Stacking: Do not run AI video tools while fast-charging your phone. Both activities generate extreme heat. Together, they accelerate internal motherboard aging.
  2. Choose Your Case Wisely: Some thick, rugged cases act like thermal blankets. They trap heat inside the phone. Consider removing the case during heavy AI processing tasks. This helps the heat escape into the air.
  3. Watch the Ambient Temperature: Using AI features in direct sunlight is dangerous for your hardware. High external heat combined with NPU heat can cause a permanent “Black Screen of Death.”
  4. Identify Early Warning Signs: Does your phone stay warm even when you aren’t using it? Do Wi-Fi or Bluetooth features toggle off by themselves? These are common signs of early phone motherboard heat damage.

Software resets will not fix physical hardware strain. If your phone behaves strangely, you should contact us for a professional diagnostic. We can often save the board before it fails completely and you lose your data.

Section 4: Conclusion and Final Thoughts

Mobile AI brings exciting new capabilities to our fingertips. However, it has a hidden hardware cost that many users don’t realize. We are pushing mobile silicon to its absolute limits. The motherboard is often the silent victim of this technological race.

Think of your phone as a high-performance computer rather than just a communication tool. Managing heat is your most important job as an owner. Whether you are looking to buy and sell a device or keep yours for years, monitor your temperatures. If you are worried about your device’s health, get an instant quote for a check-up. At Fix Wireless, we ensure your hardware can keep up with your software.


FAQs

Can heat actually break my phone’s motherboard?

Yes. Excessive heat causes the solder joints to crack. It can also cause the physical layers of the internal circuit board to separate.

Does using AI features drain my battery faster?

Absolutely. AI processing is very power-hungry. The resulting heat can also lower your overall battery health capacity over time.

Should a professional look at my phone if it gets hot?

If your phone is often too hot to touch comfortably, seek help. You may need computer repairs or specialized mobile advice to protect your data and hardware.

Does “Low Power Mode” help with heat?

Yes. Low Power Mode usually limits processor speeds. This reduces the heat generated by the NPU and helps prevent phone motherboard heat damage.


Disclaimer: This content is for educational purposes regarding hardware longevity. Always consult a certified technician at Fix Wireless before attempting any hardware-level repairs yourself.