Beyond the Wrist: Why Your Smartwatch Sensors are ‘Going Blind’ in 2026 and How to Restore Bio-Tracking Accuracy

Written by: Ronnie Gonenc

Close-up of a clean smartwatch optical sensor array glowing with green light on a white microfiber cloth to ensure smartwatch sensor accuracy.

You rely on your smartwatch as a silent guardian of your health. It tracks every heartbeat and sleep cycle with supposed precision. But have you noticed your heart rate spiking while you are sitting still? Perhaps your blood oxygen levels look suspiciously low. You are not alone.

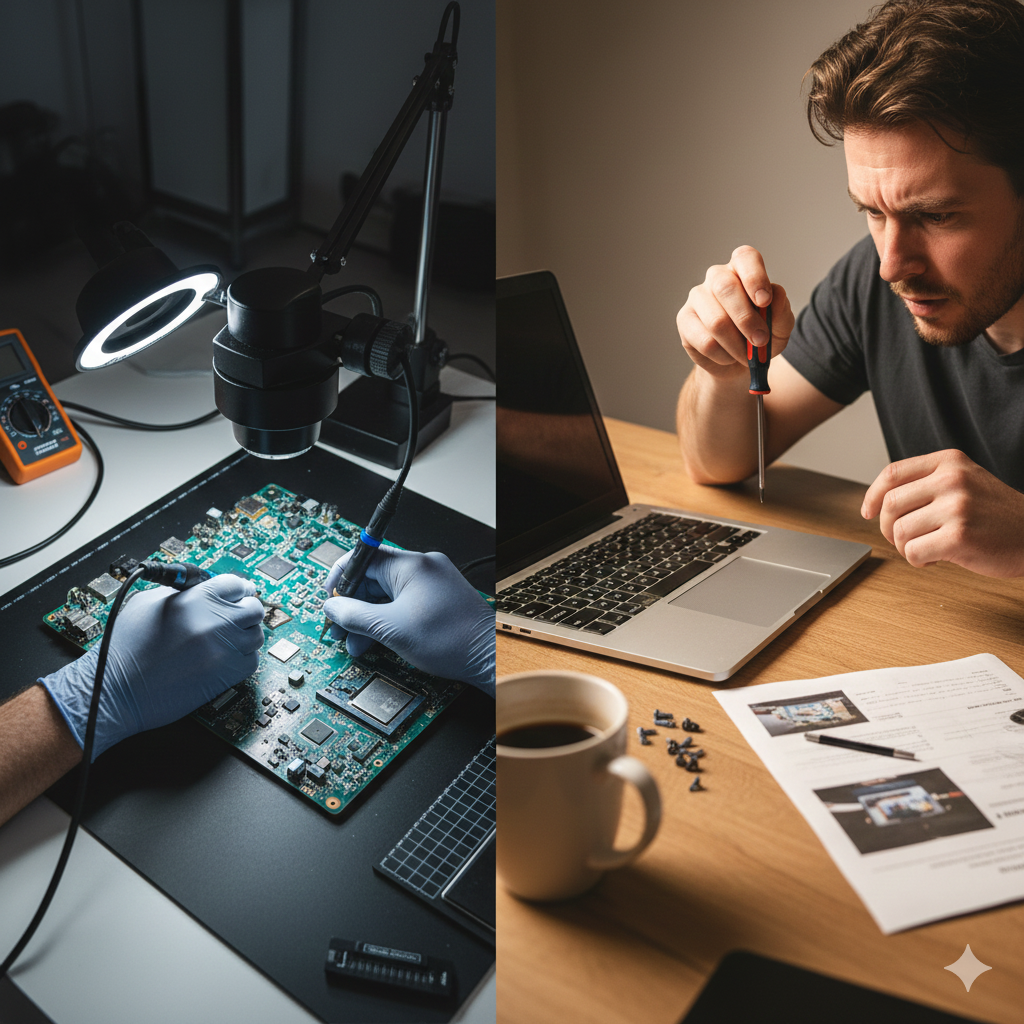
In 2026, we are seeing a massive uptick in “sensor blindness.” This phenomenon happens when high-tech wearables lose their ability to “see” through the skin. I have spent years performing other device repairs. I see firsthand how environmental wear and calibration drifts turn a $500 health tool into a digital bracelet. Restoring that accuracy requires more than a software update. You must understand the delicate relationship between hardware and human biology.

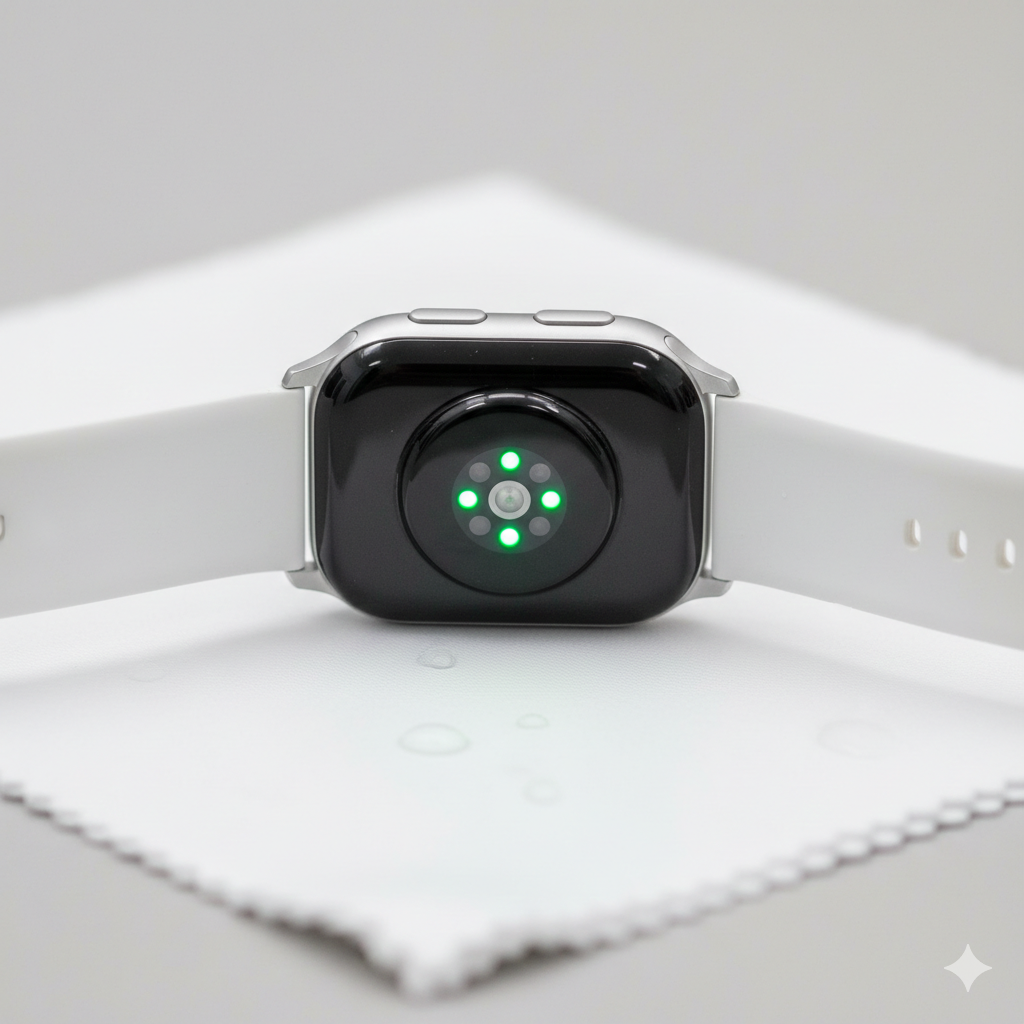
Section 1: [The Science of Smartwatch Sensor Accuracy] Most modern smartwatches use Photoplethysmography (PPG) sensors. These sensors shine green or red light into your tissue. They then measure the light scatter to determine your blood flow. However, several factors in 2026 complicate this process.

Invisible Physical Barriers

Micro-scratches on the zirconia or sapphire crystal backplate often cause issues. These scratches are invisible to the naked eye. Yet, they refract sensor light and create “noisy” data. Additionally, bio-films accumulate over time. These layers of sweat, dead skin, and oils create a barrier. This barrier dulls the sensitivity of the sensor.

Why Distance Matters

Expert research shows that even a slight deviation in the sensor-to-skin seal causes a 30% margin of error. This significantly impacts heart rate variability (HRV) readings. Proper contact is essential for precision.

Section 2: [Identifying Symptoms of Sensor Decay] Sensor failure is rarely a total blackout. Instead, it is a slow degradation of quality. If you experience these symptoms, your device is likely struggling.

Common Signs of Inaccuracy

  • The “Flatline” Effect: Your heart rate stays at a specific number despite physical exertion.
  • Erratic Spiking: You see a 180 bpm reading while simply walking to the kitchen.
  • Ghost Notifications: Your watch claims it is not on your wrist when it clearly is.

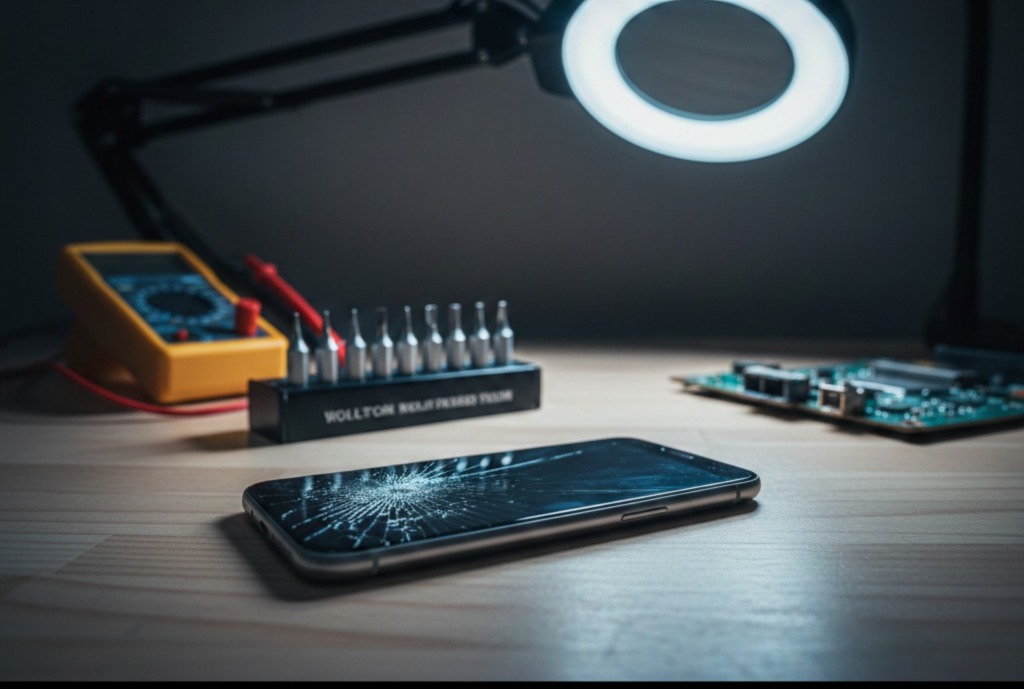
We often see these issues during smartphone repairs. Ambient light sensors often fail due to internal dust or adhesive degradation. In wearables, the stakes are much higher. This data influences your fitness and health decisions. If your hardware is compromised, consider the buy and sell value of the device before it fails completely.

Section 3: [Practical Advice for Sensor Restoration] Do not assume your watch is broken immediately. Follow these professional restoration steps to fix your device.

Professional Cleaning and Calibration

First, perform a deep clean of the optical array. Use a 70% isopropyl alcohol wipe to dissolve stubborn bio-films. Avoid abrasive cloths. These can add more micro-scratches to the sensor housing.

Next, re-calibrate via a system reset. Sometimes the internal algorithm “learns” incorrect baselines. A factory reset forces the software to re-analyze your skin tone and perfusion levels. This often clears up digital glitches.

Checking Hardware Integrity

Check the gasket integrity regularly. If you use your watch in salt water, the seals can dry out. This allows moisture to fog the interior lens. If you suspect internal fogging, seek professional iPhone repairs or specialized wearable service. This prevents motherboard corrosion. Finally, use the “Two-Finger” rule. The band should be tight enough that you cannot slide more than two fingers under it.

Section 4: [Conclusion and Final Thoughts] Your smartwatch is an incredible feat of engineering. However, it is not invincible. Maintaining sensor precision requires a mix of digital hygiene and physical care. When your device “goes blind,” it usually signals that the hardware needs attention.

At Fix Wireless, we extend the life of your tech through transparency. Do not let bad data dictate your health journey. Ensure your sensors stay as sharp as the day you unboxed them. If you feel unsure about your device’s health, contact us for a professional evaluation.

FAQs

Q: Can a scratched sensor be fixed?

A: Minor surface scuffs can sometimes be buffed out. However, deep cracks in the sensor glass require a back-housing replacement. This ensures water resistance and accuracy.

Q: Why does my tattoo interfere with my heart rate monitor?

A: Dark ink absorbs the green light used by PPG sensors. This prevents the light from reaching the blood vessels. Wear the watch on a non-tattooed wrist for a reliable fix.

Q: How often should I clean my sensors?

A: Active users should perform a quick wipe-down after every workout. Perform a deeper cleaning with alcohol once per week.


Disclaimer: This information is for educational purposes regarding device maintenance. Wearable devices are not medical-grade instruments. If you experience concerning physical symptoms, consult a healthcare professional immediately.

How to Recalibrate Your iPhone or Android Battery to Fix Inaccurate Percentage Jumps

Written By: Ronnie Gonenc


Recalibrate your phone battery guide

Your phone says 40%… then drops to 15%.
Or worse—your phone shuts off at 20%.

This issue is more common than most people realize, and in many cases, the battery isn’t actually failing. The problem is often battery miscalibration, where your phone’s software no longer accurately understands how much charge the battery holds.

According to Apple’s official documentation on iPhone battery health and performance, battery percentage is an estimate based on software models—not a direct measurement.

The good news? In many cases, recalibrating your battery can restore accurate percentage readings without replacing the battery.


Section 1: Why Phone Battery Percentages Become Inaccurate

Your phone doesn’t measure battery percentage directly. Instead, it estimates remaining power based on voltage, charging behavior, temperature, and usage patterns.

Google explains this process in their Android power management documentation.

Over time, this estimation can drift due to:

  • Frequent partial charging (never reaching 100%)
  • Constant short charging sessions
  • Letting the phone die unexpectedly
  • Major iOS or Android updates
  • Natural lithium-ion battery aging

When the software estimate no longer matches the battery’s real behavior, you’ll see sudden percentage drops, inaccurate readings, and unexpected shutdowns.


Section 2: What Battery Recalibration Actually Fixes (And What It Doesn’t)

Battery recalibration resets your phone’s internal reference points for full and empty charge levels.

It does help with:

  • Percentage jumps
  • Battery stuck at one number
  • Phone dying before 0%

It does NOT:

  • Repair a worn-out battery
  • Increase battery capacity
  • Fix charging ports or internal power components

Apple confirms in their guide on understanding battery health that recalibration only affects reporting accuracy—not physical battery condition.


Section 3: How to Recalibrate Your iPhone or Android Battery (Step-by-Step)

This recalibration method works for both iPhone and Android devices and mirrors professional diagnostic procedures.

Step-by-Step Process

  1. Use your phone normally until it shuts off on its own
  2. Leave the phone powered off for 30–60 minutes
  3. Plug in a reliable charger and charge uninterrupted to 100%
  4. Keep the phone plugged in for an additional 30–60 minutes after reaching 100%
  5. Unplug and use your phone normally

Avoid using the phone while charging to allow voltage levels to stabilize.

For deeper technical insight, Battery University explains lithium-ion behavior in their article on prolonging lithium-based batteries.


Section 4: Common Recalibration Mistakes That Make Things Worse

At repair benches, many calibration attempts fail because of these mistakes:

  • Repeating full drain cycles too often
  • Using apps to force battery drain
  • Charging in short bursts immediately after recalibration
  • Expecting recalibration to fix a degraded battery

Battery University specifically warns against frequent deep discharges in their guide on how to properly charge lithium-ion batteries.

Recalibration should be occasional, not routine.


Section 5: How Often Should You Recalibrate Your Battery?

Recalibration is recommended only when problems appear:

  • Every 3–4 months if percentage jumps occur
  • After major iOS or Android updates
  • When phones shut off above 10–20%

If your battery behaves normally, recalibration isn’t necessary.


Section 6: When Recalibration Is No Longer Enough

Recalibration won’t fix:

  • Phones dying at 20–30%
  • Batteries draining extremely fast
  • Battery health below ~80%
  • Swelling or overheating
  • Devices that only work while plugged in

At this point, professional diagnostics are the smarter move.

If you suspect hardware issues, Fix Wireless offers professional phone diagnostics and battery replacement services. You can explore their repair options on their phone repair services page.


Section 7: Professional Battery Repair Options

If recalibration doesn’t help, these services may be needed:

Battery Replacement

A degraded battery can cause inaccurate percentages and sudden shutdowns. Learn more about smartphone battery replacement at Fix Wireless smartphone repair services.

Full Device Diagnostics

Charging port issues, power IC failures, or internal corrosion can also cause battery problems. A full inspection is available through Fix Wireless repair services.

Visit a Local Repair Shop

For in-person service, you can visit one of the local Fix Wireless locations listed on their official website.


Section 8: Final Thoughts

Battery percentage jumps are frustrating—but they’re often a software issue, not immediate battery failure.

Recalibrating your phone battery can restore accurate readings when done correctly. And when it doesn’t work, it provides a clear signal that professional repair or battery replacement is the next step.

Knowing the difference saves time, money, and unnecessary stress.


FAQs

Does recalibrating damage my battery?
No, if done occasionally. Doing it too often can increase wear.

Should I let my phone hit 0% regularly?
No—only when recalibration is needed.

Can apps recalibrate my battery automatically?
No. Apps cannot reset system-level battery calibration.

Does fast charging affect battery accuracy?
Not directly, but excess heat accelerates battery aging.


Disclaimer

This article is for informational purposes only. Battery performance varies by device age and usage. If issues persist, consult a qualified phone repair professional such as Fix Wireless for accurate diagnostics and service.

How to Safely Clean Your Phone’s Earpiece and Speakers Without Damaging the Mesh

Written by:
Ronnie Gonenc

Safe phone speaker cleaning tips

Muffled calls. Quiet videos. Music that suddenly sounds like it’s coming from the bottom of a drawer.

This is one of the most common complaints we hear—and in most cases, the phone isn’t broken at all. After years of hands-on diagnostics and repairs, we’ve found that clogged speaker and earpiece mesh is one of the most misunderstood phone issues. Many people assume they need a new speaker or even a new phone, when the real problem is dirt packed into places you can barely see.

That said, cleaning your phone the wrong way can turn a minor issue into a major repair. This guide explains how to clean your phone speaker safely, what not to do, and when cleaning stops being the right solution.


Section 1: Why Speaker and Earpiece Mesh Fails Over Time

Your phone’s speaker and earpiece mesh are designed to balance two things: airflow and protection. The mesh keeps dust and debris out while still allowing sound to pass through clearly. Over time, that balance breaks down.

Here’s why buildup happens so easily:

  • Phones live in pockets, purses, gym bags, and cars
  • Skin oils and sweat trap dust particles
  • Makeup and fabric lint compress into the mesh
  • Humidity causes debris to stick instead of fall out

Unlike cracks or water damage, clogged mesh doesn’t look dramatic—but it directly affects sound quality. According to electronics maintenance data, blocked speaker grills are one of the top reasons users seek phone repair for “audio failure,” even when the speaker itself still works perfectly.


Section 2: Cleaning Methods That Damage Speakers (And Why They Fail)

Before covering what works, it’s important to understand what causes the damage we see most often at the repair bench.

Sharp Objects

Needles, pins, paperclips, SIM tools—these tear the mesh instantly. Once punctured, dust enters freely, and sound quality usually gets worse over time.

Compressed Air

Blowing air directly into the speaker forces debris deeper into the phone. We regularly see phones that came in for “quiet audio” and left needing full speaker replacement because debris was pushed into the speaker cone.

Liquids and Alcohol

Even small drops can wick through the mesh and affect internal components. Water resistance does not protect against pressure or residue buildup inside speaker chambers.

Aggressive Scrubbing

Hard brushes and repeated pressure can deform the mesh, changing how sound travels through it.

Most of these mistakes come from good intentions—but they’re responsible for a large percentage of avoidable repairs.


Section 3: Technician-Approved Ways to Clean Phone Speakers Safely

These methods are used during professional diagnostics because they minimize risk.

Soft-Bristle Brush (Primary Method)

A clean, dry, soft toothbrush works best.

  • Brush side-to-side, not downward
  • Use light pressure only
  • Hold the phone speaker-side down so debris falls out

This alone resolves many muffled speaker issues on both iPhone and Android devices.

Electronics-Safe Adhesive Putty

Used correctly, this can lift debris out of mesh pores.

  • Gently dab—never press
  • Avoid dragging across the surface
  • Use small amounts only

This method is especially effective for makeup or lint buildup.

Low-Suction Vacuum (Optional)

Held slightly away from the speaker opening, not touching it.

  • No attachments pressed to the grill
  • Short bursts only

This helps remove loosened debris after brushing.


Section 4: Step-by-Step Cleaning Process (Detailed)

  1. Power off your phone completely
  2. Remove the case and any accessories
  3. Inspect the mesh under bright light
  4. Hold the phone with the speaker facing downward
  5. Gently brush across the mesh for 15–20 seconds
  6. Lightly dab adhesive putty if needed
  7. Test audio before repeating

If sound improves, stop. Repeating the process too many times increases the risk of damage.

If there’s no change at all, the issue may be internal—common with water exposure, corrosion, or aging speakers. This is when a professional diagnostic from a Samsung repair or multi-brand technician is recommended.


Section 5: When Cleaning Is No Longer Enough

Cleaning won’t fix:

  • Water-damaged speaker components
  • Corrosion inside the speaker chamber
  • Torn or deformed mesh
  • Blown or distorted speaker cones

In these cases, continued DIY attempts often make repairs more expensive. A proper inspection can determine whether cleaning, repair, or replacement is the most cost-effective option.


Section 6: Conclusion and Final Thoughts

Cleaning your phone’s earpiece and speakers is one of the most overlooked forms of maintenance—and one of the easiest ways to restore sound clarity when done correctly. The key is patience and restraint.

Most serious speaker damage we see isn’t from age or defects. It’s from well-meaning cleaning attempts that go too far. Knowing when to stop is just as important as knowing how to start.

If safe cleaning doesn’t solve the issue, professional help will save you time, money, and frustration in the long run.


FAQs

How often should I clean my phone speakers?
Every 2–3 months, or whenever sound quality noticeably drops.

Can I use a toothpick wrapped in cloth?
Not recommended. It still applies pressure and can push debris inward.

Are water-resistant phones safer to clean?
Water resistance does not protect speaker mesh from damage or residue.

Why does sound sometimes get worse after cleaning?
Debris may have been forced deeper, or the mesh may be damaged.


Disclaimer

This article is for informational purposes only. Improper cleaning methods can damage internal components. If sound issues persist, consult a qualified phone repair professional for accurate diagnosis and service.

Why Magnetic Accessories Might Be Ghost-Clicking Your Screen: The Truth About MagSafe Interference

Written by:
Ronnie Gonenc

Ghost touches on smartphone caused by wallet

If your phone has ever started tapping, scrolling, or opening apps all on its own, you’re not imagining things—and you’re definitely not alone. Over the past year, we’ve seen a sharp rise in customers walking into our repair shop convinced their screen is “possessed.”

In many of these cases, the culprit isn’t a bad screen or software glitch. It’s magnetic accessories. As MagSafe wallets, mounts, chargers, and battery packs become everyday add-ons, we’re seeing more real-world cases of magnetic interference triggering ghost touch issues. This article breaks down what’s actually happening, why it matters, and what you can do about it—based on hands-on repair experience, not speculation.


Section 1: What Is MagSafe Screen Interference?

MagSafe screen interference happens when strong or poorly aligned magnets disrupt how your phone’s touchscreen registers input. Modern smartphones rely on capacitive touch technology, which detects tiny electrical changes caused by your fingers. External magnetic fields—especially when placed directly behind the display—can distort those signals.

Apple and accessory manufacturers design MagSafe to be safe within specifications, but real-world usage isn’t always ideal. Thick cases, third-party accessories, metal plates, or misaligned magnetic mounts can create uneven pressure or electromagnetic interference. According to industry testing referenced by mobile hardware engineers, inconsistent magnetic fields can affect touch accuracy, especially near screen edges.

This is why many ghost-touch cases resolve instantly when accessories are removed—no repair needed.


Section 2: How Magnetic Accessories Trigger Ghost Touch Issues

Wallets and Card Holders

Magnetic wallets are one of the most common offenders. When cards, metal shielding, and magnets stack together, they create localized pressure points. We’ve seen phones sent in for screen repair that worked perfectly the moment the wallet was removed.

Car Mounts and Desk Stands

Magnetic mounts apply constant force to one area of the phone. Over time, this can subtly warp the display assembly or interfere with digitizer sensitivity—especially on larger phones.

Wireless Chargers with Strong Alignment Rings

Some third-party chargers exceed recommended magnetic strength or lack proper shielding. This can lead users to believe they need an iPhone repair when the issue is actually external.

Cheap or Uncertified Accessories

Low-quality magnets are often poorly balanced and unregulated. We frequently identify these during diagnostics for Android and Samsung repair visits involving phantom touches.


Section 3: Practical Steps to Fix or Prevent Ghost Clicking

  • Remove all magnetic accessories immediately and test the phone bare for 24 hours
  • Restart the device to rule out temporary software conflicts
  • Check for screen protectors lifting or bubbling, which can amplify pressure issues
  • Avoid stacking MagSafe accessories (wallet + battery pack + case)
  • Use manufacturer-certified accessories whenever possible

If ghost touches continue without accessories attached, it’s time for a professional inspection. A trained technician can determine whether the issue is digitizer damage, pressure distortion, or internal component failure. Scheduling a diagnostic with a trusted cell phone repair service prevents unnecessary screen replacements.


Section 4: Conclusion and Final Thoughts

MagSafe and magnetic accessories are incredibly convenient—but they’re not always harmless. Ghost clicking is often the phone’s way of telling you something external is interfering with how it senses touch.

Before assuming the worst or spending money on a new device, strip the phone down to basics and test it properly. In many cases, the fix is as simple as changing accessories. And when it’s not, having a repair expert evaluate the problem early can save time, money, and frustration.

Understanding how your accessories interact with your device is part of owning modern tech—and a little awareness goes a long way.


FAQs

Can MagSafe actually damage my phone screen?
MagSafe itself is safe, but poorly designed or overly strong magnetic accessories can cause pressure-related or touch issues.

Why does ghost touch stop when I remove my wallet or mount?
Removing the magnetic field restores normal capacitive touch behavior.

Do Android phones have the same issue?
Yes. Any capacitive touchscreen can be affected by strong magnets, not just iPhones.

Is this a software problem or hardware problem?
Most cases are external interference. Persistent issues may indicate digitizer or display damage.


Disclaimer

This content is for informational purposes only. Touchscreen behavior can vary by device, accessory quality, and usage conditions. For persistent issues, consult a qualified repair professional for proper diagnosis and service.

The 2026 Repair Audit: Is It Better to Fix Your Current Phone or Upgrade to a Mid-Range Model?

Written by:
Ronnie Gonenc

Old vs new: smartphone comparison

It’s 2026, and phones aren’t cheap anymore—but repairs aren’t always either. Every week, customers walk into our shop asking the same honest question: “Should I fix this phone, or is it time to move on?”

As someone who’s spent years repairing everything from cracked iPhone screens to water-damaged Androids, I’ve seen both sides of this decision play out in real life. Some repairs genuinely buy you years. Others just delay the inevitable. This repair audit is about cutting through the noise and helping you make a smart, financially sound choice—without sales pressure or tech jargon.


Section 1: Understanding the 2026 Smartphone Landscape

Mid-range smartphones in 2026 are better than ever. Devices priced between $400–$600 now offer OLED displays, 5G, solid cameras, and multi-day battery life. According to consumer data from the mobile industry, average smartphone prices have risen nearly 15% over the past three years, while repair costs have stayed relatively stable.

At the same time, modern phones are more repairable than many people realize. Common issues like battery degradation, charging port failure, or cracked glass can often be resolved affordably at a professional phone repair shop—without replacing the entire device.

The real question isn’t whether phones are “worth fixing” anymore. It’s whether your phone is.


Section 2: When Repairing Your Phone Makes More Sense

The Damage Is Isolated

If your phone still performs well but has one clear issue—like a shattered screen or weak battery—repair is often the smarter move. For example, a professional iPhone screen repair typically costs far less than buying even a budget replacement device.

You’re Happy With Performance

If apps run smoothly, storage isn’t maxed out, and updates are still supported, replacing a battery or camera module can restore your phone to near-new usability.

You Want to Avoid Data Hassles

New phones mean data transfers, app logins, and security reconfigurations. Many customers choose repair simply to avoid that headache—especially when the fix is same-day.

Environmental Impact Matters

Extending the life of your phone reduces electronic waste. The U.S. Environmental Protection Agency highlights that device reuse significantly lowers carbon emissions compared to manufacturing new electronics.


Section 3: When Upgrading to a Mid-Range Phone Is the Better Call

Multiple Failures at Once

If your phone needs a screen, battery, and charging port—all at the same time—the repair bill can creep close to replacement territory. At that point, upgrading starts to make sense.

No More Software Support

Phones that no longer receive security updates pose real risks. If your device has aged out of manufacturer support, upgrading protects your data and privacy.

Daily Reliability Issues

Dropped calls, overheating, random shutdowns—these are signs of deeper hardware wear. In those cases, even expert repair can only do so much.

If you’re unsure where your device stands, a diagnostic from a trusted Samsung repair specialist or multi-brand shop can clarify whether repair is practical or just temporary.


Section 4: Conclusion and Final Thoughts

So, should you fix or upgrade your phone in 2026? The honest answer depends on value—not hype. If a repair restores reliability for a fraction of replacement cost, it’s usually the smarter decision. If problems are stacking up or security is compromised, a mid-range upgrade offers peace of mind.

The best move is an informed one. A quick evaluation from a professional repair technician can save you hundreds and help you avoid regret—whether you walk out with a repaired phone or decide it’s time to upgrade.

If you want to understand your options better, start by exploring professional cell phone repair services or speaking directly with a technician who sees these decisions every day.


FAQs

Is it cheaper to fix or upgrade a phone in 2026?
In most cases, fixing a single issue is cheaper. Multiple major repairs may justify upgrading.

How long does a phone typically last after repair?
A quality repair can extend a phone’s life by 1–3 years, depending on usage and model.

Are mid-range phones good enough now?
Yes. Many mid-range models now rival older flagship phones in speed and features.

Should I repair water-damaged phones?
It depends on corrosion and internal damage. A professional inspection is essential.


Disclaimer

This article is for informational purposes only. Repair and upgrade decisions vary based on device condition, usage, and security needs. Always consult a qualified repair professional before making a final decision.

The Invisible Short Circuit: How ‘Pocket Humidity’ and Steam Damage Your Phone Without It Ever Touching Water

Written by: Ronnie Gonenc

Damaged smartphone repair close-up

Most people think phone water damage only happens when a device takes a swim. That’s not what we see at the repair bench. Phones come in every week with corrosion, shorted components, and failing screens—even though they were “never dropped in water.”

After years of hands-on diagnostics and board-level repair, one culprit shows up again and again: pocket humidity. Moisture trapped in pockets, bathrooms, gyms, and kitchens slowly works its way inside your phone, causing damage long before any warning appears. This article breaks down how that happens, why steam is especially dangerous, and what you can realistically do about it.


Section 1: Topic Overview

What “Pocket Humidity” Really Means

Pocket humidity isn’t a buzzword—it’s a real environmental condition. Phones are often stored in warm, enclosed spaces like pants pockets, purses, or gym bags. When heat from your body combines with ambient moisture, it creates condensation.

Modern smartphones are not airtight. Even models with water-resistance ratings rely on seals that degrade over time. According to Apple’s own support documentation, water resistance decreases with normal wear, making phones increasingly vulnerable to humidity and vapor exposure.

Steam is even worse. Unlike liquid water, vapor penetrates tiny gaps around speakers, microphones, SIM trays, and charging ports. Once inside, it condenses onto internal components.


Section 2: Key Points or Information

How Steam Causes Internal Phone Damage

Steam damage is deceptive. The phone may work fine for weeks or months before problems appear. Internally, however, moisture triggers oxidation on connectors and microchips. Over time, that corrosion leads to:

  • Random shutdowns
  • Touchscreen failures
  • Charging issues
  • Camera fogging
  • Logic board shorts

At our repair counter, phones exposed to frequent bathroom steam often show corrosion patterns identical to liquid submersion—even though the owner never dropped the device.

Real-World Repair Observations

We regularly open phones where the Liquid Contact Indicator (LCI) hasn’t fully triggered, yet corrosion is clearly present on the board. This is common with pocket humidity exposure because moisture levels stay just below the threshold needed to trip visible indicators.

Devices used by contractors, fitness instructors, and kitchen staff are especially vulnerable. Constant temperature changes accelerate internal condensation cycles.


Section 3: Practical Advice or Recommendations

How to Reduce Pocket Humidity Damage

While no phone is immune, a few habits dramatically reduce risk:

  • Avoid bathrooms and showers: Don’t bring your phone into steamy environments, even briefly.
  • Let your phone breathe: Remove it from pockets after workouts or long periods of heat exposure.
  • Use protective cases wisely: Some waterproof cases trap humidity inside once moisture gets in.
  • Dry immediately: If your phone feels warm and damp, power it down and let it air-dry in a cool place.

If you notice charging issues, screen glitches, or fog under the camera lens, don’t wait. Early diagnostics can prevent board-level failure. A professional inspection from a trusted phone repair service—like those available through CT Fix Wireless—can catch corrosion before it spreads.


Section 4: Conclusion and Final Thoughts

Pocket humidity is one of the most overlooked causes of smartphone failure. Steam and trapped moisture quietly degrade internal components until the damage becomes unavoidable—and expensive.

Understanding how environmental moisture works helps you make smarter decisions about phone storage, daily habits, and early repairs. Awareness alone can add years to a device’s lifespan and save you from sudden, unexplained breakdowns.


FAQs

Can steam really damage a phone even if it’s water-resistant?
Yes. Water resistance is designed for splashes, not prolonged vapor exposure. Steam penetrates seals more easily than liquid water.

Why didn’t my phone’s water indicator turn red?
Humidity exposure often stays below the indicator’s activation threshold while still causing corrosion over time.

Is pocket humidity worse in winter or summer?
Both. Summer heat increases moisture, while winter temperature shifts cause condensation when moving between cold and warm environments.

Should I use silica gel or rice?
They can help with minor moisture, but they won’t reverse corrosion. If symptoms appear, professional evaluation is strongly recommended.

How to Fix a Phone Camera That Won’t Open or Shows a Black Screen

Written By: Ronnie Gonenc

There is nothing more frustrating than lining up the perfect shot only to find your phone camera won’t open or, worse, greets you with a void-like black screen. Whether you are trying to capture a once-in-a-lifetime memory or just scanning a QR code for lunch, a malfunctioning camera feels like losing a vital sense.

As a technician with years of experience in mobile diagnostics at CT Fix Wireless, I have seen everything from simple software “brain farts” to total hardware failure. While it’s easy to panic and assume you need a new phone, most camera issues are actually solvable at home. In this guide, we will break down exactly why your camera is acting up and how you can get it back to crystal-clear performance.


Section 1: Why Is My Camera Not Working? (Topic Overview)

When a camera fails to launch or displays a black screen, the culprit usually falls into one of two camps: Software Glitches or Hardware Damage.

According to industry data, nearly 60% of smartphone “camera failures” reported to repair centers are actually software-related conflicts that can be fixed without opening the device. However, if your phone recently took a tumble or went for an accidental swim, the probability of a physical hardware disconnect increases significantly.

Common Symptoms

  • The Black Screen: The app opens, but the viewfinder is pitch black.
  • The Freeze: The app opens but immediately hangs or crashes back to the home screen.
  • “Camera Failed” Error: A system pop-up explicitly tells you the hardware cannot be initialized.

If your camera issues are getting in the way of your day, you can always Contact Us for a professional diagnostic.


Section 2: Key Troubleshooting Steps for Software Issues

Before we assume the camera module is “dead,” we need to rule out the digital gremlins.

1. The Force Restart

This is the “Have you tried turning it off and on again?” of the tech world, and it works surprisingly often. A force restart clears the temporary memory (RAM) and kills any background processes that might be “holding the camera hostage.”

  • For Android: Hold Power + Volume Down for 10 seconds.
  • For iPhone: Quickly press Volume Up, then Volume Down, then hold the Side Button.

2. Check for App Permissions

Modern operating systems (Android 14+ and iOS 17+) have strict privacy controls. If you recently updated your phone or installed a new security app, it might have revoked the camera’s permission to run.

Pro Tip: Go to Settings > Privacy > Permission Manager > Camera and ensure your main Camera app is allowed to “Allow while using the app.”

3. Clear the Cache and Data (Android Only)

Over time, the camera app accumulates “junk” files that can become corrupted.

  • Go to Settings > Apps > Camera > Storage.
  • Tap Clear Cache.
  • If that fails, tap Clear Data (this won’t delete your photos, but it will reset your camera settings like “Grid Lines” or “Beauty Mode”).

4. Test in “Safe Mode”

Safe Mode runs the phone with only the original factory apps. If the camera works in Safe Mode, a third-party app (like Snapchat, Instagram, or a flashlight app) is causing the conflict.


Section 3: Identifying Hardware Problems

If you’ve tried all the software fixes and the screen is still black, we have to look at the physical components.

The “Flashlight Test”

Try to turn on your phone’s flashlight. Since the flashlight and the camera are often part of the same hardware assembly, if the flashlight won’t turn on either, it’s a 99% certainty that the hardware module has been dislodged or damaged internally.

Physical Obstructions and Lens Damage

Sometimes the simplest answer is the right one.

  • Case Interference: Is your new phone case blocking the lens or the laser autofocus sensor?
  • Cracked Lens: Even a hairline fracture in the glass can cause the software to fail as it tries to focus.
  • Internal Moisture: Does the lens look “foggy”? Water damage can short-circuit the camera’s delicate flex cable.

If you suspect hardware damage, it’s best to get an Instant Quote for a repair rather than attempting a DIY fix that could damage the motherboard.


Section 4: Practical Recommendations and Final Thoughts

If you have reached this point and your camera is still non-responsive, it is likely time for a professional part replacement. Replacing a camera module is a standard procedure and is significantly cheaper than buying a brand-new flagship phone.

Final Takeaways:

  1. Always Back Up: Before performing a factory reset (the “nuclear” option), ensure your photos are synced to Google Photos or iCloud.
  2. Avoid DIY: Smartphone cameras are held in by incredibly thin flex cables. One wrong move with a screwdriver can kill the face-ID or fingerprint sensors.
  3. Check Warranty: If your phone is less than a year old and hasn’t been dropped, the manufacturer might cover the repair.

If your phone is older and the repair cost is high, you might even consider our Buy and Sell program to trade in your broken device for a refurbished one.


FAQs

Q: Will clearing the camera data delete my gallery?

A: No. Clearing the “Data” or “Cache” in the app settings only removes the app’s internal configuration files. Your photos are stored in a separate directory and will remain safe.

Q: My front camera works, but the back one is black. Is it software?

A: Usually, no. If one camera works and the other doesn’t, it almost always points to a hardware failure in that specific module.


Disclaimer: The information provided in this post is for educational purposes. Performing DIY repairs can void your warranty. If you are unsure, please consult a professional technician.

DIY vs. Professional Computer Repair: When to Fix It Yourself and When to Call CT Fix Wireless

Written By: Ronnie Gonenc

A side-by-side conceptual image showing a cluttered home DIY computer repair setup with a screwdriver versus a clean, professional technician workstation with high-end diagnostic tools and an anti-static mat.

We’ve all been there: your computer starts acting sluggish, the “Blue Screen of Death” makes an appearance, or a glass of water takes a sudden tumble onto your keyboard. Your first instinct? Open YouTube, search for a tutorial, and grab a screwdriver. It looks easy on screen, but as anyone who has ever ended up with “extra screws” after a repair knows, the reality is far more complex.

In the world of tech, the line between a “quick fix” and a “total loss” is razor-thin. While DIY culture is booming, your computer—whether it’s a high-end gaming rig or a vital work laptop—is a sensitive piece of financial and personal infrastructure. This guide is designed to help you navigate that line. We’ll look at the actual costs of professional repair in 2025, the hidden risks of going solo, and exactly when you should put the tools down and let the experts at CT Fix Wireless take over.


Section 1: The Computer Repair Landscape in 2025

Computer technology has reached a point where components are more powerful—but also more proprietary and delicate—than ever before. In 2025, the average cost of a professional computer repair typically ranges from $88 to $220, depending on the complexity. While this might seem like a cost you’d want to avoid, compare it to the price of a new mid-range laptop, which now frequently starts at $1,200+.

The “Rule of Thumbs” for 2025:

  • The Age Factor: If your device is under 4 years old, it is almost always worth repairing. If it’s over 7 years old and struggles with modern apps, it might be time to check out our buy/sell options.
  • The 50% Rule: Industry experts generally agree: if a repair costs more than 50% of the price of a new, comparable machine, a replacement is the smarter financial move.
  • The Data Value: Data is often more valuable than the hardware. According to recent data security reports, 16 billion passwords were leaked or compromised in 2025 alone. A botched DIY repair doesn’t just break a screen; it can expose your drive to corruption or permanent data loss.

Section 2: When Is It Safe to DIY?

Not every glitch requires a trip to the shop. There are several maintenance tasks that are perfectly safe (and encouraged) for a confident user to handle.

1. Software Maintenance & Optimization

If your computer is just “slow,” the problem is often digital, not physical.

  • What you can do: Run malware scans, uninstall “bloatware,” and manage your startup programs.
  • Risk Level: Low. As long as you aren’t deleting system files, you’re safe.

2. Basic Component Swaps (Desktops Only)

Desktop PCs are modular by design.

  • What you can do: Upgrading RAM or adding a new SSD is usually a “plug-and-play” process.
  • Risk Level: Moderate. You must ground yourself to avoid Electrostatic Discharge (ESD), which can fry a motherboard instantly.

3. Peripheral Replacements

  • What you can do: Replacing a mouse, external keyboard, or a monitor cable.
  • Risk Level: Zero.

Section 3: The Danger Zone—Why DIY Often Costs More

The temptation to save $100 on labor can lead to a $1,000 mistake. Here are the most common ways DIY goes wrong:

The Static Enemy (ESD)

You can’t see it, feel it, or smell it, but a tiny spark of static electricity from your fingertip can kill a semiconductor. Professional shops use anti-static mats and wrist straps; most home “technicians” work on carpets or wooden tables, unknowingly shortening the life of their components.

The “One Wrong Screw” Mistake

Modern laptops use dozens of screws of varying lengths. If you put a “long” screw into a “short” hole, you can pierce the motherboard or the battery. This is known as “Long Screw Damage,” and it is often unrepairable.

Accidental Data Loss

When you open a device to fix a hardware issue, you are centimeters away from the storage drive. One slip of a metal pry tool can scratch the drive or cause a short circuit that wipes your photos, tax returns, and work documents. At CT Fix Wireless, we prioritize data preservation above all else.

Repair TypeDIY DifficultyRisk to DataProfessional Recommendation
Virus RemovalLowLowDIY if you have good software
RAM UpgradeMediumLowSafe for desktops; Pros for laptops
Screen ReplacementHighModerateCall the Pros
Water DamageExtremeHighProfessional Only
Logic Board RepairExtremeHighProfessional Only

Section 4: When to Call CT Fix Wireless

There are specific scenarios where professional intervention isn’t just a convenience—it’s a necessity.

  1. Water or Liquid Damage: Time is your enemy. Corrosion starts the second liquid hits the board. We use ultrasonic cleaners and specialized chemicals to stop the rot before it’s too late.
  2. No Power / “Dead” Device: If your computer won’t turn on, it could be a power supply, a battery, or a logic board short. Our diagnostic testing identifies the root cause so you don’t waste money buying parts you don’t need.
  3. Laptop Screen & Hinge Repair: Laptops are incredibly cramped. Replacing a screen requires delicate routing of Wi-Fi antennas and camera cables. One wrong move and your “fixed” screen has no internet.
  4. Game Console Issues: From HDMI port replacements to overheating, consoles require high-heat soldering that home irons simply can’t handle.

Conclusion: Peace of Mind vs. The Headache

DIY is great for a hobby, but when your livelihood or your memories are on the line, professional repair is an investment in reliability. A professional repair comes with a warranty, expert diagnostics, and—most importantly—the assurance that your data is safe.

Before you start unscrewing that case, ask yourself: Is saving the labor fee worth the risk of losing the entire device? If the answer is no, we’re here to help. From iPhone repairs to complex tablet fixes, the team at CT Fix Wireless has the tools and the training to do it right the first time.


FAQs

Q1: Is it cheaper to repair or replace a laptop in 2025?

A1: It depends on the age. If the laptop is under 5 years old, a repair (usually $150–$300) is much cheaper than a new machine ($800–$1,500). If it’s over 7 years old, the hardware may be too slow for modern security updates.

Q2: Will opening my laptop void my warranty?

A2: In many cases, yes. Most manufacturers use “warranty void if removed” stickers. A certified technician can often perform repairs that maintain the integrity of your device.


Disclaimer

This content is for informational purposes only. Attempting hardware repairs can lead to electrical shock, fire, or permanent device damage. Always disconnect power sources before attempting any work and consult a professional for complex issues.

Beyond the Screen: Why Your Phone’s Logic Board is the Most Critical Repair

Written By: Ronnie Gonenc

Close-up professional micro-soldering repair on a smartphone logic board using precision tweezers and a microscope under bright laboratory lighting.

We have all been there. Your phone slips, hits the pavement, and your heart sinks. You check the screen—it’s perfect. You breathe a sigh of relief, only to realize minutes later that the phone won’t turn on, won’t charge, or has completely lost its Wi-Fi signal. This is the moment you realize that a smartphone is far more than just a glass display; it is a complex ecosystem powered by a single, central nervous system: the logic board.

While screen cracks are the most visible injuries a phone can sustain, logic board failures are the most critical. As a senior technician with years of experience in high-level micro-soldering and board diagnostics, I can tell you that a faulty logic board is essentially “heart failure” for your device. Most general repair shops will tell you a dead board means a dead phone. At CT Fix Wireless, we know that isn’t true.

This guide dives deep into the high-stakes world of logic board repair—a category often classified under YMYL (Your Money or Your Life) because it involves significant financial decisions and the potential loss of irreplaceable personal data. Understanding this component is the difference between saving your digital life and spending $1,000 on a new device prematurely.


Section 1: The Logic Board—A Topic Overview

The logic board (often called the motherboard in the Android world) is the primary circuit board that houses the CPU, memory, and every connector that makes your phone a “smart” device. If the screen is the face, the logic board is the brain. It coordinates every single action, from the haptic vibration of a text message to the complex encryption of your banking apps.

Why Logic Board Health Matters

Unlike a battery or a charging port, which are modular components that can be “swapped” out, the logic board is a singular piece of multi-layered fiberglass and copper. According to industry data from Grand View Research, the consumer electronics repair market is projected to reach over $25 billion by 2030, largely driven by the increasing complexity of these internal components.

Common Concerns for Users:

  • Data Security: Because the storage chips (NAND) are soldered directly onto the logic board, a board failure often means your photos and contacts are trapped.
  • Cost vs. Value: Replacing a board through a manufacturer like Apple can cost upwards of $500 to $700, often making a new purchase seem like the only option.
  • Reliability: Many fear that once a board is “touched” by a technician, the phone will never be the same.

Section 2: Key Information & Technical Insights

To understand why this repair is so critical, we have to look at what actually goes wrong. Logic board issues aren’t just “broken”; they are microscopic disruptions in electrical flow.

Sub-section 1: The Science of Micro-Soldering

Modern logic boards use Surface Mount Technology (SMT), where components are so small they require a microscope to see. A grain of sand is often larger than the resistors and capacitors we handle daily.

Repairing these requires micro-soldering, a specialized skill where technicians use high-heat precision irons and hot air stations to replace individual Integrated Circuits (ICs). For example, if your iPhone has “Touch Disease” or “Audio IC” issues, it isn’t a broken screen or speaker—it’s a microscopic fracture in the solder joints on the logic board itself.

Sub-section 2: The Main Culprits of Failure

  1. Water Damage: This is the #1 killer. While many phones are “water-resistant,” they are not waterproof. Liquid creates corrosion that bridges electrical connections, causing a “short circuit.”
  2. Heat Stress: Prolonged gaming or using a faulty charger can cause the CPU to overheat, eventually weakening the solder balls that hold it to the board.
  3. Physical Impact: A hard drop can cause the logic board to flex. While the glass might survive, the tiny traces (internal wires) inside the board can snap.

Expert Insight: Statistics from the Consumer Technology Association (CTA) suggest the average lifespan of a smartphone is 2.5 to 3 years. However, high-quality logic board repairs can extend that lifespan by another 2 years, saving consumers hundreds of dollars.


Section 3: Practical Advice & Recommendations

When your phone stops working, you are at a crossroads. Should you fix it, or is it time to move on?

1. Diagnosing the “Unfixable”

Before you assume your phone is a paperweight, look for these specific “Board-Level” symptoms:

  • No Power: Even with a new battery and charger, the device remains black.
  • Boot Loops: The phone starts to turn on, shows the logo, and dies repeatedly.
  • Missing Functions: Greyed-out Wi-Fi, no audio during calls, or a camera that won’t open despite the hardware being replaced.

2. The 50% Rule

We generally recommend that if a logic board repair costs less than 50% of the device’s current market value, it is worth the investment—especially if you have not backed up your data. You can get an instant quote to see where your device stands.

3. Professional Consultation

Warning: Do not attempt logic board repairs at home. Opening a device without proper ESD (Electrostatic Discharge) protection can instantly fry the CPU. Always consult a technician who specializes in iPhone repairs or tablet repairs and has a proven track record of micro-soldering.


Section 4: Conclusion and Final Thoughts

The logic board is the heart of your digital world. While manufacturers often push for total device replacement, micro-soldering and advanced diagnostics have made logic board repair a viable, eco-friendly, and cost-effective solution. By choosing to repair the “brain” of your phone, you are not just saving a gadget—you are preserving your data and reducing electronic waste.

At CT Fix Wireless, we believe in transparency. Whether it’s a game console or a flagship smartphone, our goal is to provide a repair that lasts. Don’t let a “dead” phone dictate your budget.


FAQs

Q1: Will I lose my data during a logic board repair?

A1: Unlike a factory reset or a full board replacement from the manufacturer, a component-level repair aims to fix the existing board. This is often the only way to recover data from a dead phone. However, data can never be 100% guaranteed in cases of severe damage.

Q2: Is a logic board repair as reliable as a new phone?

A2: If performed by a certified professional using high-quality parts, yes. A repaired board is often sturdier than it was before, as common weak points (like under-filled ICs) are reinforced during the process.


Disclaimers

The information provided in this post is for educational purposes only. Smartphone repairs involve high-voltage components and delicate circuitry. CT Fix Wireless is not responsible for damage caused by DIY repair attempts. Please consult a professional for all hardware issues.

5 Warning Signs Your Phone Needs a Professional Repair (Before It’s Too Late)

Written By: Ronnie Gonenc

5 Warning Signs Your Phone Needs a Professional Repair

We’ve all been there: a slight lag when opening an app, a screen that feels a bit warmer than usual, or a tiny hairline crack that “doesn’t really bother anything.” It is tempting to push your device to its absolute limit, especially when a new flagship phone can cost upwards of $1,000. However, as experts in the mobile repair industry with years of hands-on experience at CT Fix Wireless, we’ve seen how a $50 fix today can easily turn into a $300 “total loss” tomorrow.

Your smartphone is essentially a high-powered computer condensed into a palm-sized frame. Because the components are so tightly packed, a failure in one area—like a degrading battery or a microscopic crack—can quickly cascade into catastrophic motherboard failure. According to industry data from Business Research Insights, over 70% of global mobile users experience battery or screen-related issues annually.

In this guide, we will break down the five most critical “red flags” that indicate your device is crying out for professional help. Taking action now isn’t just about convenience; it’s about protecting your data and your wallet.


1. The “Ghost” in the Machine: Unresponsive or Ghost Touching

If your phone starts opening apps on its own, typing random characters, or refusing to acknowledge your swipes, you’re experiencing what the industry calls “Ghost Touching.”

Why This Happens

This usually points to a failing digitizer—the thin layer of glass integrated into your screen that converts your touch into digital signals. While it might feel like a software bug, it is almost always a hardware integrity issue. According to a study by the Canadian Institute for Device Repairs, screen-related damages account for over 50% of all professional repair requests.

The Professional Fix

Often, users try to “clean” the screen or restart the phone, but if the internal connectors are loose or the digitizer is compressed, you need a physical replacement. At our iPhone Repairs section, we frequently see this issue after a minor drop that didn’t even break the outer glass but shifted the internal layers.


2. Excessive Heat (Even When You Aren’t Using It)

It’s normal for a phone to get warm while playing a high-intensity game or charging. However, if your phone feels hot to the touch while sitting idle in your pocket or on your nightstand, you have a serious problem.

The Hardware Risk

Persistent overheating is a “silent killer” for internal electronics. Excessive heat can cause:

  • Solder Joint Fatigue: Microscopic connections on the motherboard can literally melt or crack.
  • Processor Throttling: Your phone will purposefully slow down to stay cool, leading to permanent lag.
  • Safety Hazards: A battery that stays hot is at risk of “thermal runaway.”

According to reports from Asurion, lithium-ion batteries typically have a lifespan of 2 to 3 years. If yours is overheating frequently, the internal chemical resistance has likely increased to a dangerous level. You can check our Other Device Repairs page to see how we handle thermal diagnostics for various brands.


3. The “Expanding” Phone: Screen or Back Panel Lifting

This is the one sign you must never ignore. If you notice a gap between the screen and the frame, or if the back of your phone looks slightly “pregnant” or bloated, your battery has failed.

The Science of Battery Swelling

Lithium-ion batteries produce gas as a byproduct of chemical degradation or overcharging. This gas is trapped inside the battery casing, causing it to swell.

Warning: A swollen battery is a fire hazard. Do not attempt to “press” the screen back down, as puncturing the battery can lead to an immediate fire or explosion.

If you see this, stop using the device immediately and contact us for a safe disposal and replacement.


4. Erratic Charging and Port Connection Issues

Do you have to wiggle your charging cable at a “magic angle” just to get a connection? While many people assume they just need a new cable, the culprit is usually the charging port (USB-C or Lightning port).

Common Causes

  1. Mechanical Wear: Plugging and unplugging thousands of times eventually loosens the port from the motherboard.
  2. Corrosion: Even tiny amounts of moisture (like steam from a shower) can corrode the pins.
  3. Debris: Pocket lint can become compacted inside the port, preventing a full connection.

While you can try to gently clean the port with a non-conductive toothpick, professional repair is often needed to re-solder the connection or replace the port entirely. For larger devices, check our Tablet Repairs section, as charging ports on tablets are particularly prone to stress-related damage.


5. Rapid Battery Drain and Random Shutdowns

If your phone is at 40% and suddenly dies, or if it drops 20% in ten minutes, your battery’s “health” has plummeted.

Why DIY Calibration Rarely Works

Many online “hacks” suggest calibrating the battery by draining it to 0%. However, modern smartphones use sophisticated Battery Management Systems (BMS). If the hardware cells are physically degraded, no amount of software resetting will fix it. In 2025, with the rise of Right to Repair laws, it is easier than ever for professionals to swap these out with high-quality OEM parts.

If you aren’t sure if your battery is the problem or if it’s a motherboard short, you can get an instant quote widget estimate to see the cost of a professional diagnostic and repair.


Expert Recommendations: What Should You Do Now?

If your device is showing even one of these signs, the clock is ticking. Here is a quick checklist for your next steps:

  • Backup Your Data: Before a hardware failure becomes permanent, ensure your photos and contacts are in the cloud.
  • Consult a Professional: A certified technician can use a multimeter to check for voltage irregularities that aren’t visible to the naked eye.
  • Evaluate Repair vs. Replacement: Sometimes, the cost of repair is close to the value of the phone. In those cases, we recommend checking out our Buy and Sell options to trade in your damaged device for a refurbished model.

Statistics to Consider

  • 85% of adults worldwide now own a smartphone, making the demand for quality repair higher than ever (Business Research Insights).
  • 5.2% Annual Growth: The repair market is expanding as people realize that fixing a device is more sustainable and cost-effective than buying a new one every 18 months (Deep Market Insights).

Conclusion: Don’t Wait Until It’s a Paperweight

Your phone is your lifeline—it’s how you work, stay in touch with family, and manage your life. Ignoring small warning signs is a gamble where the stakes are your data and your safety. By catching these issues early, you can extend the life of your device by years.

Whether it’s a simple screen swap or a complex battery replacement, the team at CT Fix Wireless is here to help you get back online.


FAQs

Q: Can I fix a cracked screen with a DIY kit?

A: While kits exist, modern screens are often fused with high-strength adhesives. Without professional heat guns and suction tools, you risk damaging the delicate ribbon cables or the FaceID/TouchID sensors.

Q: Is it worth repairing an older phone?

A: Generally, if the repair cost is less than 50% of the cost of a used version of that same phone, it’s a smart investment—especially to recover your data.


Disclaimer

The information provided in this post is for educational purposes only. Handling damaged lithium-ion batteries or opening electronic devices carries risks of fire or electric shock. Please consult a professional technician before attempting any hardware modifications.