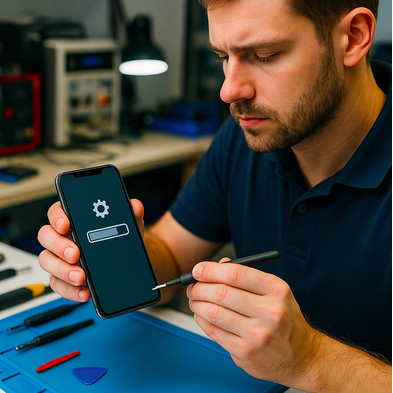
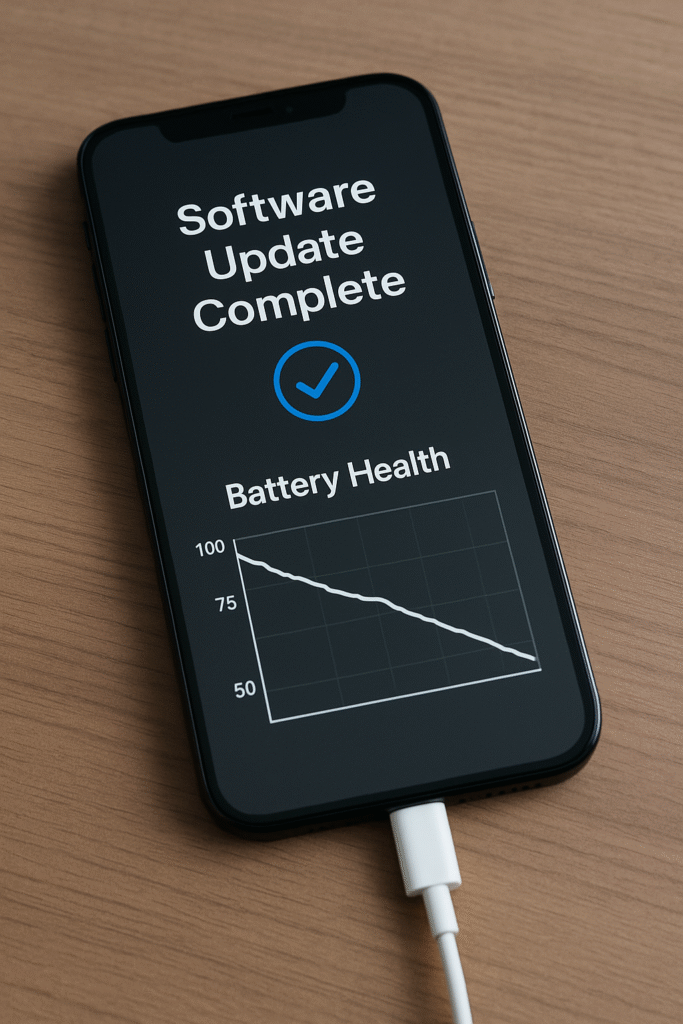
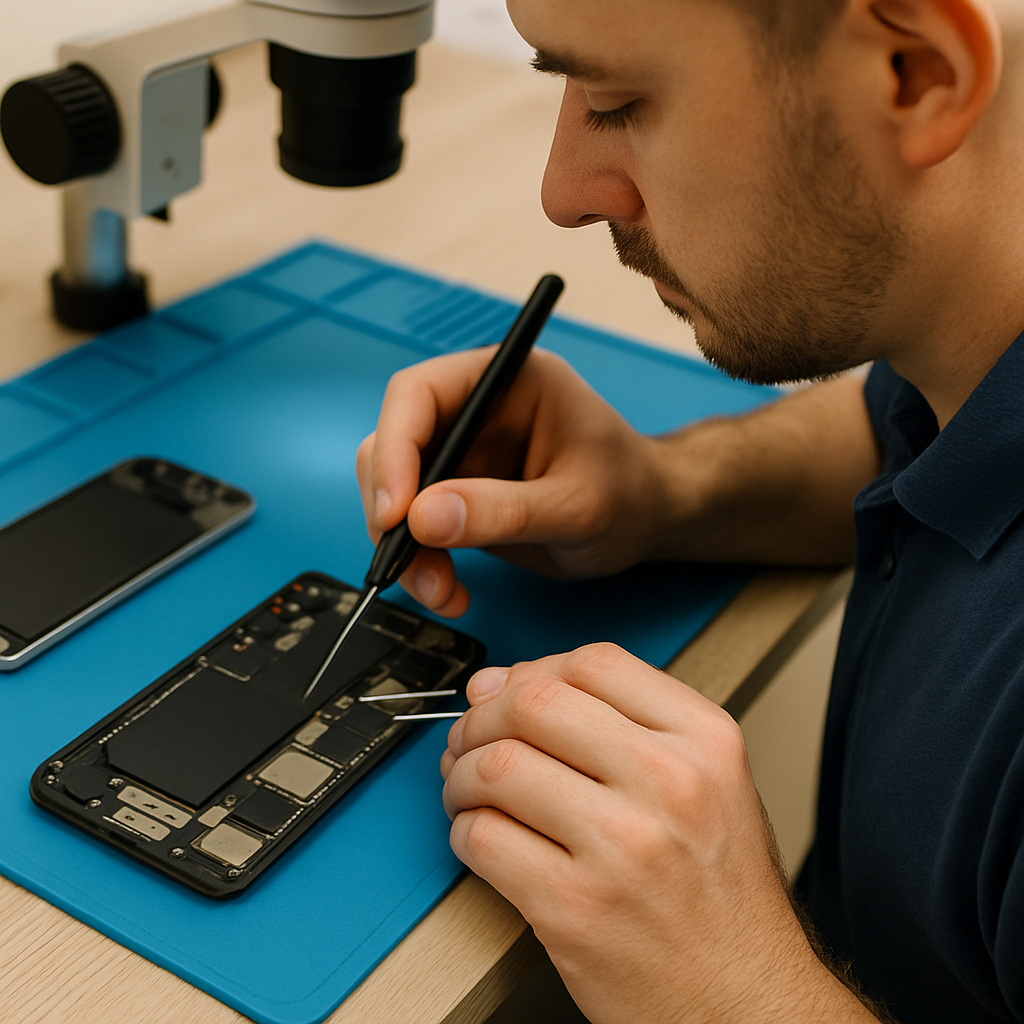
How to Fix a Phone Stuck on the Logo or in a Restart Loop

Written By: Ronnie Gonenc
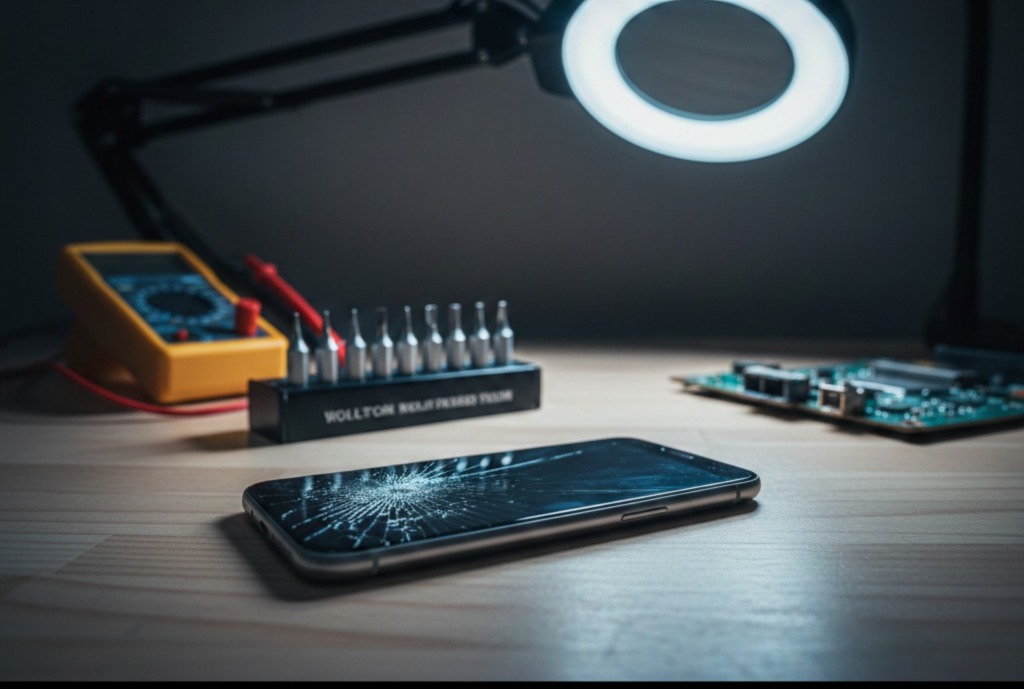
There is a specific kind of sinking feeling that happens when you turn on your phone, see the familiar brand logo, and… nothing. It stays there. Or worse, it shows the logo, goes black, and vibrates before showing the logo again in an infinite, maddening loop.

This is known in the tech world as a “Boot Loop.” It effectively turns your $1,000 piece of cutting-edge technology into a very expensive paperweight. At CT Fix Wireless, this is one of the most common issues we diagnose. The good news? It doesn’t always mean your phone is “bricked.” Often, it is just a software conflict that needs a gentle (or firm) nudge to resolve.

In this guide, we’ll walk through why this happens and the exact steps you can take to break the loop.


Section 1: Why Is My Phone Stuck in a Loop? (Topic Overview)

A boot loop occurs when the device’s Power-On Self-Test (POST) or the operating system (OS) fails to “hand off” to the next stage of the startup process. Think of it like a runner failing to pass a baton in a relay race; the race just stops.

According to repair data from 2025, the primary causes of boot loops include:

  • Failed System Updates: If your phone runs out of battery or loses Wi-Fi during a critical OS update, the system files become “half-written” and unreadable.
  • App Conflicts: Low-level system apps or malware can interfere with the boot sequence.
  • Hardware Fatigue: A failing battery or a stuck power button can trick the phone into thinking it needs to restart constantly.
  • Motherboard Issues: According to Samsung Community experts, chipset corruption (like on the Exynos 9611) can lead to permanent motherboard failure if not addressed.

If your phone is stuck right now, you can get a quick estimate on repair costs using our Instant Quote Widget.


Section 2: Step-by-Step Troubleshooting

1. The “Soft Reset” (Force Restart)

Since you can’t access the on-screen menu, you must use physical buttons to force the hardware to cut power and try again.

  • iPhone 8 and Newer: Press Vol Up, then Vol Down, then hold the Side Button until the Apple logo reappears.
  • Android (Samsung/Pixel/LG): Press and hold the Power + Volume Down buttons for a full 15 seconds.

2. Check the Power Button

This sounds simple, but it’s a “silent killer.” If your power button is jammed or dirty, it might be sending a constant “Restart” signal.

  • The Fix: Rapidly click the power button 10–20 times to dislodge any debris. Use a tiny bit of 90% isopropyl alcohol on a Q-tip to clean around the edges of the button.

3. Enter Recovery Mode & Wipe Cache

Wiping the “Cache Partition” is a lifesaver. It deletes temporary system files that might be corrupted without touching your photos or messages.

  1. Turn the device off (or wait for it to restart).
  2. Hold Volume Up + Power (on most Androids) until you see a text-based menu.
  3. Use the volume keys to highlight “Wipe Cache Partition” and press Power to select.
  4. Once finished, select “Reboot System Now.”

4. Remove the SIM and SD Card

Sometimes a corrupted SD card or a shorted SIM card can prevent the OS from mounting the file system properly. Pop the tray out and try booting the phone “naked.”


Section 3: When to Seek Professional Help

If you have tried a factory reset and the phone still gets stuck on the logo, the issue is likely Physical Hardware. ### Signs of Hardware Failure:

  • The Battery: If your battery is old, it may not be providing enough “peak voltage” to push the phone past the power-heavy boot sequence.
  • Liquid Damage: Even old water damage can cause corrosion on the motherboard that shorts out the boot sequence.
  • Storage IC Failure: The physical memory chip inside your phone can wear out, meaning the phone literally cannot find the operating system to load it.

Before you give up on your device, check out our About Us page to see how our micro-soldering experts handle complex motherboard repairs that big-box stores won’t touch.


Section 4: Final Thoughts and Recommendations

Dealing with a boot loop is stressful, especially when your data isn’t backed up. If your phone finally boots up, the very first thing you should do is perform a full cloud backup.

Summary Checklist:

  1. Try a Force Restart.
  2. Clean your Power Button.
  3. Wipe the Cache Partition in Recovery Mode.
  4. If it’s still stuck, the motherboard or battery likely needs professional attention.

If the repair ends up being too costly, you don’t have to throw the phone away. We offer a Buy and Sell program where you can trade in your damaged device for credit toward a high-quality refurbished model.


External and Internal Links

Internal Links:

External Links:


FAQs

Q: Will a factory reset delete my photos?

A: Yes. A factory reset (Wipe Data) will return the phone to the state it was in when you first opened the box. Always try “Wipe Cache” first, as that does not delete your data.

Q: My phone gets hot while it’s stuck on the logo. Is that normal?

A: It’s common, but not “good.” The processor is working at maximum capacity trying to boot. If the phone gets dangerously hot, unplug it and bring it to a professional immediately.


Disclaimer: The troubleshooting steps provided are for informational purposes. CT Fix Wireless is not responsible for data loss. Please ensure you have backups or consult a professional before performing a factory reset.

How to Fix a Phone Camera That Won’t Open or Shows a Black Screen

Written By: Ronnie Gonenc

There is nothing more frustrating than lining up the perfect shot only to find your phone camera won’t open or, worse, greets you with a void-like black screen. Whether you are trying to capture a once-in-a-lifetime memory or just scanning a QR code for lunch, a malfunctioning camera feels like losing a vital sense.

As a technician with years of experience in mobile diagnostics at CT Fix Wireless, I have seen everything from simple software “brain farts” to total hardware failure. While it’s easy to panic and assume you need a new phone, most camera issues are actually solvable at home. In this guide, we will break down exactly why your camera is acting up and how you can get it back to crystal-clear performance.


Section 1: Why Is My Camera Not Working? (Topic Overview)

When a camera fails to launch or displays a black screen, the culprit usually falls into one of two camps: Software Glitches or Hardware Damage.

According to industry data, nearly 60% of smartphone “camera failures” reported to repair centers are actually software-related conflicts that can be fixed without opening the device. However, if your phone recently took a tumble or went for an accidental swim, the probability of a physical hardware disconnect increases significantly.

Common Symptoms

  • The Black Screen: The app opens, but the viewfinder is pitch black.
  • The Freeze: The app opens but immediately hangs or crashes back to the home screen.
  • “Camera Failed” Error: A system pop-up explicitly tells you the hardware cannot be initialized.

If your camera issues are getting in the way of your day, you can always Contact Us for a professional diagnostic.


Section 2: Key Troubleshooting Steps for Software Issues

Before we assume the camera module is “dead,” we need to rule out the digital gremlins.

1. The Force Restart

This is the “Have you tried turning it off and on again?” of the tech world, and it works surprisingly often. A force restart clears the temporary memory (RAM) and kills any background processes that might be “holding the camera hostage.”

  • For Android: Hold Power + Volume Down for 10 seconds.
  • For iPhone: Quickly press Volume Up, then Volume Down, then hold the Side Button.

2. Check for App Permissions

Modern operating systems (Android 14+ and iOS 17+) have strict privacy controls. If you recently updated your phone or installed a new security app, it might have revoked the camera’s permission to run.

Pro Tip: Go to Settings > Privacy > Permission Manager > Camera and ensure your main Camera app is allowed to “Allow while using the app.”

3. Clear the Cache and Data (Android Only)

Over time, the camera app accumulates “junk” files that can become corrupted.

  • Go to Settings > Apps > Camera > Storage.
  • Tap Clear Cache.
  • If that fails, tap Clear Data (this won’t delete your photos, but it will reset your camera settings like “Grid Lines” or “Beauty Mode”).

4. Test in “Safe Mode”

Safe Mode runs the phone with only the original factory apps. If the camera works in Safe Mode, a third-party app (like Snapchat, Instagram, or a flashlight app) is causing the conflict.


Section 3: Identifying Hardware Problems

If you’ve tried all the software fixes and the screen is still black, we have to look at the physical components.

The “Flashlight Test”

Try to turn on your phone’s flashlight. Since the flashlight and the camera are often part of the same hardware assembly, if the flashlight won’t turn on either, it’s a 99% certainty that the hardware module has been dislodged or damaged internally.

Physical Obstructions and Lens Damage

Sometimes the simplest answer is the right one.

  • Case Interference: Is your new phone case blocking the lens or the laser autofocus sensor?
  • Cracked Lens: Even a hairline fracture in the glass can cause the software to fail as it tries to focus.
  • Internal Moisture: Does the lens look “foggy”? Water damage can short-circuit the camera’s delicate flex cable.

If you suspect hardware damage, it’s best to get an Instant Quote for a repair rather than attempting a DIY fix that could damage the motherboard.


Section 4: Practical Recommendations and Final Thoughts

If you have reached this point and your camera is still non-responsive, it is likely time for a professional part replacement. Replacing a camera module is a standard procedure and is significantly cheaper than buying a brand-new flagship phone.

Final Takeaways:

  1. Always Back Up: Before performing a factory reset (the “nuclear” option), ensure your photos are synced to Google Photos or iCloud.
  2. Avoid DIY: Smartphone cameras are held in by incredibly thin flex cables. One wrong move with a screwdriver can kill the face-ID or fingerprint sensors.
  3. Check Warranty: If your phone is less than a year old and hasn’t been dropped, the manufacturer might cover the repair.

If your phone is older and the repair cost is high, you might even consider our Buy and Sell program to trade in your broken device for a refurbished one.


FAQs

Q: Will clearing the camera data delete my gallery?

A: No. Clearing the “Data” or “Cache” in the app settings only removes the app’s internal configuration files. Your photos are stored in a separate directory and will remain safe.

Q: My front camera works, but the back one is black. Is it software?

A: Usually, no. If one camera works and the other doesn’t, it almost always points to a hardware failure in that specific module.


Disclaimer: The information provided in this post is for educational purposes. Performing DIY repairs can void your warranty. If you are unsure, please consult a professional technician.

DIY vs. Professional Computer Repair: When to Fix It Yourself and When to Call CT Fix Wireless

Written By: Ronnie Gonenc

A side-by-side conceptual image showing a cluttered home DIY computer repair setup with a screwdriver versus a clean, professional technician workstation with high-end diagnostic tools and an anti-static mat.

We’ve all been there: your computer starts acting sluggish, the “Blue Screen of Death” makes an appearance, or a glass of water takes a sudden tumble onto your keyboard. Your first instinct? Open YouTube, search for a tutorial, and grab a screwdriver. It looks easy on screen, but as anyone who has ever ended up with “extra screws” after a repair knows, the reality is far more complex.

In the world of tech, the line between a “quick fix” and a “total loss” is razor-thin. While DIY culture is booming, your computer—whether it’s a high-end gaming rig or a vital work laptop—is a sensitive piece of financial and personal infrastructure. This guide is designed to help you navigate that line. We’ll look at the actual costs of professional repair in 2025, the hidden risks of going solo, and exactly when you should put the tools down and let the experts at CT Fix Wireless take over.


Section 1: The Computer Repair Landscape in 2025

Computer technology has reached a point where components are more powerful—but also more proprietary and delicate—than ever before. In 2025, the average cost of a professional computer repair typically ranges from $88 to $220, depending on the complexity. While this might seem like a cost you’d want to avoid, compare it to the price of a new mid-range laptop, which now frequently starts at $1,200+.

The “Rule of Thumbs” for 2025:

  • The Age Factor: If your device is under 4 years old, it is almost always worth repairing. If it’s over 7 years old and struggles with modern apps, it might be time to check out our buy/sell options.
  • The 50% Rule: Industry experts generally agree: if a repair costs more than 50% of the price of a new, comparable machine, a replacement is the smarter financial move.
  • The Data Value: Data is often more valuable than the hardware. According to recent data security reports, 16 billion passwords were leaked or compromised in 2025 alone. A botched DIY repair doesn’t just break a screen; it can expose your drive to corruption or permanent data loss.

Section 2: When Is It Safe to DIY?

Not every glitch requires a trip to the shop. There are several maintenance tasks that are perfectly safe (and encouraged) for a confident user to handle.

1. Software Maintenance & Optimization

If your computer is just “slow,” the problem is often digital, not physical.

  • What you can do: Run malware scans, uninstall “bloatware,” and manage your startup programs.
  • Risk Level: Low. As long as you aren’t deleting system files, you’re safe.

2. Basic Component Swaps (Desktops Only)

Desktop PCs are modular by design.

  • What you can do: Upgrading RAM or adding a new SSD is usually a “plug-and-play” process.
  • Risk Level: Moderate. You must ground yourself to avoid Electrostatic Discharge (ESD), which can fry a motherboard instantly.

3. Peripheral Replacements

  • What you can do: Replacing a mouse, external keyboard, or a monitor cable.
  • Risk Level: Zero.

Section 3: The Danger Zone—Why DIY Often Costs More

The temptation to save $100 on labor can lead to a $1,000 mistake. Here are the most common ways DIY goes wrong:

The Static Enemy (ESD)

You can’t see it, feel it, or smell it, but a tiny spark of static electricity from your fingertip can kill a semiconductor. Professional shops use anti-static mats and wrist straps; most home “technicians” work on carpets or wooden tables, unknowingly shortening the life of their components.

The “One Wrong Screw” Mistake

Modern laptops use dozens of screws of varying lengths. If you put a “long” screw into a “short” hole, you can pierce the motherboard or the battery. This is known as “Long Screw Damage,” and it is often unrepairable.

Accidental Data Loss

When you open a device to fix a hardware issue, you are centimeters away from the storage drive. One slip of a metal pry tool can scratch the drive or cause a short circuit that wipes your photos, tax returns, and work documents. At CT Fix Wireless, we prioritize data preservation above all else.

Repair TypeDIY DifficultyRisk to DataProfessional Recommendation
Virus RemovalLowLowDIY if you have good software
RAM UpgradeMediumLowSafe for desktops; Pros for laptops
Screen ReplacementHighModerateCall the Pros
Water DamageExtremeHighProfessional Only
Logic Board RepairExtremeHighProfessional Only

Section 4: When to Call CT Fix Wireless

There are specific scenarios where professional intervention isn’t just a convenience—it’s a necessity.

  1. Water or Liquid Damage: Time is your enemy. Corrosion starts the second liquid hits the board. We use ultrasonic cleaners and specialized chemicals to stop the rot before it’s too late.
  2. No Power / “Dead” Device: If your computer won’t turn on, it could be a power supply, a battery, or a logic board short. Our diagnostic testing identifies the root cause so you don’t waste money buying parts you don’t need.
  3. Laptop Screen & Hinge Repair: Laptops are incredibly cramped. Replacing a screen requires delicate routing of Wi-Fi antennas and camera cables. One wrong move and your “fixed” screen has no internet.
  4. Game Console Issues: From HDMI port replacements to overheating, consoles require high-heat soldering that home irons simply can’t handle.

Conclusion: Peace of Mind vs. The Headache

DIY is great for a hobby, but when your livelihood or your memories are on the line, professional repair is an investment in reliability. A professional repair comes with a warranty, expert diagnostics, and—most importantly—the assurance that your data is safe.

Before you start unscrewing that case, ask yourself: Is saving the labor fee worth the risk of losing the entire device? If the answer is no, we’re here to help. From iPhone repairs to complex tablet fixes, the team at CT Fix Wireless has the tools and the training to do it right the first time.


FAQs

Q1: Is it cheaper to repair or replace a laptop in 2025?

A1: It depends on the age. If the laptop is under 5 years old, a repair (usually $150–$300) is much cheaper than a new machine ($800–$1,500). If it’s over 7 years old, the hardware may be too slow for modern security updates.

Q2: Will opening my laptop void my warranty?

A2: In many cases, yes. Most manufacturers use “warranty void if removed” stickers. A certified technician can often perform repairs that maintain the integrity of your device.


Disclaimer

This content is for informational purposes only. Attempting hardware repairs can lead to electrical shock, fire, or permanent device damage. Always disconnect power sources before attempting any work and consult a professional for complex issues.

Beyond the Screen: Why Your Phone’s Logic Board is the Most Critical Repair

Written By: Ronnie Gonenc

Close-up professional micro-soldering repair on a smartphone logic board using precision tweezers and a microscope under bright laboratory lighting.

We have all been there. Your phone slips, hits the pavement, and your heart sinks. You check the screen—it’s perfect. You breathe a sigh of relief, only to realize minutes later that the phone won’t turn on, won’t charge, or has completely lost its Wi-Fi signal. This is the moment you realize that a smartphone is far more than just a glass display; it is a complex ecosystem powered by a single, central nervous system: the logic board.

While screen cracks are the most visible injuries a phone can sustain, logic board failures are the most critical. As a senior technician with years of experience in high-level micro-soldering and board diagnostics, I can tell you that a faulty logic board is essentially “heart failure” for your device. Most general repair shops will tell you a dead board means a dead phone. At CT Fix Wireless, we know that isn’t true.

This guide dives deep into the high-stakes world of logic board repair—a category often classified under YMYL (Your Money or Your Life) because it involves significant financial decisions and the potential loss of irreplaceable personal data. Understanding this component is the difference between saving your digital life and spending $1,000 on a new device prematurely.


Section 1: The Logic Board—A Topic Overview

The logic board (often called the motherboard in the Android world) is the primary circuit board that houses the CPU, memory, and every connector that makes your phone a “smart” device. If the screen is the face, the logic board is the brain. It coordinates every single action, from the haptic vibration of a text message to the complex encryption of your banking apps.

Why Logic Board Health Matters

Unlike a battery or a charging port, which are modular components that can be “swapped” out, the logic board is a singular piece of multi-layered fiberglass and copper. According to industry data from Grand View Research, the consumer electronics repair market is projected to reach over $25 billion by 2030, largely driven by the increasing complexity of these internal components.

Common Concerns for Users:

  • Data Security: Because the storage chips (NAND) are soldered directly onto the logic board, a board failure often means your photos and contacts are trapped.
  • Cost vs. Value: Replacing a board through a manufacturer like Apple can cost upwards of $500 to $700, often making a new purchase seem like the only option.
  • Reliability: Many fear that once a board is “touched” by a technician, the phone will never be the same.

Section 2: Key Information & Technical Insights

To understand why this repair is so critical, we have to look at what actually goes wrong. Logic board issues aren’t just “broken”; they are microscopic disruptions in electrical flow.

Sub-section 1: The Science of Micro-Soldering

Modern logic boards use Surface Mount Technology (SMT), where components are so small they require a microscope to see. A grain of sand is often larger than the resistors and capacitors we handle daily.

Repairing these requires micro-soldering, a specialized skill where technicians use high-heat precision irons and hot air stations to replace individual Integrated Circuits (ICs). For example, if your iPhone has “Touch Disease” or “Audio IC” issues, it isn’t a broken screen or speaker—it’s a microscopic fracture in the solder joints on the logic board itself.

Sub-section 2: The Main Culprits of Failure

  1. Water Damage: This is the #1 killer. While many phones are “water-resistant,” they are not waterproof. Liquid creates corrosion that bridges electrical connections, causing a “short circuit.”
  2. Heat Stress: Prolonged gaming or using a faulty charger can cause the CPU to overheat, eventually weakening the solder balls that hold it to the board.
  3. Physical Impact: A hard drop can cause the logic board to flex. While the glass might survive, the tiny traces (internal wires) inside the board can snap.

Expert Insight: Statistics from the Consumer Technology Association (CTA) suggest the average lifespan of a smartphone is 2.5 to 3 years. However, high-quality logic board repairs can extend that lifespan by another 2 years, saving consumers hundreds of dollars.


Section 3: Practical Advice & Recommendations

When your phone stops working, you are at a crossroads. Should you fix it, or is it time to move on?

1. Diagnosing the “Unfixable”

Before you assume your phone is a paperweight, look for these specific “Board-Level” symptoms:

  • No Power: Even with a new battery and charger, the device remains black.
  • Boot Loops: The phone starts to turn on, shows the logo, and dies repeatedly.
  • Missing Functions: Greyed-out Wi-Fi, no audio during calls, or a camera that won’t open despite the hardware being replaced.

2. The 50% Rule

We generally recommend that if a logic board repair costs less than 50% of the device’s current market value, it is worth the investment—especially if you have not backed up your data. You can get an instant quote to see where your device stands.

3. Professional Consultation

Warning: Do not attempt logic board repairs at home. Opening a device without proper ESD (Electrostatic Discharge) protection can instantly fry the CPU. Always consult a technician who specializes in iPhone repairs or tablet repairs and has a proven track record of micro-soldering.


Section 4: Conclusion and Final Thoughts

The logic board is the heart of your digital world. While manufacturers often push for total device replacement, micro-soldering and advanced diagnostics have made logic board repair a viable, eco-friendly, and cost-effective solution. By choosing to repair the “brain” of your phone, you are not just saving a gadget—you are preserving your data and reducing electronic waste.

At CT Fix Wireless, we believe in transparency. Whether it’s a game console or a flagship smartphone, our goal is to provide a repair that lasts. Don’t let a “dead” phone dictate your budget.


FAQs

Q1: Will I lose my data during a logic board repair?

A1: Unlike a factory reset or a full board replacement from the manufacturer, a component-level repair aims to fix the existing board. This is often the only way to recover data from a dead phone. However, data can never be 100% guaranteed in cases of severe damage.

Q2: Is a logic board repair as reliable as a new phone?

A2: If performed by a certified professional using high-quality parts, yes. A repaired board is often sturdier than it was before, as common weak points (like under-filled ICs) are reinforced during the process.


Disclaimers

The information provided in this post is for educational purposes only. Smartphone repairs involve high-voltage components and delicate circuitry. CT Fix Wireless is not responsible for damage caused by DIY repair attempts. Please consult a professional for all hardware issues.

5 Warning Signs Your Phone Needs a Professional Repair (Before It’s Too Late)

Written By: Ronnie Gonenc

5 Warning Signs Your Phone Needs a Professional Repair

We’ve all been there: a slight lag when opening an app, a screen that feels a bit warmer than usual, or a tiny hairline crack that “doesn’t really bother anything.” It is tempting to push your device to its absolute limit, especially when a new flagship phone can cost upwards of $1,000. However, as experts in the mobile repair industry with years of hands-on experience at CT Fix Wireless, we’ve seen how a $50 fix today can easily turn into a $300 “total loss” tomorrow.

Your smartphone is essentially a high-powered computer condensed into a palm-sized frame. Because the components are so tightly packed, a failure in one area—like a degrading battery or a microscopic crack—can quickly cascade into catastrophic motherboard failure. According to industry data from Business Research Insights, over 70% of global mobile users experience battery or screen-related issues annually.

In this guide, we will break down the five most critical “red flags” that indicate your device is crying out for professional help. Taking action now isn’t just about convenience; it’s about protecting your data and your wallet.


1. The “Ghost” in the Machine: Unresponsive or Ghost Touching

If your phone starts opening apps on its own, typing random characters, or refusing to acknowledge your swipes, you’re experiencing what the industry calls “Ghost Touching.”

Why This Happens

This usually points to a failing digitizer—the thin layer of glass integrated into your screen that converts your touch into digital signals. While it might feel like a software bug, it is almost always a hardware integrity issue. According to a study by the Canadian Institute for Device Repairs, screen-related damages account for over 50% of all professional repair requests.

The Professional Fix

Often, users try to “clean” the screen or restart the phone, but if the internal connectors are loose or the digitizer is compressed, you need a physical replacement. At our iPhone Repairs section, we frequently see this issue after a minor drop that didn’t even break the outer glass but shifted the internal layers.


2. Excessive Heat (Even When You Aren’t Using It)

It’s normal for a phone to get warm while playing a high-intensity game or charging. However, if your phone feels hot to the touch while sitting idle in your pocket or on your nightstand, you have a serious problem.

The Hardware Risk

Persistent overheating is a “silent killer” for internal electronics. Excessive heat can cause:

  • Solder Joint Fatigue: Microscopic connections on the motherboard can literally melt or crack.
  • Processor Throttling: Your phone will purposefully slow down to stay cool, leading to permanent lag.
  • Safety Hazards: A battery that stays hot is at risk of “thermal runaway.”

According to reports from Asurion, lithium-ion batteries typically have a lifespan of 2 to 3 years. If yours is overheating frequently, the internal chemical resistance has likely increased to a dangerous level. You can check our Other Device Repairs page to see how we handle thermal diagnostics for various brands.


3. The “Expanding” Phone: Screen or Back Panel Lifting

This is the one sign you must never ignore. If you notice a gap between the screen and the frame, or if the back of your phone looks slightly “pregnant” or bloated, your battery has failed.

The Science of Battery Swelling

Lithium-ion batteries produce gas as a byproduct of chemical degradation or overcharging. This gas is trapped inside the battery casing, causing it to swell.

Warning: A swollen battery is a fire hazard. Do not attempt to “press” the screen back down, as puncturing the battery can lead to an immediate fire or explosion.

If you see this, stop using the device immediately and contact us for a safe disposal and replacement.


4. Erratic Charging and Port Connection Issues

Do you have to wiggle your charging cable at a “magic angle” just to get a connection? While many people assume they just need a new cable, the culprit is usually the charging port (USB-C or Lightning port).

Common Causes

  1. Mechanical Wear: Plugging and unplugging thousands of times eventually loosens the port from the motherboard.
  2. Corrosion: Even tiny amounts of moisture (like steam from a shower) can corrode the pins.
  3. Debris: Pocket lint can become compacted inside the port, preventing a full connection.

While you can try to gently clean the port with a non-conductive toothpick, professional repair is often needed to re-solder the connection or replace the port entirely. For larger devices, check our Tablet Repairs section, as charging ports on tablets are particularly prone to stress-related damage.


5. Rapid Battery Drain and Random Shutdowns

If your phone is at 40% and suddenly dies, or if it drops 20% in ten minutes, your battery’s “health” has plummeted.

Why DIY Calibration Rarely Works

Many online “hacks” suggest calibrating the battery by draining it to 0%. However, modern smartphones use sophisticated Battery Management Systems (BMS). If the hardware cells are physically degraded, no amount of software resetting will fix it. In 2025, with the rise of Right to Repair laws, it is easier than ever for professionals to swap these out with high-quality OEM parts.

If you aren’t sure if your battery is the problem or if it’s a motherboard short, you can get an instant quote widget estimate to see the cost of a professional diagnostic and repair.


Expert Recommendations: What Should You Do Now?

If your device is showing even one of these signs, the clock is ticking. Here is a quick checklist for your next steps:

  • Backup Your Data: Before a hardware failure becomes permanent, ensure your photos and contacts are in the cloud.
  • Consult a Professional: A certified technician can use a multimeter to check for voltage irregularities that aren’t visible to the naked eye.
  • Evaluate Repair vs. Replacement: Sometimes, the cost of repair is close to the value of the phone. In those cases, we recommend checking out our Buy and Sell options to trade in your damaged device for a refurbished model.

Statistics to Consider

  • 85% of adults worldwide now own a smartphone, making the demand for quality repair higher than ever (Business Research Insights).
  • 5.2% Annual Growth: The repair market is expanding as people realize that fixing a device is more sustainable and cost-effective than buying a new one every 18 months (Deep Market Insights).

Conclusion: Don’t Wait Until It’s a Paperweight

Your phone is your lifeline—it’s how you work, stay in touch with family, and manage your life. Ignoring small warning signs is a gamble where the stakes are your data and your safety. By catching these issues early, you can extend the life of your device by years.

Whether it’s a simple screen swap or a complex battery replacement, the team at CT Fix Wireless is here to help you get back online.


FAQs

Q: Can I fix a cracked screen with a DIY kit?

A: While kits exist, modern screens are often fused with high-strength adhesives. Without professional heat guns and suction tools, you risk damaging the delicate ribbon cables or the FaceID/TouchID sensors.

Q: Is it worth repairing an older phone?

A: Generally, if the repair cost is less than 50% of the cost of a used version of that same phone, it’s a smart investment—especially to recover your data.


Disclaimer

The information provided in this post is for educational purposes only. Handling damaged lithium-ion batteries or opening electronic devices carries risks of fire or electric shock. Please consult a professional technician before attempting any hardware modifications.
How to Fix Your Phone’s Wi-Fi or Bluetooth Not Connecting to Devices

Written By: Ronnie Gonenc

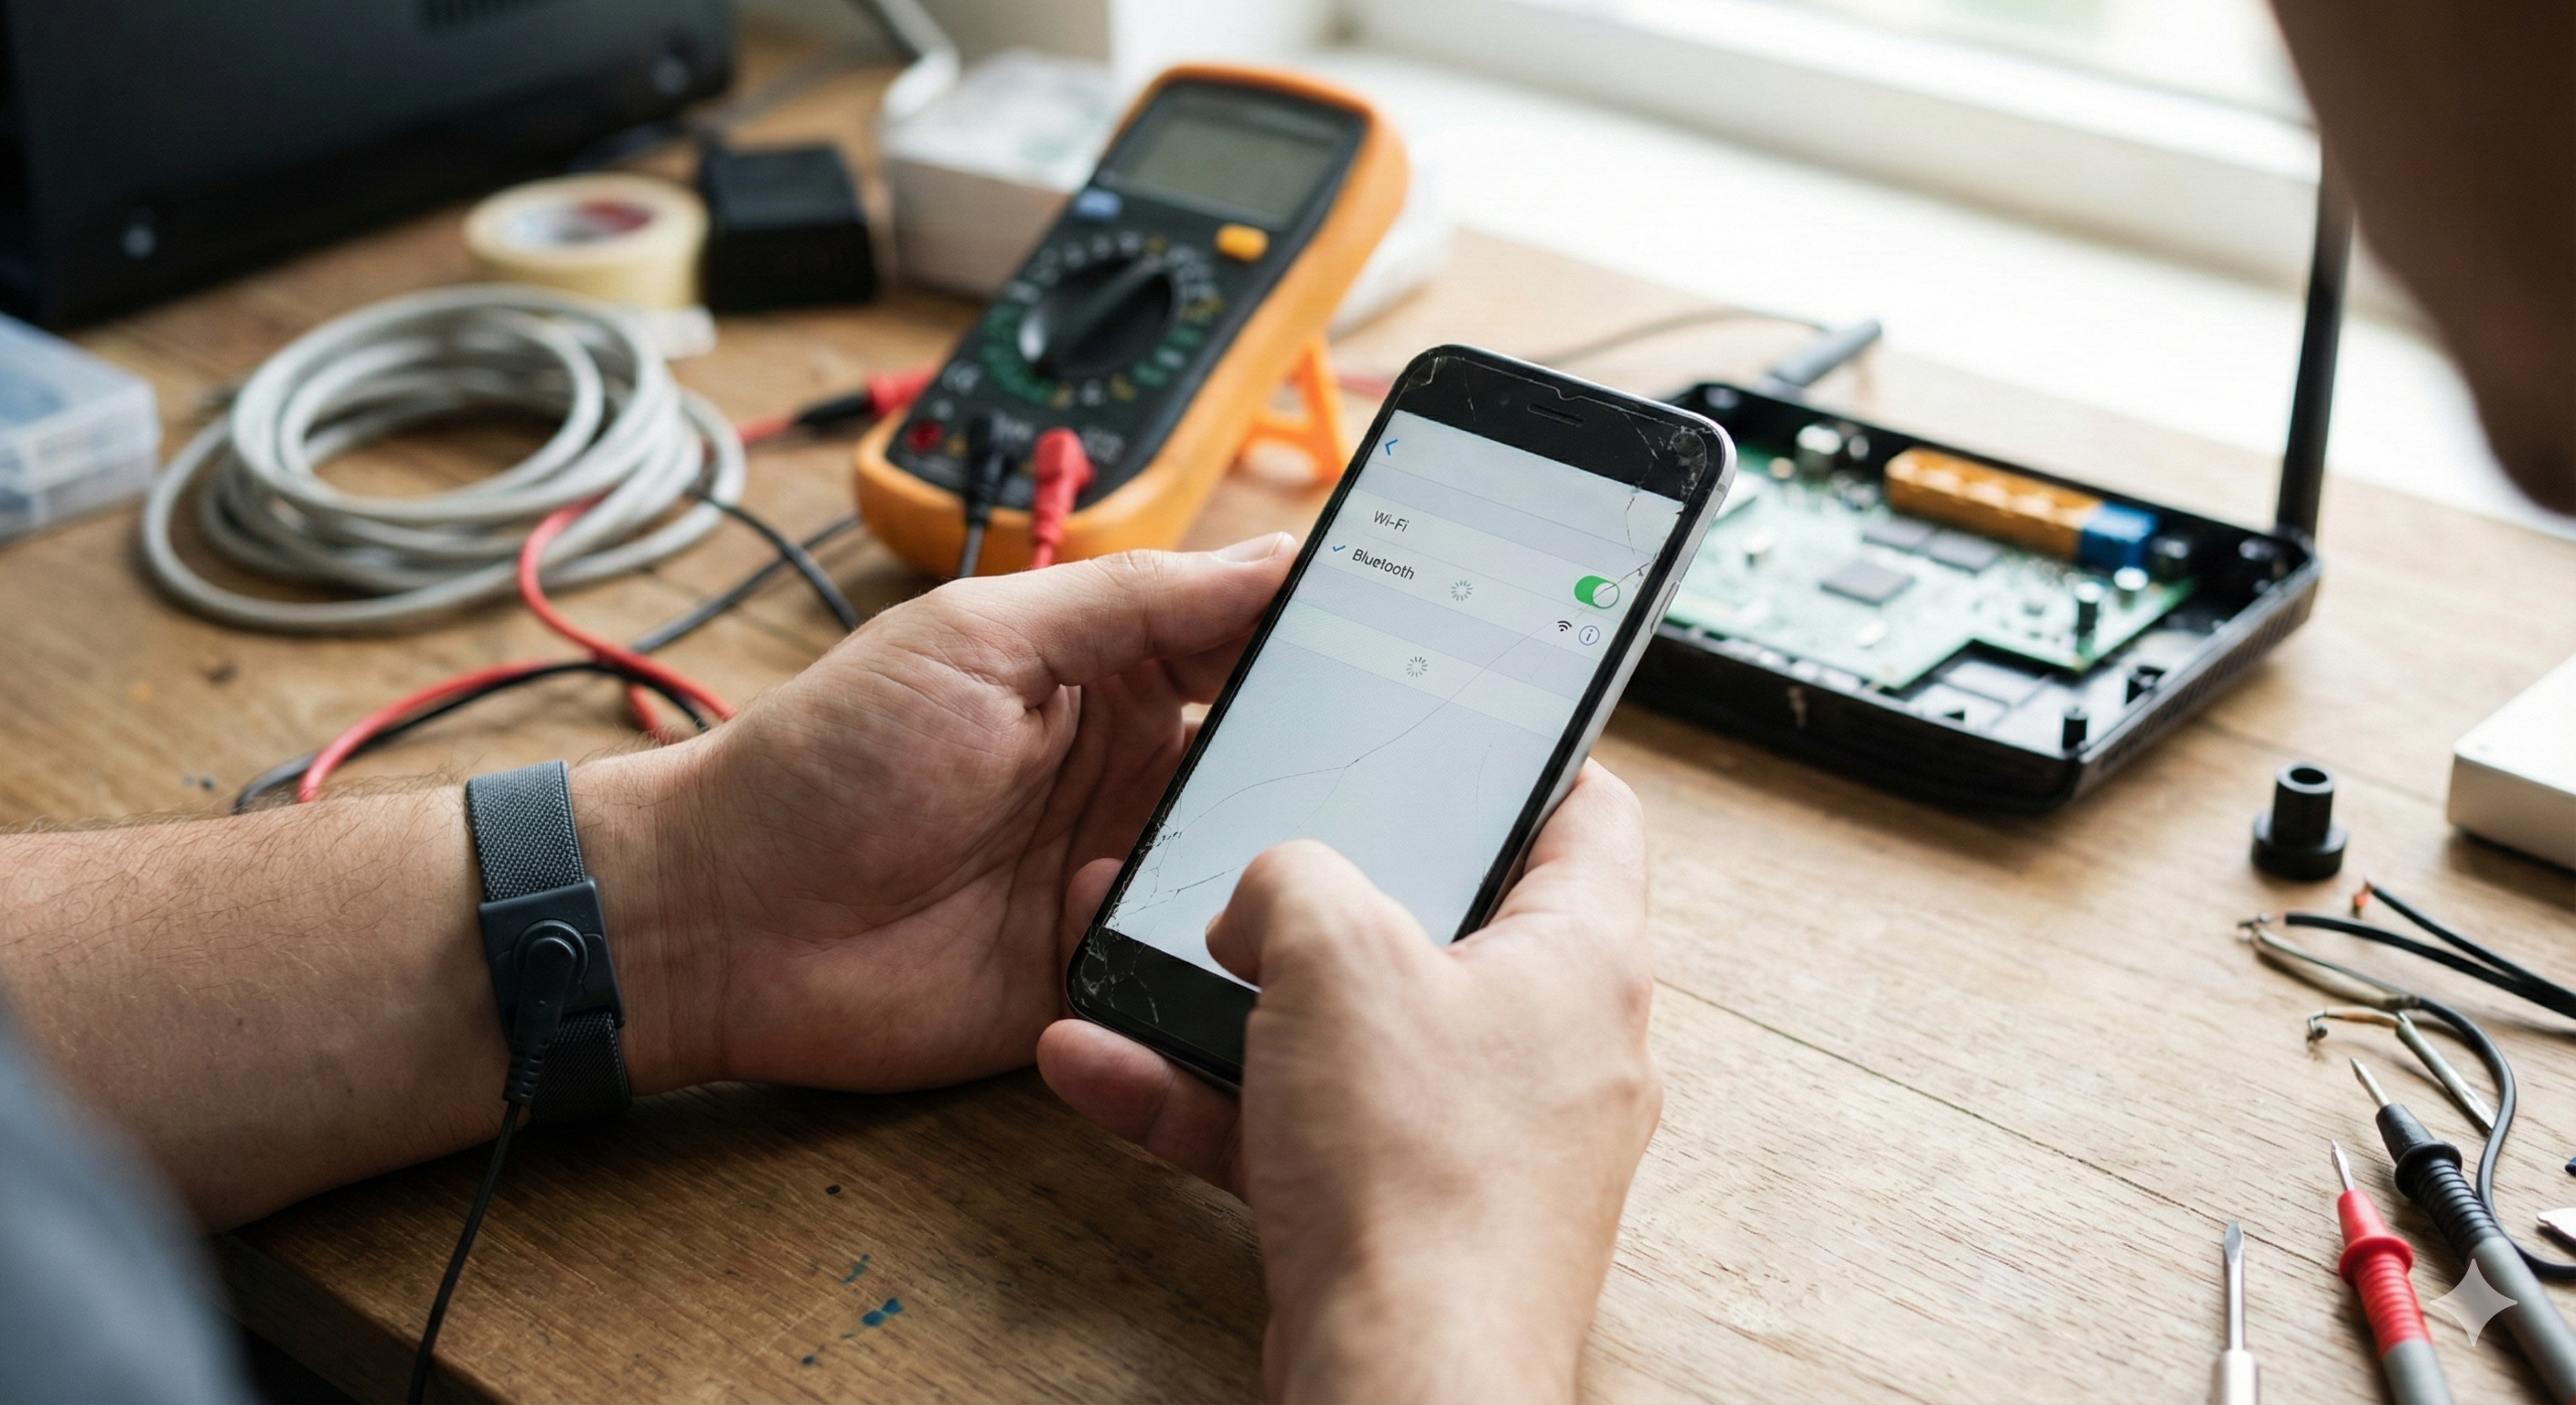
A technician's hands holding a smartphone with a cracked screen displaying Wi-Fi and Bluetooth connection settings on a busy repair workbench with tools and a multimeter.

There is nothing quite as frustrating as seeing the “Connected, No Internet” message or watching your Bluetooth headphones refuse to pair right before a workout. We live in a wireless world, and when that invisible tether snaps, your smartphone feels a lot less “smart” and a lot more like a paperweight.

At CT Fix Wireless, we see connection issues all the time. Customers often come in convinced their phone is broken beyond repair because it won’t connect to their car or home network. The truth? 80% of the time, this is a software conflict or a “digital knot” that needs untangling. The other 20%? That’s usually hardware damage to the antenna, often caused by a drop you might have forgotten about.

In this guide, I’m going to walk you through the troubleshooting hierarchy we use in our shop. We will start with the simple resets and move all the way down to the hardware diagnostics. Let’s get you reconnected.


Section 1: The “Digital Handshake” (Why Connections Fail)

Before we start pressing buttons, it helps to understand why this happens. Both Wi-Fi and Bluetooth rely on radio waves to “shake hands” with a router or another device.

Sometimes, that handshake gets interrupted. This can happen because:

  1. Software Glitches: A driver crashed in the background.
  2. Corrupted Profiles: The saved data for “Home Wi-Fi” or “Toyota Camry” is corrupted.
  3. Interference: Physical walls or other electronic devices are jamming the signal.

The goal of troubleshooting is to force your phone to forget the bad handshake and start a fresh one.


Section 2: The Easy Fixes (Try These First)

Don’t roll your eyes—these simple steps fix about half of the devices that come across our counter.

1. The Airplane Mode Toggle

This is the quickest way to refresh your phone’s radios without a full restart.

  • How to do it: Swipe down to access your control center. Tap the Airplane icon to turn it On. Wait 30 seconds. Tap it again to turn it Off. This forces the Wi-Fi and Bluetooth chips to power down and restart their search for signals.

2. The “Forget” Method

If your Bluetooth connects but the audio cuts out, or your Wi-Fi connects but doesn’t load pages, the saved profile might be buggy. You need to delete it and reconnect like it’s the first time.

  • For Wi-Fi: Go to Settings > Wi-Fi. Tap the “i” or the gear icon next to your network. Select “Forget This Network.” Then, tap the network again and re-enter your password.
  • For Bluetooth: Go to Settings > Bluetooth. Find the device giving you trouble. Tap the info icon and select “Unpair” or “Forget This Device.” Put your accessory back into pairing mode and try again.

3. Restart the Other Device

It’s not always your phone’s fault. If your Wi-Fi isn’t working, pull the power plug on your router for 60 seconds and plug it back in. If your headphones won’t pair, factory reset the headphones (usually by holding the power button for 10+ seconds).


Section 3: Deep Dive into Bluetooth Issues

Bluetooth is notoriously finicky. If the basics didn’t work, here are the pro tips.

Clear the Bluetooth Cache (Android Only)

On Android, Bluetooth is an app like any other system process. Its temporary data (cache) can get corrupted.

  1. Go to Settings > Apps.
  2. Tap the sort icon or menu and select “Show System Apps.”
  3. Find Bluetooth in the list.
  4. Tap Storage and then Clear Cache. (Do not clear “Data” unless you want to lose all your paired devices).

Check for Interference

Did you know USB 3.0 cables and microwave ovens operate on a frequency very close to Bluetooth (2.4GHz)? If you are standing next to a running microwave or have a poorly shielded hard drive plugged into your laptop, it can kill your Bluetooth connection. Move away from other electronics and test again.


Section 4: Deep Dive into Wi-Fi Issues

If your Wi-Fi is greyed out or constantly drops, try these specific settings.

Disable “Private Wi-Fi Address” (Temporarily)

Newer iPhones and Androids use a feature that randomizes your MAC address (your device’s ID card) for privacy. Some older home routers hate this feature and will block the connection.

  • iPhone: Settings > Wi-Fi > Tap the “i” icon > Toggle off Private Wi-Fi Address.
  • Android: Settings > Wi-Fi > Network Details > Privacy > Switch to Use Device MAC.

Reset Network Settings (The Magic Fix)

This is the most effective software fix available. Note: This will wipe all your saved Wi-Fi passwords and Bluetooth pairings. It will not touch your photos, contacts, or apps.

  • iOS: Settings > General > Transfer or Reset iPhone > Reset > Reset Network Settings.
  • Android: Settings > System > Reset Options > Reset Wi-Fi, mobile & Bluetooth.

After the phone reboots, you will have to re-enter your Wi-Fi password. If the issue was software-related, this usually fixes it.


Section 5: Hardware Failure (When to Call a Pro)

If you have done a Network Settings Reset and the issue persists, or if the Wi-Fi/Bluetooth toggle is “greyed out” (you can’t even tap it), you are likely dealing with hardware damage.

The Antenna

Your phone has delicate antenna lines running through the frame. A hard drop can crack these lines or pop the connector off the motherboard. If you have weak signal even when standing next to the router, it’s usually an antenna issue.

The Wi-Fi/Bluetooth Chip

On motherboard-level repairs, the actual chip responsible for wireless connections can overheat or desolder. This is common in phones that have been exposed to moisture. If your phone took a swim recently, corrosion might be eating away at the Bluetooth circuits.

This is where we come in. Diagnosing a motherboard issue requires opening the phone and using a multimeter. You can get an idea of what a repair might cost by using our Instant Quote Widget.

If you aren’t sure if you want to repair it, visit our About Us page to learn how we handle diagnostics. We believe in being honest—if the repair costs more than the phone is worth, we will tell you.


Section 6: Is It Time to Upgrade?

Sometimes, older phones just can’t keep up with modern router protocols (like Wi-Fi 6) or new Bluetooth 5.0 accessories. If you are holding onto an iPhone 6 or a Galaxy S7, the hardware simply might be too old to maintain a stable connection with modern tech.

In that case, repairing it might not be the best investment. You might be better off trading it in. Check out our Buy and Sell section to see what your device is worth and browse our inventory of newer, certified pre-owned phones.


Conclusion

Connection issues usually fall into one of two buckets: a confused software system or a broken hardware component. By following the “Forget, Reset, Restore” method, you can fix the majority of these problems at home in under ten minutes.

However, if your Wi-Fi button is greyed out or your signal is persistently weak despite a reset, don’t suffer through data overage charges. It’s likely a hardware fix that we can handle quickly.

Need help identifying the problem? Reach out to us directly via our Contact Us page. We are here to get you back online.


FAQs

Q1: Why is my Wi-Fi button greyed out and I can’t turn it on? A1: This is almost always a hardware failure. It usually points to the Wi-Fi IC (chip) on the motherboard being damaged or disconnected, often due to a drop or overheating. A standard software reset rarely fixes this; it requires professional repair.

Q2: Will resetting network settings delete my photos? A2: No. Resetting network settings only deletes wireless information: saved Wi-Fi networks/passwords, Bluetooth pairings, and VPN settings. Your photos, apps, contacts, and messages are 100% safe.

Q3: Why does my Bluetooth audio skip or stutter? A3: This is often caused by interference. If your phone is in your back pocket, your body can actually block the signal (water blocks radio waves). It can also happen if you have too many apps open in the background using up your phone’s processing power.


Disclaimer

This guide is for informational purposes. While software resets are safe, opening your device to check antennas or hardware components can void your warranty and cause damage if not done correctly. CT Fix Wireless is not liable for damages resulting from DIY repair attempts. For hardware issues, professional service is recommended.

How to Fix a Phone Microphone Not Working During Calls or Recordings

Written By: Ronnie Gonenc

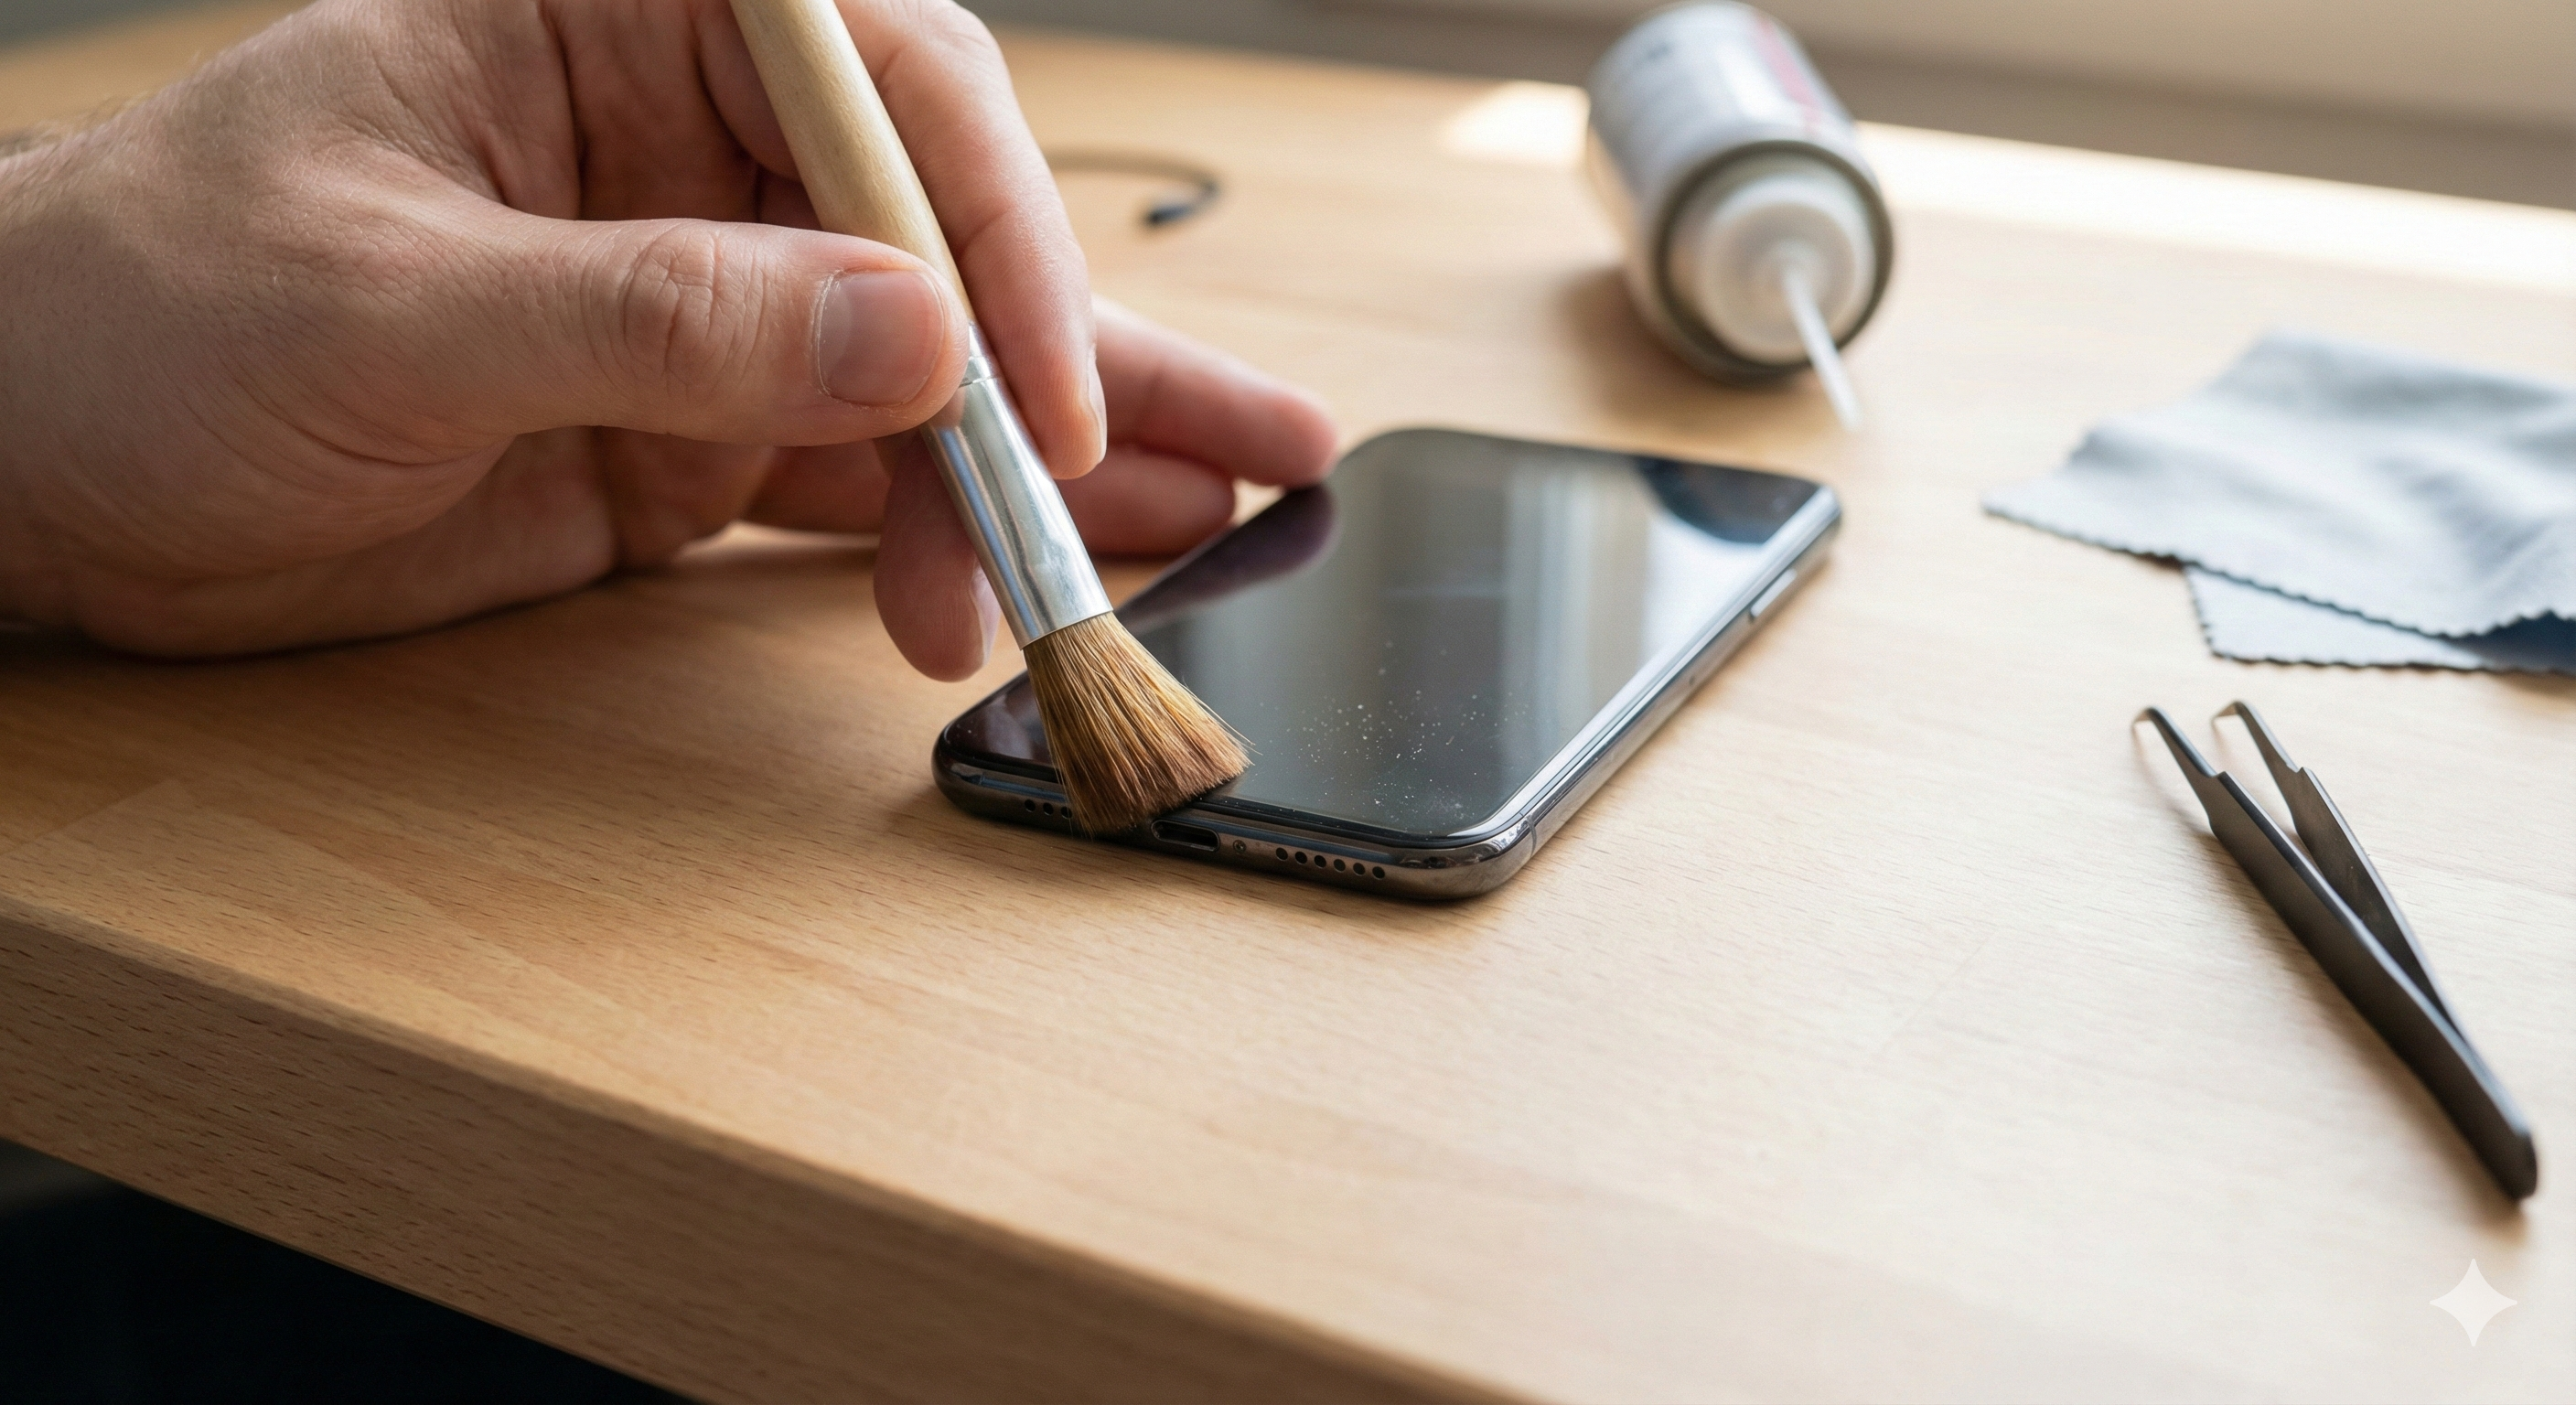
A close-up view of a hand using a small brush to gently clean dust from a smartphone's microphone port on a wooden workbench.

There are few things more annoying than picking up an important call, saying “Hello?”, and being met with dead silence—or worse, the person on the other end shouting, “I can’t hear you!” It turns your smartphone into a glorified pager instantly.

Whether you are trying to record a voice memo, send a WhatsApp audio note, or just talk to your mom, a malfunctioning microphone stops communication in its tracks. As mobile repair experts at CT Fix Wireless, we see this issue walk through our doors almost every single day. The good news? It isn’t always a catastrophic hardware failure. In fact, about half the time, the issue is caused by software glitches, permission settings, or just a little bit of pocket lint jammed in the wrong spot.

In this guide, I’m going to walk you through the exact troubleshooting steps our technicians use to diagnose and fix microphone issues. We will start with the easy, at-home fixes and move toward the more complex diagnostics. While this advice is safe for most users, please remember that smartphones are complex pieces of technology. If you are unsure about opening your device or performing a deep clean, it is always safer to seek professional help to avoid causing further damage.


Section 1: Diagnosing the Problem (Is it Hardware or Software?)

Before we start poking around with toothbrushes or resetting settings, we need to figure out exactly what is broken. Modern smartphones usually have multiple microphones. There is the primary one at the bottom for calls, a secondary one near the camera for video recording, and often a third for noise cancellation.

The Voice Memo Test

The quickest way to isolate the issue is to test the mics independently of your network connection.

  1. Open your Voice Recorder or Voice Memos app.
  2. Record a short clip of yourself speaking in a normal voice.
  3. Play it back.

If the audio sounds clear, your main microphone hardware is likely fine, and the issue might be related to your carrier signal or a specific app glitch. If the audio is static-filled, muffled, or completely silent, we are looking at a hardware obstruction or failure.

If you determine early on that this is a hardware issue you don’t want to mess with, you can visit us at CT Fix Wireless to have a look.

The “Specific App” Check

Does the mic work on regular phone calls but fail on Zoom or Instagram? If yes, your hardware is fine. This is a “permissions” issue (which we will cover in Section 3). If it fails everywhere—calls, video, Siri/Google Assistant—you are likely dealing with a physical blockage or a damaged component.


Section 2: Physical Blockages (The Most Common Culprit)

You would be amazed at how much debris a phone collects just by sitting in your pocket or purse. Lint, dust, makeup foundation, and even tiny crumbs can get impacted into the microphone grille. Since the microphone hole is tiny, even a small blockage can reduce sound input by 80% or more.

How to Clean Your Microphone Safely

Warning: Never use a metal pin or needle. You can easily puncture the delicate microphone diaphragm inside.

  1. Inspect with a Light: Use a flashlight to look closely at the microphone hole (usually at the bottom of the phone next to the charging port). If it looks packed with grey or black fuzz, that’s your enemy.
  2. The Toothbrush Method: Take a clean, dry, soft-bristled toothbrush. Gently brush across the microphone opening. Do not jam the bristles in; just brush back and forth to loosen the debris.
  3. Sticky Putty (Blu-Tack): This is a technician favorite. Take a small piece of mounting putty, press it gently over the speaker/mic hole, and pull it away quickly. It grabs the dust without pushing it further inside.
  4. Compressed Air (With Caution): If you use canned air, do not blow it directly into the hole at close range, as the pressure can destroy the mic. Spray from a distance or at an angle to dislodge dust.

If you have cleaned it thoroughly and still get no sound, the blockage might be internal (liquid damage or corrosion). At that point, you might want to stop by our shop. We can give you a better idea of the cost using our Instant Quote Widget.


Section 3: Software Glitches and Settings

If your phone is physically clean, we turn our attention to the software. Updates, rogue apps, and privacy settings can all mute your mic without you realizing it.

1. Check App Permissions

Both iOS and Android have clamped down on privacy, meaning apps have to ask to use the mic. If you accidentally hit “Deny” when you first opened WhatsApp or Skype, the mic won’t work for that specific app.

  • For iPhone: Go to Settings > Privacy & Security > Microphone. Ensure the toggle is green next to the app you are trying to use.
  • For Android: Go to Settings > Apps > (Select App) > Permissions > Microphone and select “Allow only while using the app.”

2. The “Headphone Mode” Glitch

Sometimes, your phone thinks headphones are plugged in when they aren’t. This shuts off the main mic because the phone is waiting for input from a headset mic.

  • Check the icon: Do you see a headphone icon in the status bar?
  • Clean the port: If you have a headphone jack or a charging port, carefully clean it out. Debris here can bridge connections and trick the software.
  • Toggle Bluetooth: Turn off Bluetooth completely. Your phone might be connected to a pair of earbuds sitting in the next room.

3. Noise Cancellation Conflicts

Some phones have a feature called “Noise Reduction” or “Clear Calling.” While intended to help, it can sometimes aggressively filter out your voice if the software glitches. Try searching for “Noise Cancellation” in your settings and toggling it off to see if call quality improves.


Section 4: Advanced Troubleshooting and Resets

If simple settings didn’t fix it, we have to go deeper. These steps rule out operating system corruption.

Safe Mode (Android Only)

Booting into Safe Mode disables all third-party apps.

  1. Press and hold the Power button.
  2. Tap and hold “Power Off” on the screen until “Reboot to Safe Mode” appears.
  3. Once in Safe Mode, make a test call. If the mic works perfectly in Safe Mode, a third-party app you installed (like a call recorder or a voice changer) is causing the conflict. Uninstall your recently downloaded apps one by one.

Reset All Settings (iPhone & Android)

This isn’t a factory reset—it won’t delete your photos or contacts. It just resets Wi-Fi passwords, layout preferences, and audio settings back to default.

  • iPhone: Settings > General > Transfer or Reset iPhone > Reset > Reset All Settings.
  • Android: Settings > General Management > Reset > Reset All Settings.

The Factory Reset (The Nuclear Option)

If absolutely nothing else works, a full Factory Reset is the final software step. Make sure you back up your data first. This wipes the phone clean. If the mic doesn’t work after a factory reset, you can be 99% sure it is a hardware failure.

If you are at the point where you are considering wiping your phone or buying a new one because the repair seems too complex, check out our options to Buy and Sell devices. Sometimes upgrading is more economical than repairing an older model.


Section 5: Hardware Damage & Professional Repair

When software fixes fail, we are looking at physical damage. This falls into three main categories:

1. Water Damage

Did you drop your phone in the sink or use it in a steamy bathroom? Water corruption often hits the microphone first because it’s an open port. Water damage can short-circuit the microphone component or leave behind mineral corrosion that blocks the signal.

2. The “Audio IC” Issue (Specific to Older iPhones)

We see this often in the repair industry, particularly with iPhone 7 and 8 models. A chip on the motherboard responsible for audio (the Audio IC) can loosen due to slight bending of the phone chassis over time. Symptoms include a greyed-out voice memo button and the phone taking a long time to boot up. This requires microsoldering to fix—a specialized repair we handle at CT Fix Wireless.

3. Physical Drop Damage

A hard drop can sever the ribbon cable connecting the microphone to the motherboard. In this case, the microphone module simply needs to be replaced.

If you suspect hardware damage, DIY fixes are risky. You could accidentally damage the charging port or the screen while trying to access the mic. We recommend you read more about our team and our philosophy on safe repairs on our About Us page. We believe in transparent, honest repairs.


Section 6: When Should You Call a Pro?

You should seek professional help if:

  • You have cleaned the port and done a factory reset, but the issue persists.
  • The phone has been exposed to liquid.
  • You are experiencing other audio issues simultaneously (like the speaker not working).

Repairing a microphone is usually a routine, affordable fix. It involves opening the device and replacing the daughterboard or the flex cable containing the mic. Compared to the cost of a new flagship phone, a repair is almost always the budget-friendly choice.

If you are ready to get that sound back, feel free to reach out via our Contact Us page. We can schedule a time to look at your device and get you communicating again.


Wrapping Up

A broken microphone turns a smartphone into a brick. While it is frustrating, remember that the solution is often simpler than you think. Start with a toothbrush and a check of your Bluetooth settings. If those don’t work, move on to software resets. And if you hit a wall, know that hardware repairs for microphones are standard procedures for experienced technicians.

Don’t let a silent phone ruin your day. troubleshoot it, clean it, or bring it in to let the experts handle it.


FAQs

Q1: Why does my microphone work on speakerphone but not on normal calls? A1: Most smartphones use two different microphones. The bottom mic is for normal calls, while the top or rear mic is used for speakerphone and video recording. If one works and the other doesn’t, it confirms that your bottom microphone has a hardware failure or blockage, while the audio software is functioning correctly.

Q2: Can a screen protector block my microphone? A2: Absolutely. We see this often with poor-quality or misaligned screen protectors. If the glass isn’t lined up perfectly, it can cover the tiny microphone hole near the earpiece or at the bottom of the screen. Check your alignment and consider removing the protector to test the audio.

Q3: How much does it cost to fix a phone microphone? A3: The cost varies by model and the extent of the damage. A simple cleaning might be free or very cheap, while a microphone replacement usually involves replacing a charging port flex cable. For an exact price for your specific device, we recommend using our Instant Quote widget.


Disclaimer

The information provided in this post is for educational purposes only. While cleaning your device and adjusting settings are generally safe, attempting physical repairs on your smartphone can void warranties and potentially cause further damage if not done correctly. CT Fix Wireless is not responsible for any damage incurred during DIY repair attempts. If you are unsure, please consult a professional technician.

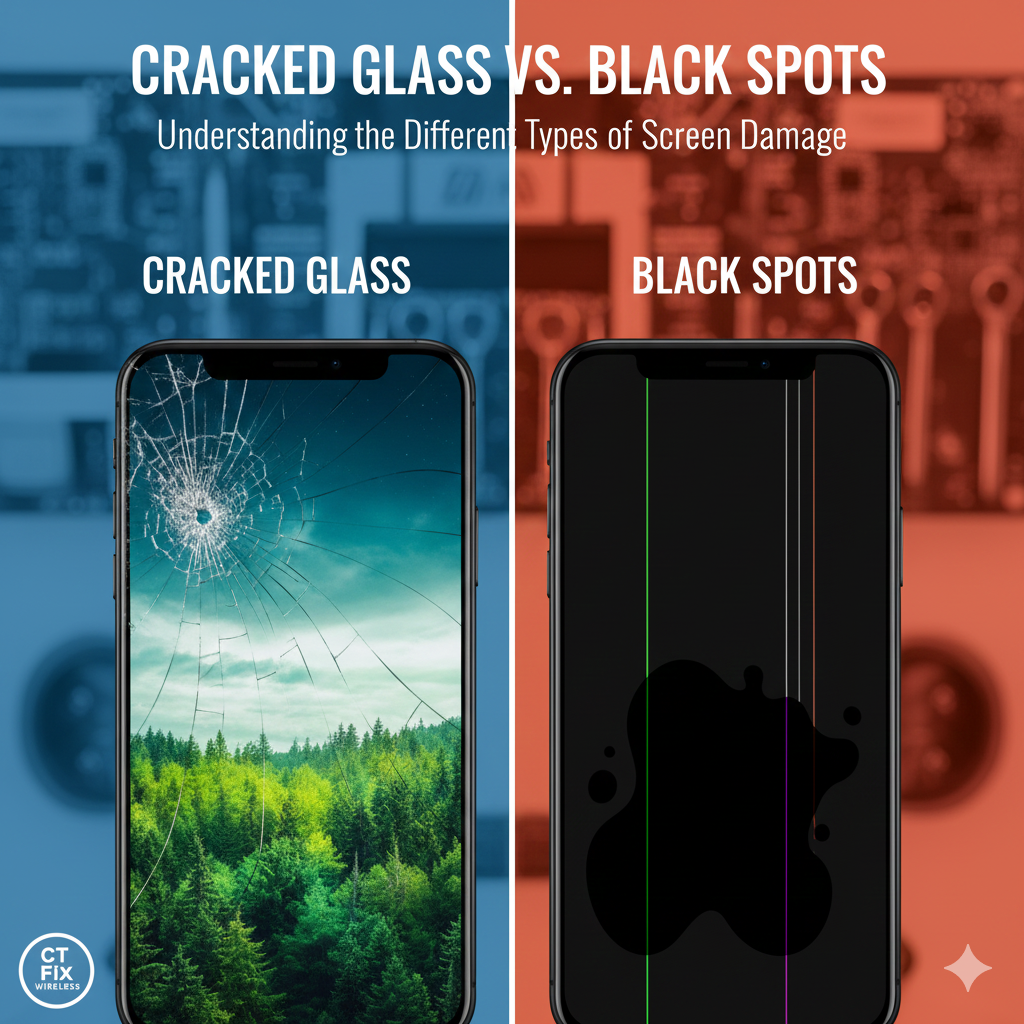
Cracked Glass vs. Black Spots: Understanding the Different Types of Screen Damage

Written By: Ronnie Gonenc

Cracked Glass vs. Black Spots: Understanding the Different Types of Screen Damage

We have all experienced that heart-stopping moment: your phone slips from your hand, tumbles in slow motion, and lands face-down on the pavement. You hesitate to pick it up, dreading what you might find.

When you finally turn it over, you usually see one of two things: a spiderweb of cracks across the surface, or worse—a dark, inky blob spreading across the display.

While both look terrible, they are fundamentally different types of damage. One is superficial “cosmetic” damage, while the other indicates a critical failure of your device’s internal display panel.

At CT Fix Wireless, we diagnose hundreds of broken screens every month. In this guide, we will help you identify which type of damage you have, why those mysterious “black spots” appear, and what your repair options are.


Section 1: Understanding Your Screen’s Anatomy

To understand the damage, you need to know that your phone screen isn’t just one piece of glass. It is actually a “sandwich” made of three distinct layers fused together:

  1. The Top Glass: This is the protective outer layer (Gorilla Glass or Ceramic Shield). Its only job is to protect the expensive components underneath.
  2. The Digitizer: This transparent layer acts as a sensor grid. It tracks your finger’s movement. If this breaks, your phone gets “Ghost Touch” (clicking things on its own) or becomes unresponsive.
  3. The LCD or OLED Panel: This is the bottom layer that actually lights up and shows you images. It is the most expensive and fragile part of the assembly.

Section 2: Scenario A — Just Cracked Glass (The “Good” News)

If you drop your phone and see cracks, but the image underneath looks perfect, you have likely only damaged the top layer.

Symptoms of Glass-Only Damage:

  • The cracks look like a spiderweb or single hairline fractures.
  • You can still see the entire picture clearly.
  • The touch screen still works perfectly (though we don’t recommend swiping over shards of glass!).
  • There are no colored lines or dark spots.

Is it urgent? While your phone is still usable, the structural integrity is gone. The next drop—even a small one—will almost certainly destroy the LCD underneath. Additionally, moisture from sweat or rain can now easily enter the cracks and fry the motherboard.


Section 3: Scenario B — Black Spots and “Screen Bleeding” (The Bad News)

If you see black dots, ink-like blotches, or vertical lines, you have damaged the actual LCD or OLED panel. This is not a surface crack; the “pixels” inside your screen are dying.

What are those black spots? On LCD screens (common in older iPhones and some Androids), the liquid crystal material is literally leaking out of its cells. This is often called “screen bleeding.” On OLED screens (newer iPhones, Samsungs), this damage appears as a deep purple or black void where the organic diodes have shattered.

The “Spreading Virus” Effect Unlike a crack in the glass, which stays the same, black spots almost always get bigger. Because the internal pressure of the screen has been compromised, the “ink” will slowly spread. A small dot in the corner today can turn into a completely blacked-out screen by next week.

Other Signs of LCD/OLED Damage:

  • Vertical Lines: Bright green, pink, or white lines running down the screen.
  • Flickering: The screen strobes or flashes brightness levels.
  • Blackout: The phone vibrates and rings, but the screen stays pitch black.

Section 4: The Repair Myth — “Can’t You Just Replace the Glass?”

A common question we get at our shop is, “Since only the glass is cracked, can you just peel it off and glue a new piece on for cheap?”

Ten years ago, this was possible. Today, it is very difficult. Modern screens are fused together with optical adhesive at the factory level. Separating the glass from the LCD requires freezing the phone to -180°C or using dangerous heating machines.

Why we recommend Full Assembly Replacement: Trying to replace only the glass often results in:

  1. Touch issues: The new glass doesn’t respond as quickly.
  2. Dust bubbles: Trapped between layers.
  3. Weakened structure: The screen becomes more likely to break again.

At CT Fix Wireless, we perform Full Assembly Replacements. We swap the entire “sandwich” (Glass + Digitizer + LCD). This ensures your phone looks, feels, and acts exactly like it did when it came out of the box.

You can get a price estimate for this service in seconds using our Instant Quote Widget.


Section 5: How to protect your phone from “The Black Spot”

Once you have repaired your screen, you want to make sure it never happens again.

  1. Tempered Glass is Mandatory: A $10 screen protector is cheaper than a $200 screen repair. It is designed to shatter instead of your actual screen, absorbing the shock.
  2. The “Lip” Test: When buying a case, look at the front. does the case have a raised “lip” that sits higher than the glass? This prevents the screen from hitting the ground directly if dropped flat.
  3. Avoid Compression: Believe it or not, many “black spots” aren’t caused by drops, but by pressure. Sitting on your phone while it’s in your back pocket can crush the LCD pixels without cracking the glass.

Section 6: Conclusion

Whether you have a simple crack or a spreading black blotch, the solution is the same: don’t wait until the phone becomes unusable. A compromised screen can lead to “Ghost Touching” (where the phone calls people on its own) or total data loss if the display dies before you can back it up.

Don’t let a broken screen ruin your day. We can fix most screens in under an hour. Check out our Buy and Sell page if you think it’s time to trade it in, or contact us below to book a repair.


External and Internal Links Checklist

Here are the resources and pages referenced in this guide to help you navigate your repair options.

Internal Links (CT Fix Wireless)

External Links (Authoritative Sources)


Disclaimer: While we provide information on screen damage, we strongly advise against using a phone with shattered glass due to the risk of injury from loose shards. Always seek professional repair for glass or LCD damage.

Phone Speaker Sounds Muffled? Easy Fixes for Low Volume | CT Fix Wireless

Written By: Ronnie Gonenc

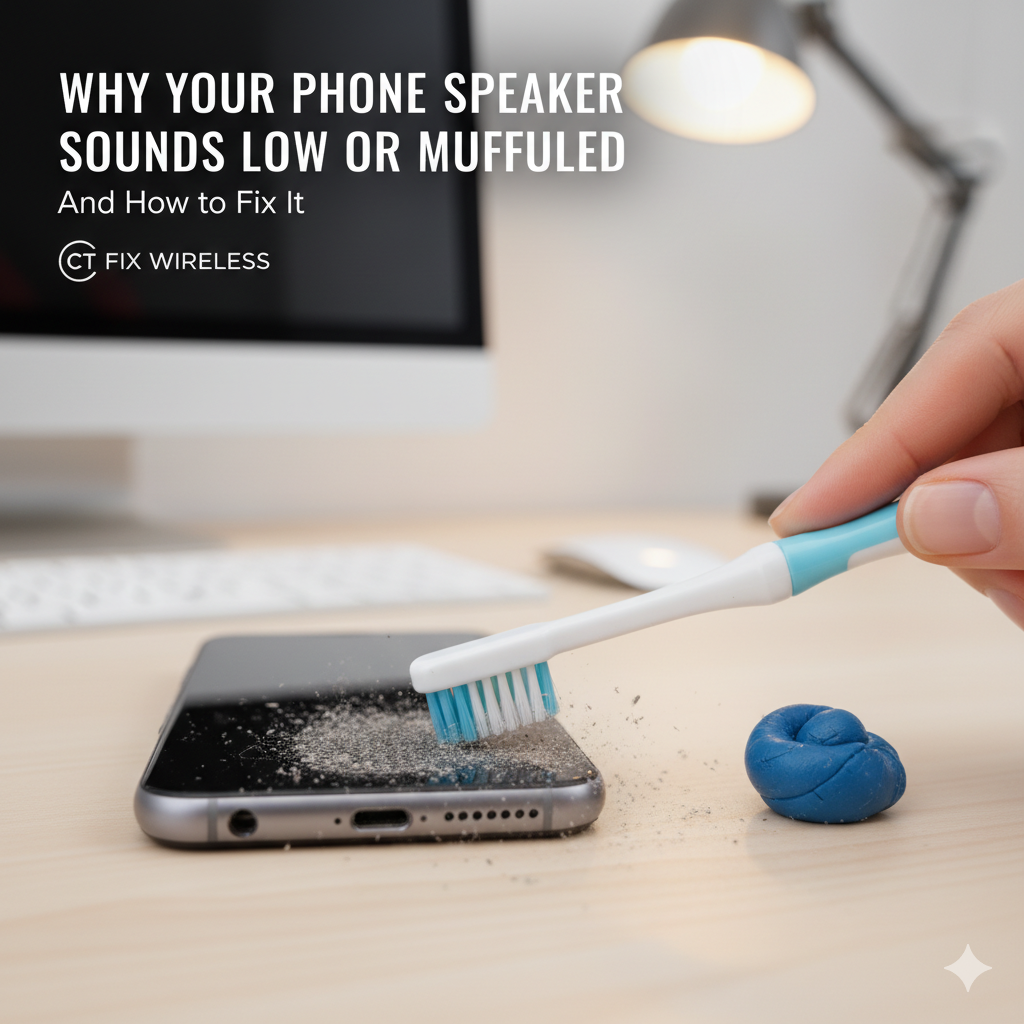
A person cleaning a smartphone speaker with a toothbrush and cleaning putty.

We have all been there. You are trying to show a friend a video, waiting for a crucial call, or listening to a voice note, and the sound coming out of your smartphone is barely a whisper. You find yourself pressing the volume button repeatedly, only to realize it is already maxed out.

A muffled or low-volume speaker isn’t just an annoyance; it disrupts how you use your device daily. Whether it’s missing alarm clocks or struggling to hear navigation instructions while driving, audio issues are a major pain point for smartphone users.

As repair experts at CT Fix Wireless, we see this issue walk through our doors almost daily. The good news? In about 80% of cases, this is not a permanent hardware failure. It is often a matter of debris accumulation, software misconfiguration, or environmental factors.

In this comprehensive guide, we will walk you through the same diagnostic steps our technicians use. We will cover safe cleaning methods, deep software troubleshooting for both iOS and Android, and help you decide when it is time to bring the device in for a professional look.


Section 1: The Anatomy of Sound (Why It Goes Wrong)

To understand why your speaker sounds “fuzzy” or quiet, you have to understand how it works. Modern smartphones, whether it’s the latest iPhone or a Samsung Galaxy, rely on micro-mesh grills to protect the internal speaker components.

1. The Debris Barrier

The most common culprit is physical blockage. Your phone spends its life in pockets, purses, and on dusty tables. Over months, lint, makeup, dead skin cells, and natural oils form a paste that clogs the fine mesh of your speaker grill. This creates a physical wall that sound waves cannot penetrate effectively, resulting in that “underwater” sound.

2. The Hardware fatigue

Speakers are mechanical components. They vibrate to produce sound. Over time, or after a heavy impact (like a drop), the internal membrane can tear, or the connection coils can loosen. This usually results in a “crackling” or static noise rather than just low volume.

3. Software Throttling

Sometimes, the phone is protecting itself (or you). Features like “Headphone Safety” or “Volume Limiters” can inadvertently cap your output. Additionally, a glitchy Bluetooth connection can trick your phone into thinking it’s still playing audio through a device that isn’t there.


Section 2: The “Toothbrush Method” and Physical Maintenance

Disclaimer: Proceed with caution. Using sharp objects (like needles or SIM ejectors) to clean speaker grills can puncture the mesh and destroy the water resistance of your phone.

Before you panic about hardware failure, you need to perform a deep clean. This is the first step we take when a customer visits us at CT Fix Wireless.

Step 1: Visual Inspection

Use a flashlight to inspect the speaker holes at the bottom of your phone and the earpiece at the top. Do you see a layer of grey or black fuzz? That is your enemy.

Step 2: The Dry Brush

Use a clean, soft-bristled toothbrush (a child’s toothbrush works best).

  1. Hold the phone so the speaker faces down (gravity helps debris fall out rather than in).
  2. Gently brush across the speaker holes horizontally, then vertically.
  3. Do not press hard; let the bristles do the work.

Step 3: Painter’s Tape/Mounting Putty

If the brush loosens the dirt but doesn’t remove it:

  • Take a small piece of painter’s tape (blue tape) or specialized electronic cleaning putty.
  • Press it gently against the speaker grill and peel it back.
  • This lifts the dust out of the mesh without pushing it deeper.

Expert Tip: Avoid using compressed air (canned air) directly into the speaker grill. The high pressure can rupture the microphone or speaker diaphragm located immediately behind the mesh.


Section 3: Software Troubleshooting for iPhone Users

If your iPhone looks clean but still sounds quiet, the issue is likely buried in iOS settings. Apple includes several safety features that can sometimes be too aggressive.

Check “Reduce Loud Sounds”

  1. Go to Settings > Sounds & Haptics.
  2. Tap on Headphone Safety.
  3. Look for Reduce Loud Sounds. If this is toggled on, your iPhone might be capping the decibel level to protect your ears, even when using the loudspeaker. Try turning it off or adjusting the slider.

The “EQ” Fix

Sometimes the default equalizer setting dampens volume.

  1. Go to Settings > Music.
  2. Tap EQ.
  3. Select “Late Night”. Interestingly, the “Late Night” mode compresses the dynamic range, which often has the side effect of making quiet sounds louder and the overall volume appear boosted.

If these settings don’t resolve the issue and you suspect a hardware fault, you can always use our Instant Quote Widget to see how much a speaker replacement might cost for your specific model.


Section 4: Software Troubleshooting for Android Users

Android ecosystems are vast, but the audio architecture is generally similar across Samsung, Google Pixel, and Motorola devices.

Dolby Atmos and Sound Adapt

Many modern Androids feature Dolby Atmos.

  1. Go to Settings > Sounds and Vibration.
  2. Tap Sound Quality and Effects.
  3. Ensure Dolby Atmos is turned On.
  4. Check for an option called “Adapt Sound”. This feature runs a hearing test and boosts specific frequencies tailored to your ears. If it was set up poorly in the past, it might be muting frequencies you need.

Safe Mode Testing

If your sound issues started recently, a rogue app might be hijacking your audio focus.

  • Boot your phone into Safe Mode (usually by holding the power button, then long-pressing the “Power Off” icon on screen).
  • Test the speaker in Safe Mode. If it sounds crisp and loud, a third-party app you recently installed is the culprit. Uninstall recent apps one by one.

Section 5: The Water Damage Variable

Did you drop your phone in the sink, or use it in a steamy shower? Even water-resistant phones (IP68 rated) can suffer from muffled audio when water sits in the speaker cavity.

Do NOT use rice. Rice is a myth; it creates starch dust that gets into the phone and does not absorb moisture effectively from the inside.

The Fix:

  1. Download a “Water Eject” shortcut or app. These play a specific low-frequency tone that vibrates the speaker violently enough to push water droplets out.
  2. Let the phone dry in a well-ventilated area with airflow (like near a fan).

If the sound remains crackly after 24 hours of drying, the water may have corroded the contacts. This requires professional cleaning. You can learn more about our team’s experience with liquid damage on our About Us page.


Section 6: Advanced Hardware Failure – When to Call the Pros

If you have cleaned the mesh, reset the settings, and dried the device, but the sound is still low or distorted (buzzing/crackling), you are likely looking at a hardware failure.

Common Hardware Issues:

  • Blown Speaker: This happens if you play loud audio for extended periods or dropped the phone while audio was playing. The internal cone tears.
  • Displaced Components: A hard drop can knock the speaker module slightly out of alignment, breaking the seal that directs sound out of the phone.
  • IC Audio Failure: On some older devices (like iPhone 7/8), the “Audio IC” chip on the motherboard can loosen, causing greyed-out voice memos and speaker failure.

Is it worth fixing?

Speaker replacements are generally one of the more affordable repairs. However, if your phone is very old and has multiple issues (bad battery, cracked screen, bad speaker), it might be more economical to upgrade.

At CT Fix Wireless, we offer a unique solution: we can fix your current device, or if you decide it’s time for an upgrade, we can buy your old device from you. Check out our Buy and Sell page to see what your device might be worth.


Section 7: Conclusion

A muffled speaker doesn’t always mean a broken phone. By following the hygiene steps and software checks listed above, you can often restore your audio to crystal-clear quality without spending a dime.

However, smartphones are precision-engineered devices. If DIY methods fail, forcing the issue can cause more damage. Whether you need a quick speaker cleaning, a component replacement, or a logic board diagnosis, professional help is the safest route.

Ready to get your sound back? If you have tried everything and still can’t hear your calls, don’t suffer in silence.

  • Contact Us today to schedule a diagnostic.
  • Visit us in-store for a quick consultation.

Disclaimer: The information provided in this post is for educational purposes only. While cleaning your device can improve performance, improper handling can cause damage. CT Fix Wireless is not responsible for damage caused by DIY repair attempts. If you are unsure, please consult a professional technician.

Why Is My Phone Overheating? 5 Common Causes | CT Fix Wireless

Written By: Ronnie Gonenc

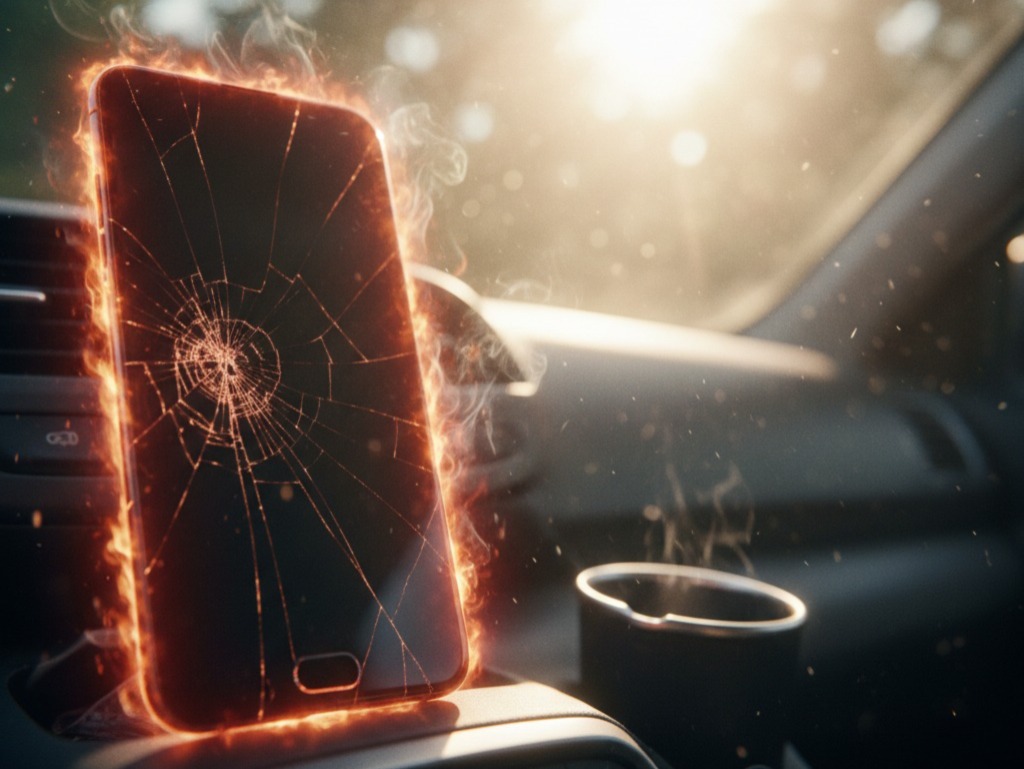
A smartphone with a cracked screen glowing red with heat and smoke, left on the dashboard of a hot car in direct sunlight.

We have all been there. You are in the middle of a high-stakes mobile game, streaming your favorite show in high definition, or simply navigating home using GPS on a sunny day, and suddenly, your device feels less like a smartphone and more like a hot coal.

For most users, a warm phone is a minor annoyance. But when does “warm” turn into “dangerously hot”?

In the world of mobile technology, heat is the silent killer of internal components. While modern smartphones—whether you are Team iPhone or Team Android—are engineering marvels designed to dissipate heat, they have their limits. Prolonged overheating can degrade your battery life, melt internal adhesive, permanently damage the Central Processing Unit (CPU), and in rare, extreme cases, cause the battery to swell or catch fire.

As a dedicated team of repair experts at CT Fix Wireless, we see overheating devices come into our shop every single day. Often, the issue is manageable with a few habit changes. However, sometimes it signals a critical hardware failure that requires immediate attention.

In this comprehensive guide, we will break down the science of why phones get hot, the five most common culprits, and exactly how to fix them. If you are worried that your device is already past the point of no return, don’t risk it—Contact Us immediately for a professional assessment.


The Science: Why Do Phones Get Hot?

Before we dive into the specific causes, it is vital to understand how your phone works. Unlike a desktop computer or a laptop, your smartphone does not have a fan to blow hot air out. It relies on passive cooling.

The components inside your phone—specifically the processor (CPU), the graphics chip (GPU), and the battery—generate heat as they work. The harder they work, the more electricity they consume, and the more heat is produced as a byproduct. Your phone’s frame (aluminum, glass, or plastic) acts as a heat sink, absorbing that heat and transferring it away from the critical internal chips and toward the air.

When you feel your phone getting hot, that is actually a sign the cooling system is working: it is moving heat from the inside to the outside. However, if the heat is being generated faster than it can be dissipated, or if the environment prevents that heat from escaping, you enter the overheating zone.


Cause 1: Environmental Factors (The “Greenhouse” Effect)

The most common reason a phone overheats has nothing to do with the phone itself and everything to do with where it is.

Direct Sunlight

Your phone is essentially a dark slab of glass and metal. If you leave it in direct sunlight—say, on a beach towel or a café table—it absorbs solar radiation rapidly. Smartphones are generally designed to operate between 32° F and 95° F (0° C to 35° C). Direct sunlight can push the internal temperature well past 110° F in minutes.

The “Hot Car” Scenario

Leaving your phone in a car on a warm day is one of the fastest ways to kill a battery. The interior of a car acts like a greenhouse. If it is 80° F outside, your car’s dashboard can reach 160° F within an hour. This extreme heat can cause the chemicals inside your Lithium-Ion battery to destabilize, leading to swelling or permanent capacity loss.

The Fix:

  • Keep your phone in the shade.
  • Never leave devices in a parked car.
  • If your phone gives you a temperature warning, move it to a cooler place immediately (but do not put it in the fridge/freezer—we will explain why later).

Cause 2: Intensity of Usage (Overworking the CPU)

Your phone is a pocket-sized supercomputer, but it has limits. When you ask it to perform heavy tasks for long periods, the CPU and GPU run at 100% capacity, generating massive amounts of heat.

High-Performance Gaming

Modern mobile games like Genshin Impact, Call of Duty Mobile, or PUBG require immense processing power. They force the screen to stay on at high brightness, the GPU to render complex 3D graphics, and the data modem to maintain a connection—all simultaneously.

Streaming and GPS

Streaming 4K video or using turn-by-turn navigation requires constant data transfer and screen usage. GPS is particularly taxing because the phone’s GPS chip is constantly pinging satellites while the screen displays a moving map, often while the phone is mounted on a dashboard in the sun (a double whammy).

The Fix:

  • Take breaks during long gaming sessions.
  • Lower your screen brightness or graphics settings in games.
  • If you are a heavy user and your phone can no longer keep up, it might be time for an upgrade. You can trade in your current device at our Buy and Sell section.

Cause 3: Battery and Charging Issues (The Dangerous Heat)

Heat generated during charging is normal, but excessive heat during charging is a red flag.

Faulty Cables and Adapters

Using cheap, uncertified, or frayed charging cables can lead to unstable power delivery. If the charger doesn’t regulate the voltage correctly, your phone’s power management chip has to work overtime to convert that energy, creating excess heat.

Charging While Using

“Passthrough usage” is when you use the phone for high-intensity tasks (like gaming) while it is plugged in. The battery is trying to charge while simultaneously discharging to power the screen and CPU. This generates heat from two sources at once, leading to rapid thermal buildup.

The Aging Battery

As Lithium-Ion batteries age, their internal resistance increases. This means they have to work harder to accept and deliver a charge, generating more heat in the process. If your phone is several years old and gets hot the moment you plug it in, the battery is likely failing.

Expert Insight: If your battery is swelling (pushing the screen up), unplug it immediately. This is a fire hazard. You need a replacement right away. Check our About Us page to see how our technicians handle safe battery disposal and replacement.


Cause 4: Software Glitches and Malware

Sometimes, the heat is ghost-generated by software you aren’t even using.

Background Processes

An app might crash in the background but get stuck in a “loop,” constantly trying to restart or sync data. This causes the CPU to run at high speeds even when the phone is in your pocket.

Malware and Cryptojacking

In rarer cases, malicious software (malware) may have infected your device. Some sophisticated malware uses your phone’s processing power to mine cryptocurrency for hackers (cryptojacking). This runs your processor at maximum capacity 24/7, causing severe overheating and battery drain.

Buggy Updates

Occasionally, a new iOS or Android update might contain a bug that optimizes battery usage poorly.

The Fix:

  • Check your battery settings to see which app is using the most energy.
  • Keep your apps and operating system updated.
  • Perform a factory reset if you suspect malware (backup your data first!).

Cause 5: Hardware Failure (Internal Shorts)

If your phone heats up immediately after turning it on, or heats up in a specific spot even when not in use, you may be dealing with a logic board issue.

This can happen after:

  1. Water Damage: Even if the phone dried out, corrosion can create short circuits that generate heat.
  2. Drops: A hard fall can dislodge thermal paste or crack internal components, disrupting the flow of electricity.

This type of overheating is not solvable with software updates. It requires board-level diagnostics. If you suspect internal damage, do not wait. Get a quote for a repair using our Instant Quote Widget.


When Is Overheating Dangerous? (YMYL Safety Warning)

It is crucial to distinguish between “operating warm” and “dangerously hot.”

Safe Warmth:

  • Slightly warm during charging.
  • Warm after 30 minutes of gaming.
  • Warm after recording a 4K video.

Dangerous Heat (Take Action Immediately):

  • The phone is too hot to hold comfortably.
  • You smell burning plastic or chemicals.
  • The screen displays a temperature warning and shuts down.
  • The most critical sign: The battery is swollen. If your phone case no longer fits, or the screen is lifting away from the frame, the battery is expanding due to gas buildup. Do not press on it. Do not charge it.

Safety Disclaimer: Dealing with swollen batteries is dangerous. They can puncture and ignite. Bring the device to a professional repair shop like CT Fix Wireless immediately for safe handling.


Practical Advice: How to Cool Down a Hot Phone

If your phone is overheating right now, follow these steps to cool it down safely.

What TO Do:

  1. Remove the Case: Cases trap heat. Taking it off allows the aluminum or glass body to release heat into the air.
  2. Turn on Airplane Mode: This kills GPS, Bluetooth, Wi-Fi, and Cellular data, stopping almost all background processing.
  3. Move to the Shade: Get it out of direct sunlight.
  4. Place it near a Fan: Gentle airflow helps passive cooling.
  5. Close All Apps: Swipe away all open applications.

What NOT To Do (Crucial!):

  • Do NOT put it in the fridge or freezer. Rapid cooling causes condensation (moisture) to form inside the phone. This water damage can kill the phone faster than the heat would have.
  • Do NOT dunk it in water. Even “water-resistant” phones lose their seals over time.

Conclusion: Don’t Let the Heat Win

Smartphones are resilient, but they aren’t invincible. Heat is the number one enemy of electronics longevity. By understanding the causes—whether it is that intense gaming session, a sunny day at the park, or an aging battery—you can take steps to protect your investment.

Regular maintenance, using quality chargers, and monitoring your battery health are the keys to a cool, long-lasting device. However, if you have tried everything and your phone still feels like a toaster, it is time for professional help.

At CT Fix Wireless, we specialize in diagnosing thermal issues, replacing batteries, and repairing logic boards. Don’t let a hot phone turn into a melted brick.


FAQs: Overheating Questions Answered

Q1: Can a virus cause my phone to overheat? A1: Yes. Malware, specifically adware or cryptomining software, can run heavy processes in the background without your knowledge. This forces the CPU to run at max capacity, generating significant heat.

Q2: Is it bad to use my phone while it’s charging? A2: It is generally safe for light tasks (texting, reading), but heavy tasks (gaming, video calls) during charging cause “parasitic load.” This generates excessive heat and cycles the battery, degrading its health faster.

Q3: Why does my phone get hot after an update? A3: Immediately after a system update, your phone effectively “re-indexes” its files and optimizes apps in the background. This can cause temporary heating for 24-48 hours. If it persists longer, it may be a software bug.

Q4: Can I fix a swollen battery by cooling it down? A4: No. A swollen battery is a chemical failure. Cooling it will not reverse the gas buildup. It requires immediate professional replacement to avoid fire risks.


Disclaimer: The information provided in this blog post is for educational purposes only and should not be considered a substitute for professional repair diagnostics. Attempting DIY repairs on swollen batteries or internal components can be dangerous. Always consult a professional technician for hardware issues.